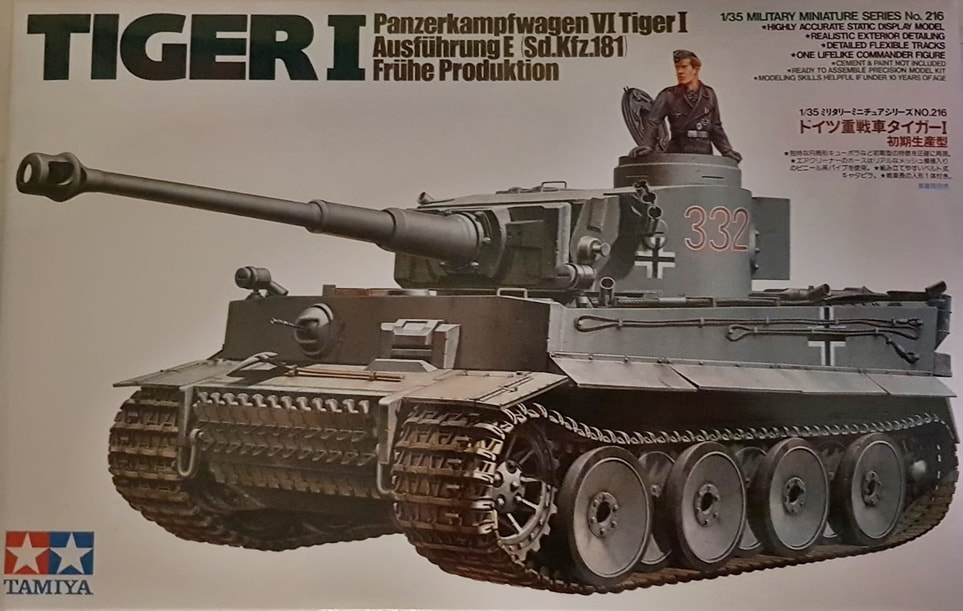
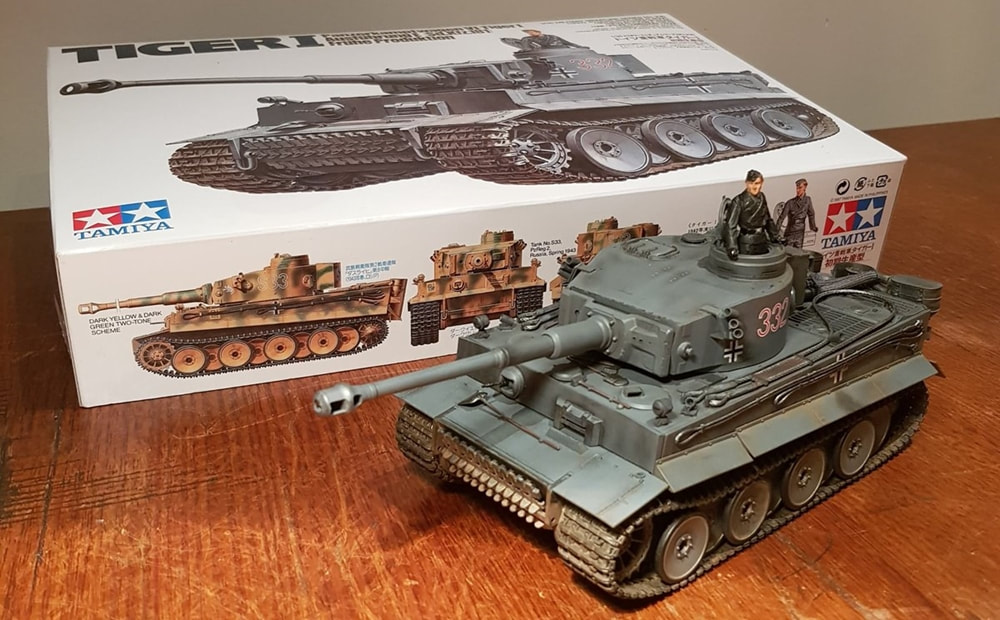
For years i have wanted to build a Tiger I, so finally 30 years after finishing a very rushed Victor K2 at the age of about 13 that ended up in the cracker pit i decided i would try my hand again. I had little idea where to start and a lot of trepidation even starting as the modelling game is in top form these days. Type in Tamiya Tiger I or any other model kit and you are met with such perfect looking specimens you would swear they are real. This makes it quite challenging for a beginner, which i am, as we do like to compare what we have done against what others have done. The big difference from 30 years ago is instant tutorials. Videos, reviews, step by step builds, painting, weathering, anything you can think of and you can learn and attempt it. So i thought, lets do this, and thus i walked out of my local toy store with a 1/35th Tamiya Tiger I, a bunch of 10ml paint bottles of various boring tank colours, a cheap modelling knife and some brushes and glue.
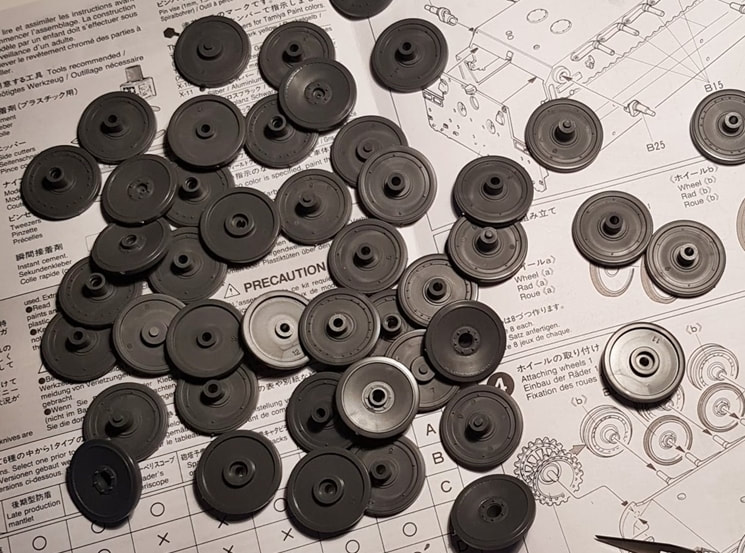
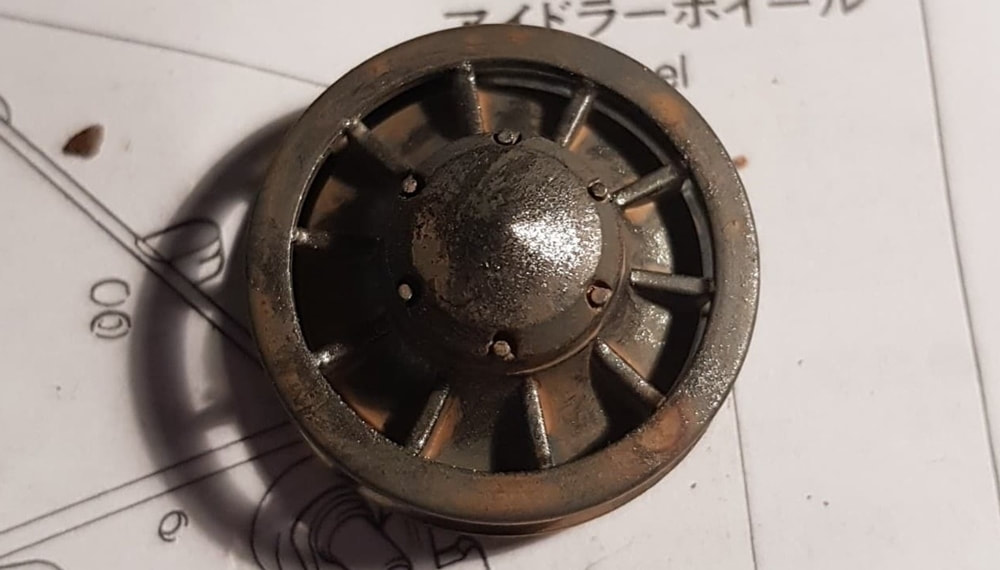
The easy step was done. For the previous couple of days i had been watching videos, reading blogs and looking at tank pictures. I was all over this like a rat up a Stalingrad drainpipe. First things first, wheels, and tanks seem to have far too many. The Tiger has an interleaved wheel system which involved me for the next four days. 48 wheels plus two drive sprockets and two idler sprocket for a total of 52 roundy bits.
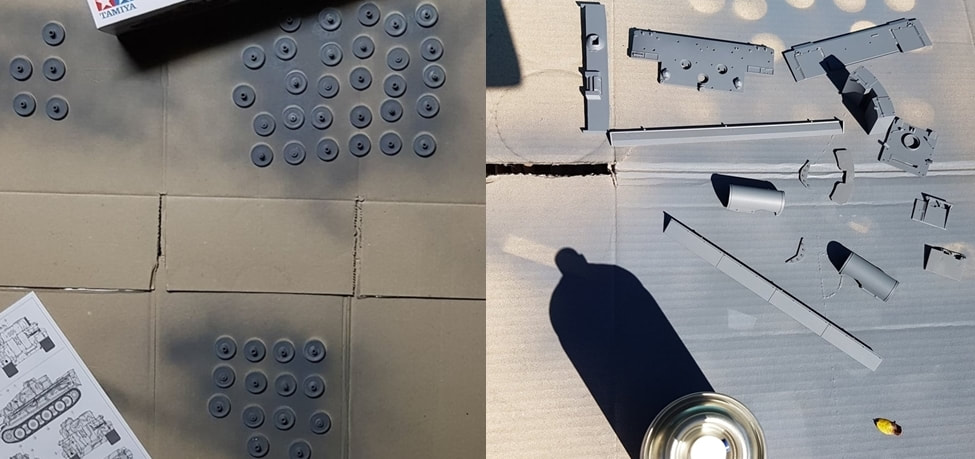
This was actually a good start to my rekindled interest in modelling. Repetition was the keyword and i had learnt a whole lot just by the time i was finished these. Cutting, trimming, some minor sanding and then two nights of painting and weathering. After watching a few more tutorials on general weathering i had bolted back to the toy shop and grabbed a Tamiya weathering (master) kit which included snow, soot and rust powders. Much like my sisters eye shadow kits i remember as a kid. I wanted to at least attempt to make this model a bit worn and not fresh out of the factory. One thing i didn't do on this first kit was primer, i didn't prime anything. The next thing was i didn't have an airbrush or compressor, and no skills to go with those pieces of hardware anyway, so i planned to use brushes for smaller pieces like the tools and roadwheel outer rubber sections and model spray paint for larger bits like the actual body and turret sections. Back to the shop for two tins of German Grey. I cut most of the larger pieces from the sprue that i would be spraying and then trimmed them all up ready for painting. For sprue cutting i purchased a pair of mini side cutters that only cost four dollars.
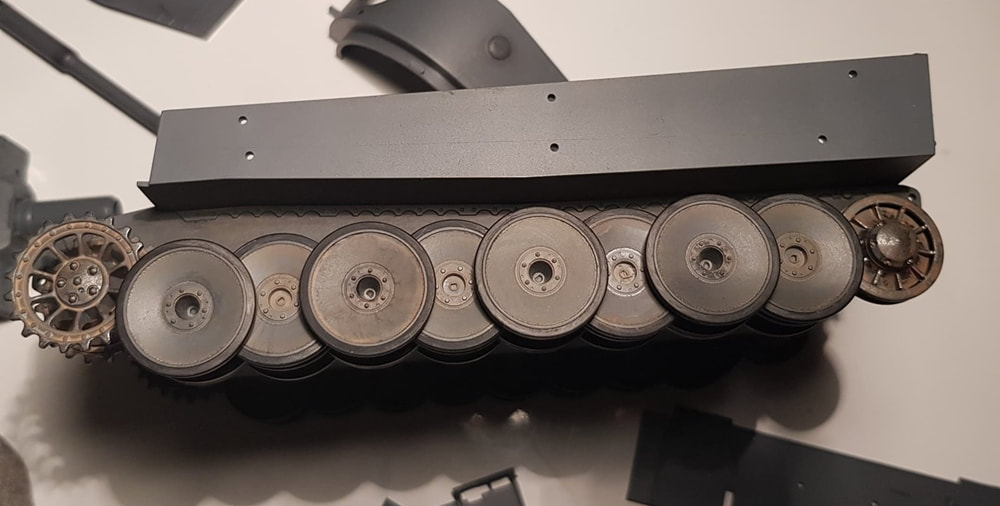
The next couple of days was wheels and tracks. I hand painted all of the rubber outer sections with rubber black, i wasn't too worried about any over paint onto the rim section as the wheels have a nice little lip that i could then scrape with the knife blade to clean up. Once rubberised i mucked around with the rust and soot weathering application. At first i was dipping my brush in water and then the powdery weather rust and applying it and after a couple of wheels i backed way off on the water until it was more like dry brushing. Dry brushing is where you dip your paintbrush into the paint and then wipe nearly all of it off so when you apply the brush you can control the minimal amounts that come off to do fairly fine weathering/chipping effects. This was something i sort of fell into and got better as the wheel process moved along. If i did get too much of the weathering dust on a wheel it was as simple as a water clean up and start again. I was learning along the way and it was pretty cool! After dirtying up all of the wheels i used the knife to scrape back my over paint on the lips and ended up with these results.
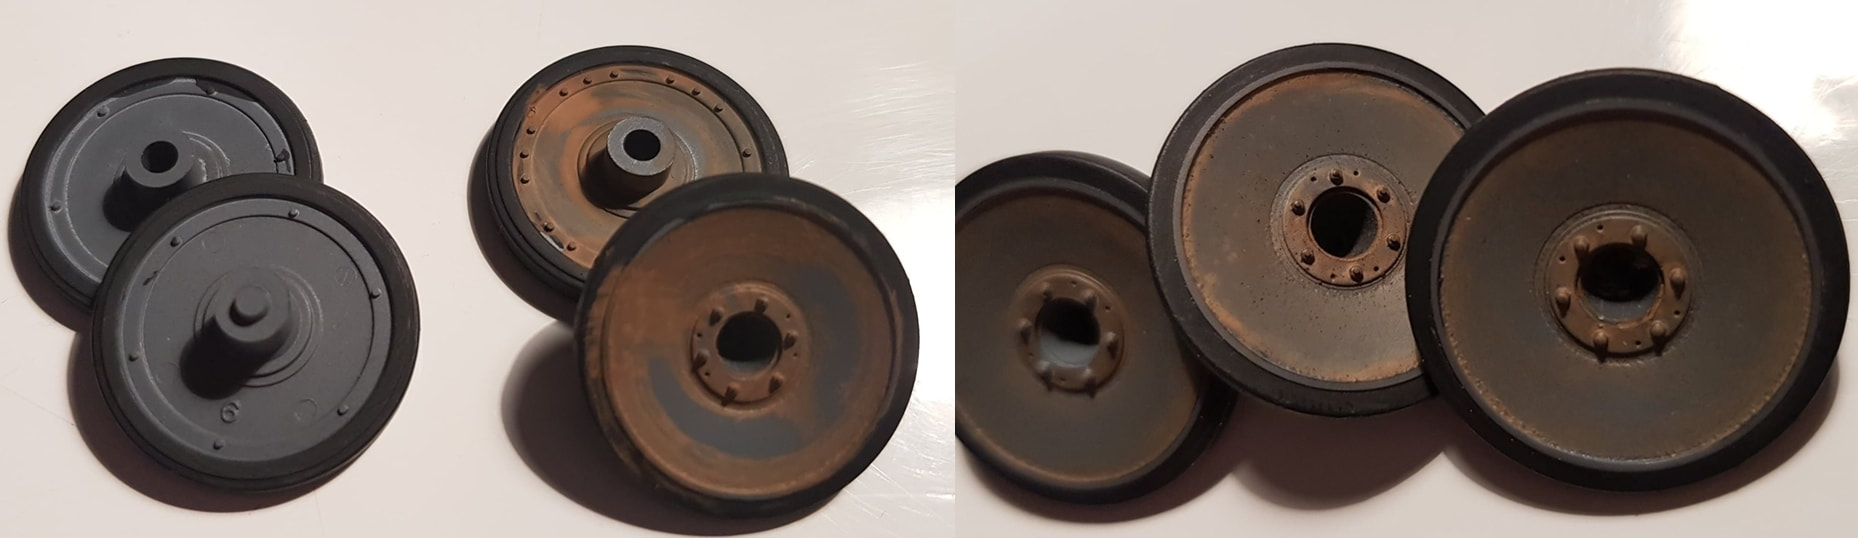
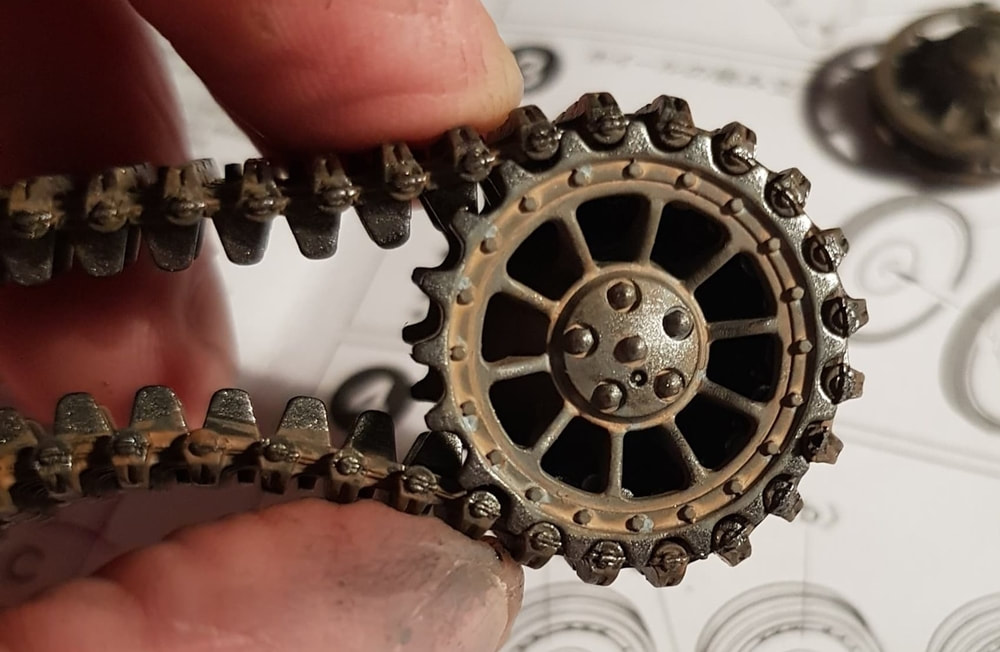
For a beginner i was pretty happy with these wheels. They looked dirty and slightly rusty but not overly so. Next up was the drive wheels, idlers and the tracks. For the drive and idlers i mucked around with a bit of the soot coloured weathering compound as well as the rust. I then got into it with a toothbrush to get it right into the crevices and ended up with a more semi shiny effect compared to the wheels. This i attributed to the soot colour and frenetic brushing. I painted the cog tips in a gunmetal and then gave them a good going over with the toothbrush once they dried so they didn't look too uniform and have that 'painted on' look.
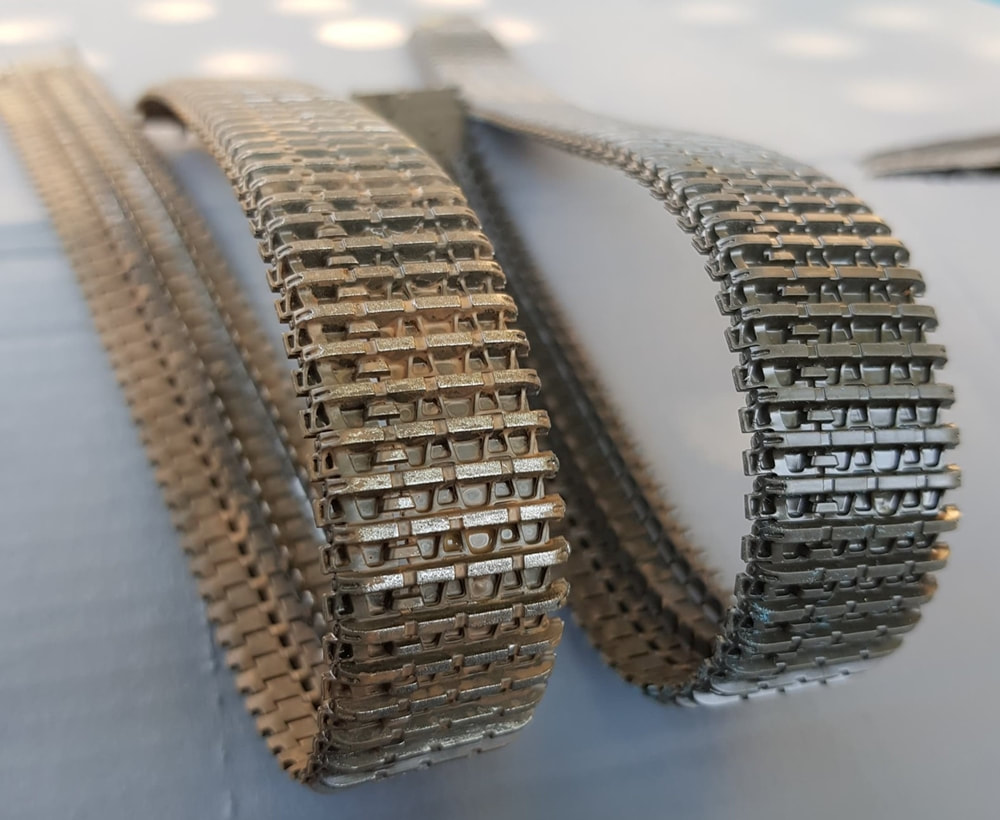
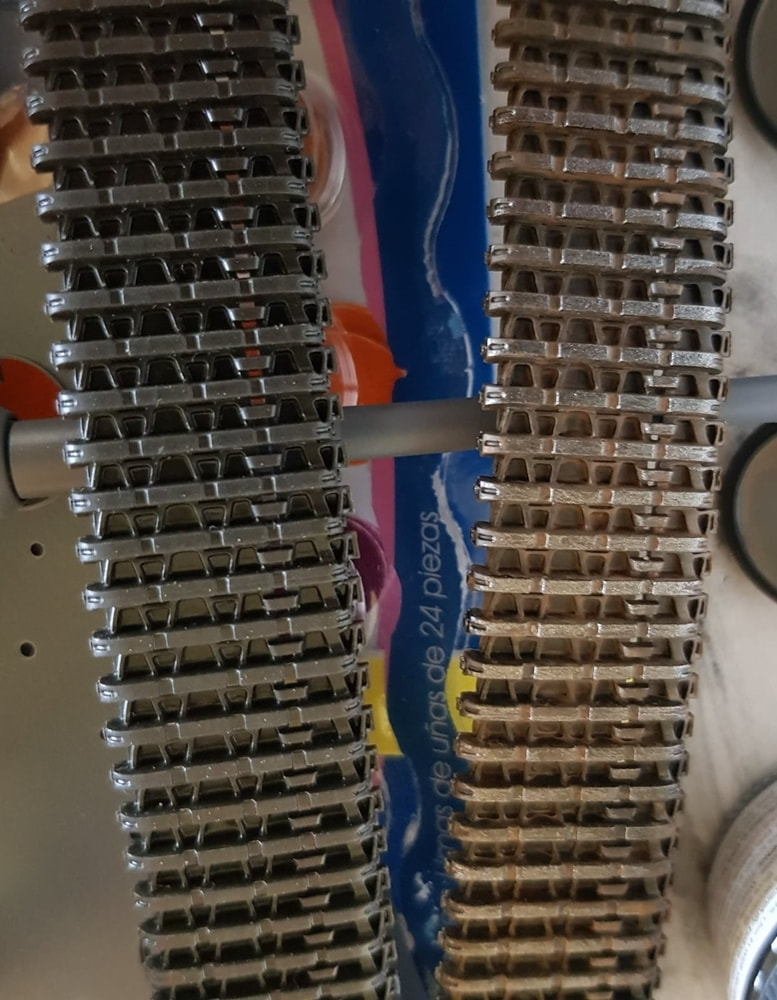
The tracks are a two rubber lengths and quite nicely detailed. I painted them black and then chopped some chunks off the rust and soot weathering compound, chipped it down to dust with a blade in a spray can cap and went to town with my brush just jamming it randomly all over the track and working it in. The result was really good! Much better than i thought it would be. I laid the tracks flat and then using gunmetal grey i lightly painted the pins that stick out of the side of the tracks and the track sections that touch the ground to add some detail. Because the sections of the track that touch the ground are raised it is fairly easy to get a nice light coat without having paint go where you don't want it. Less paint on your brush at this stage is better than more. It was similar to dry brushing but with a tiny bit more of a wetter brush. The inside wheel guide of the tracks (the teeth) got a hit of gunmetal as well and then slightly dirtied up with the old trusty rust. I sat a drive wheel in the front of a track for looks and it was really starting to come together.
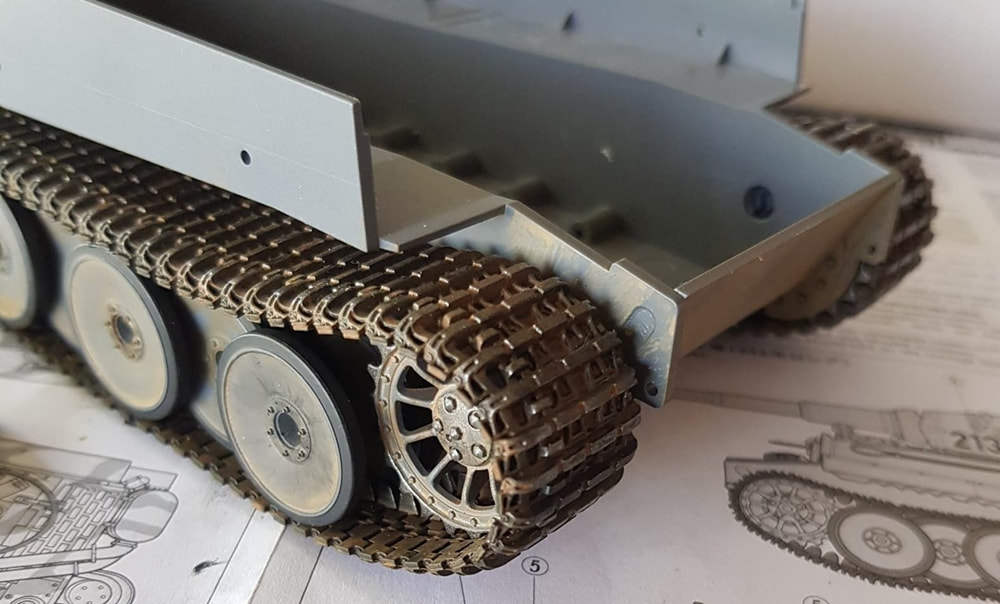
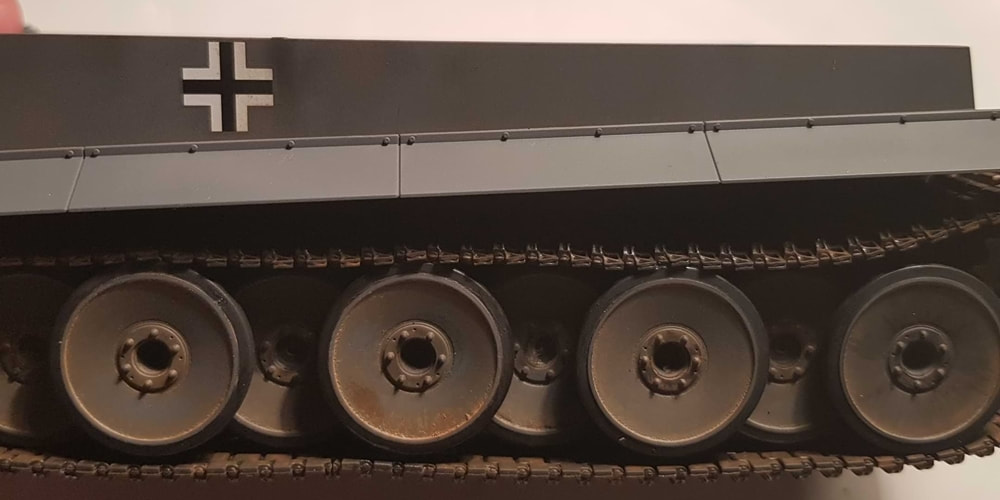
So i had a full set of wheels and a set of tracks. Time to get them fitted to the tank body! The body itself is simply a couple of slabs of plastic that make the basically rectangular shaped Tiger hull that i had previously painted. I glued the lower section of the tank together and then glued on the swing arms that hold the wheels. I let this all sit overnight and then glued one full side of wheels on. Behind the tank wheels on the body i did apply a little mix of soot and rust so it wasn't perfectly clean. Once the wheels are on you will not be able to get in there, well not easily anyway. Once glued i let it sit overnight and checked every couple of minutes to make sure the wheels were straight when looked at from below and the front.
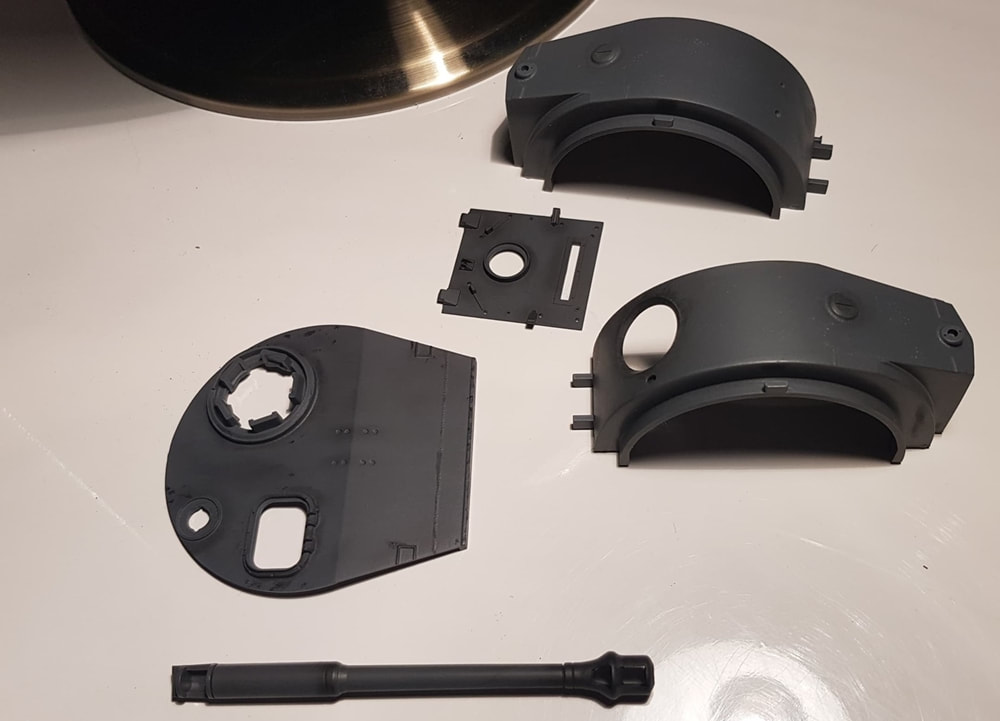
The next day i did the opposite side and then whilst waiting for them to set i got into the turrets and top deck with some weathering. Here i was just trying to imagine were dirt and general gunk would settle and worked away mainly with the soot compound. Mainly around the hatches and inside of any grooves or cutouts. I wasn't really sure i liked what i ended up with but it also wasn't terrible. The end of the 88 barrel got a soot makeover. The front of the Tiger i overdid, because i was using matte paint and had not yet learned the gloss trick i could not wipe any excess off. My fault as i used too much and worked it in too hard. Learning, learning, learning. The machine gun is installed before the front vertical plate goes on and is painted gunmetal and then once dry, i lightly brushed on some soot to knock the shine back a bit.
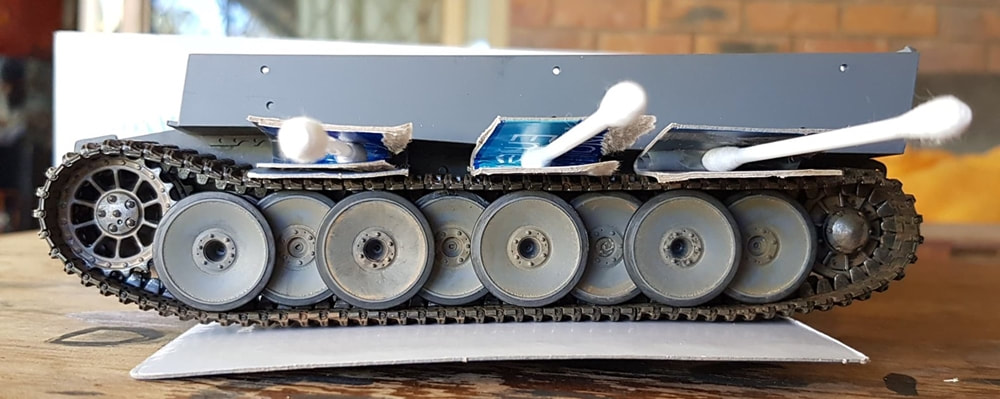
At this stage i did a couple of dry fits of the tracks to decide where the join should be and to see how hard it was to get them on. They have a joining system that is just some plastic plugs, male on end and female on the other. The track ends up fairly taut but still has a bit of stretch in it. Once i was happy with the fit i glued the track to the lower wheels and put a bunch of weight into the hull and let it sit for a few hours. While it was drying i was thinking about how to make the top of the track sag for a more natural weighted so as to not sit like this...
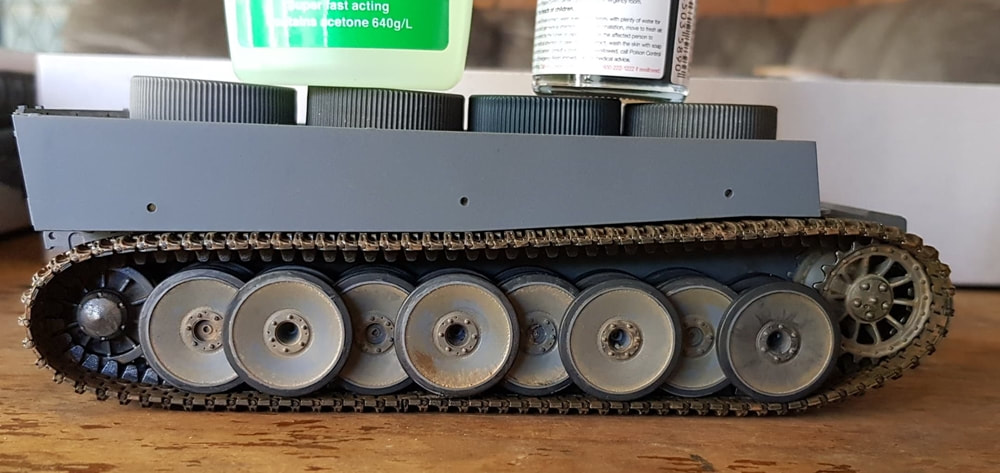
It was a very simple solution, jam something in the gap between the body and the track and glue the track to the tops of the wheels. That something was cotton buds and bent up pieces of cardboard. I used buds and cardboard because i reasoned they had a bit of squish to them as opposed to using something hard and incompressible. Once again i let it sit for about five or six hours before i removed the buds and cardboard. Worked a treat.
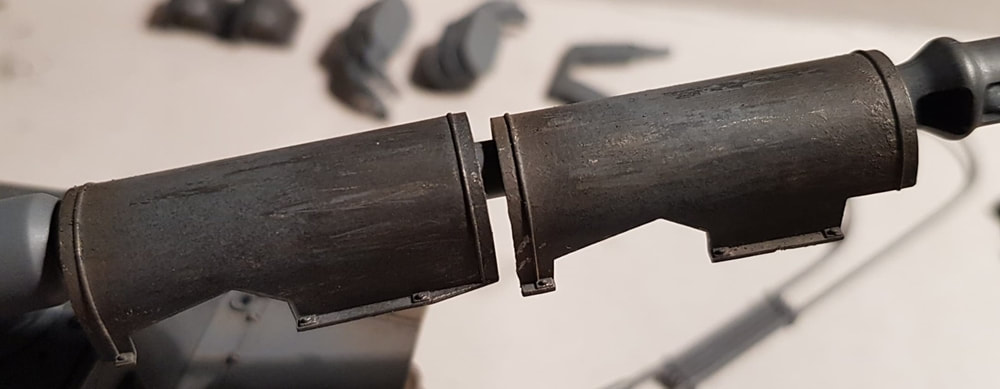
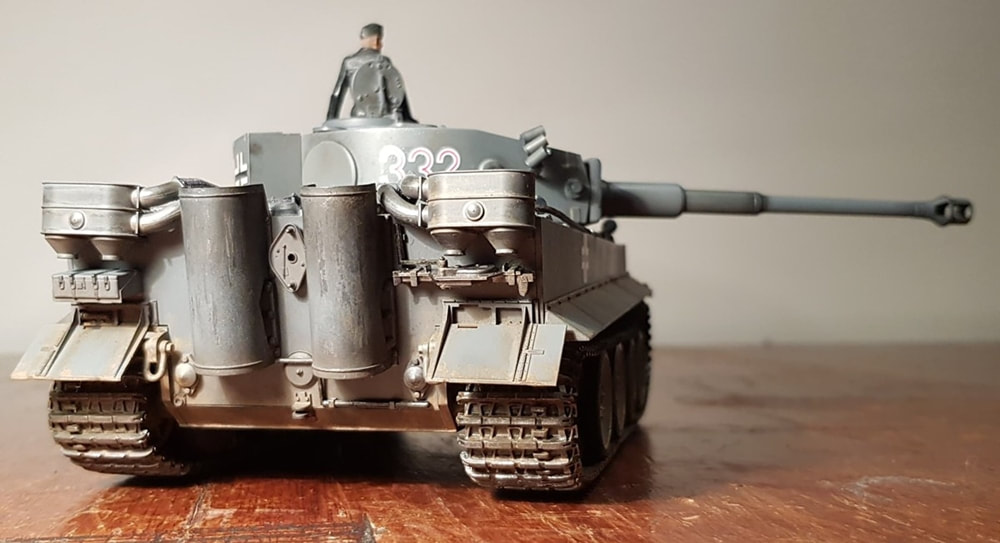
That was the probably the biggest slog of the model kit done. So far it had soaked up nearly a week and i was rather happy with my patience more than anything else. As a kid it was bull at the gate building and painting and on to the next one! The quiet time you get when building a kit, reading up about the kit/vehicle you are building with some tunes on in the background was becoming very zen. Next up was the stick on bits. Mufflers, mufflers shields, tow cables, skirts etc. The mufflers i over weathered at first, it looked more like a diesel tank than a petrol. I ended up giving them a light over spray of the german grey that still showed through my previous weathering and then dry brushed on some silver paint that i mostly scraped off carefully with a blade to attempt to show some scrapes. I was still experimenting with weathering techniques here. The mufflers got the treatment as well. The first two pictures are the before, the third is the final weathering.

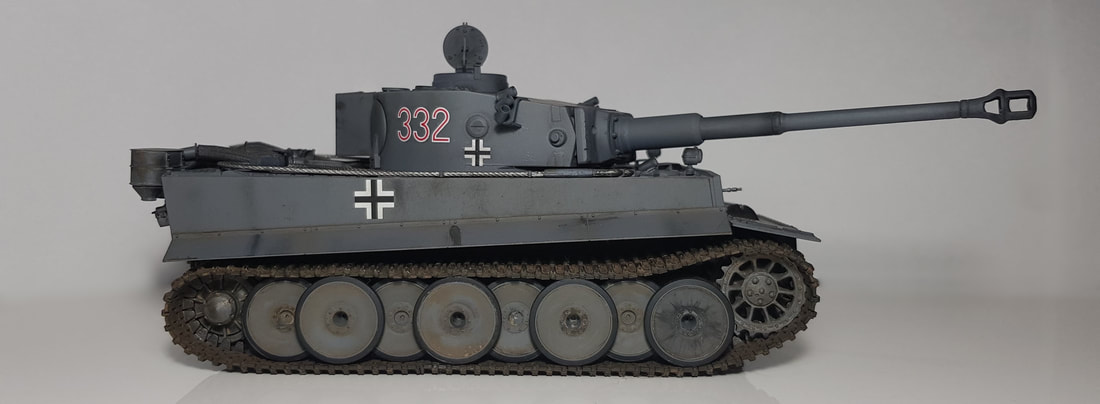
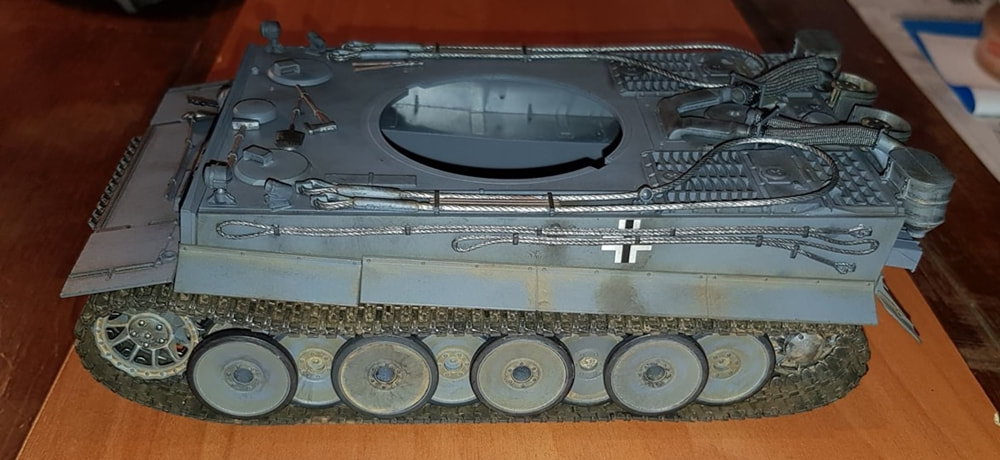
I moved back onto the hull in preparation for adding the side skirts. Before the skirts would go on i applied some of the rust compound mixed with a bit of soot for under the skirts. The side of the Tiger also got some slight weathering running vertically. I also got to put on the first decal as i figured it would be easier to apply now than after the skirts were on. One side was to have a full skirt, the other i was going to section the front piece similar to the box art to try and give it some character.

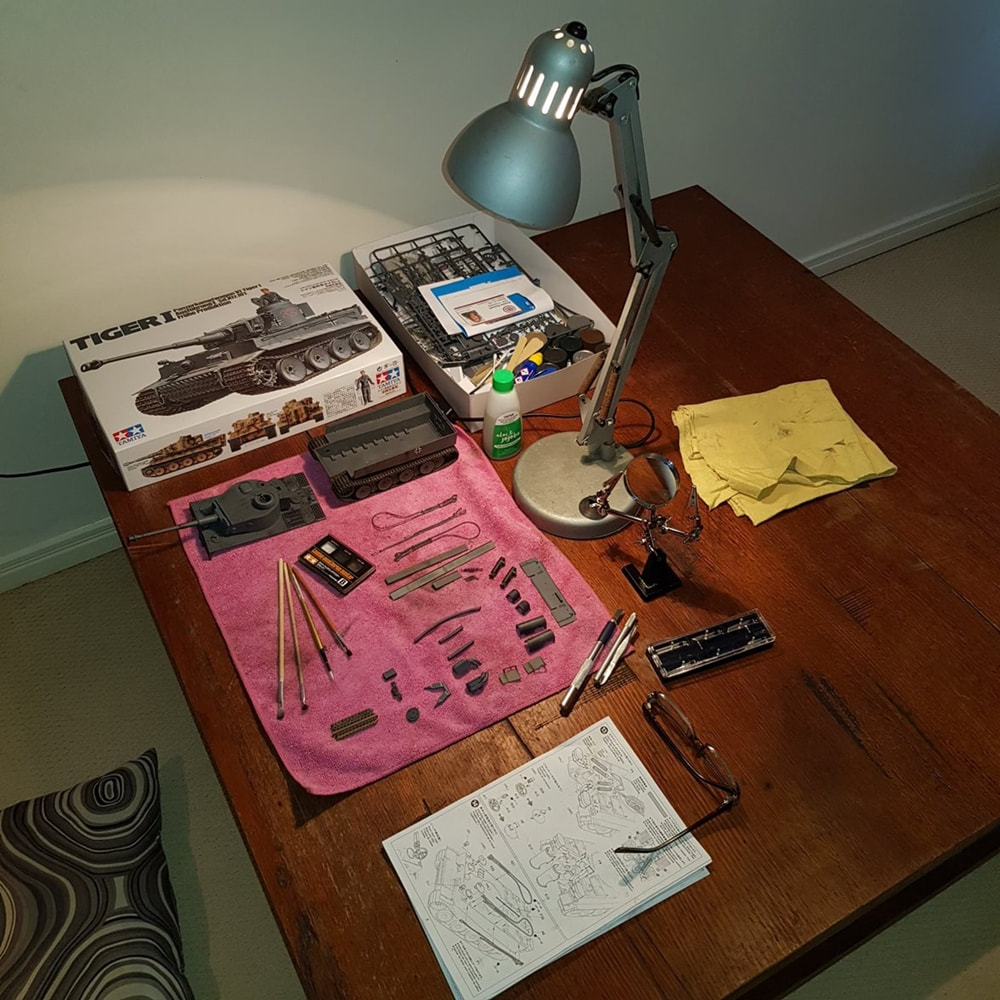
At this stage we moved house so the Tiger got shelved for two weeks. My new setup was less than stellar but it would have to do until i could organise a desk and other items and relocate to the garage. I missed a couple of pics here as i have already put the turret together and started on the rear mudguards and exhaust systems piping.
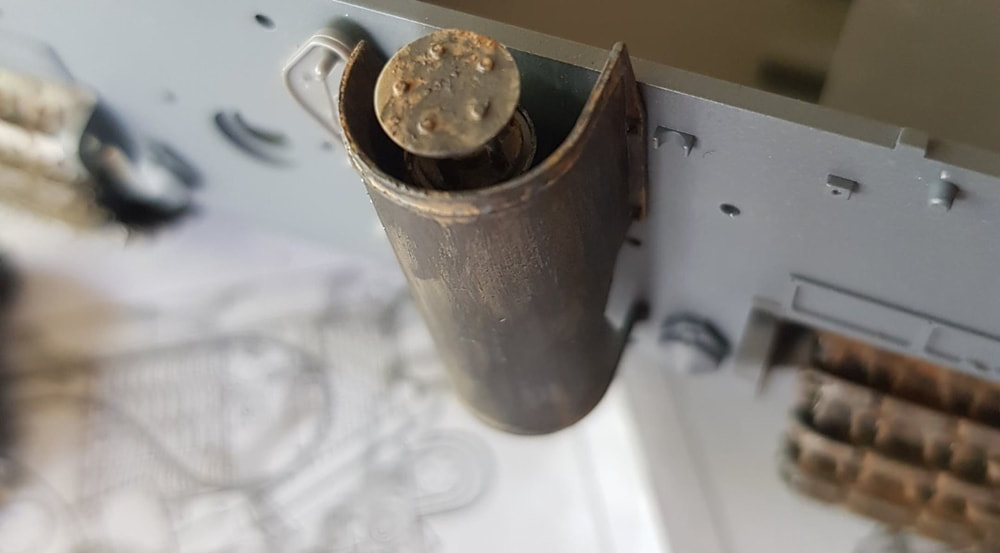
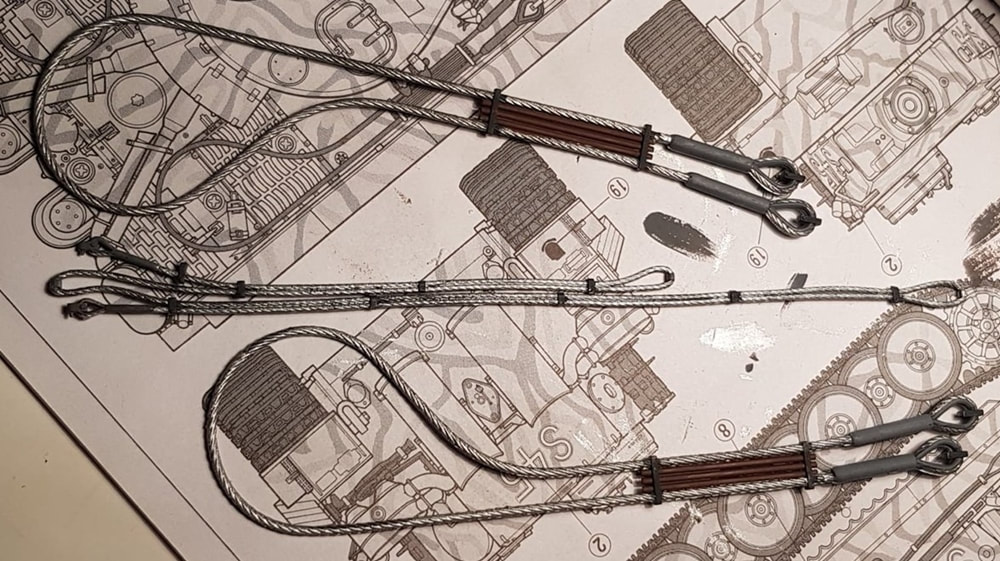
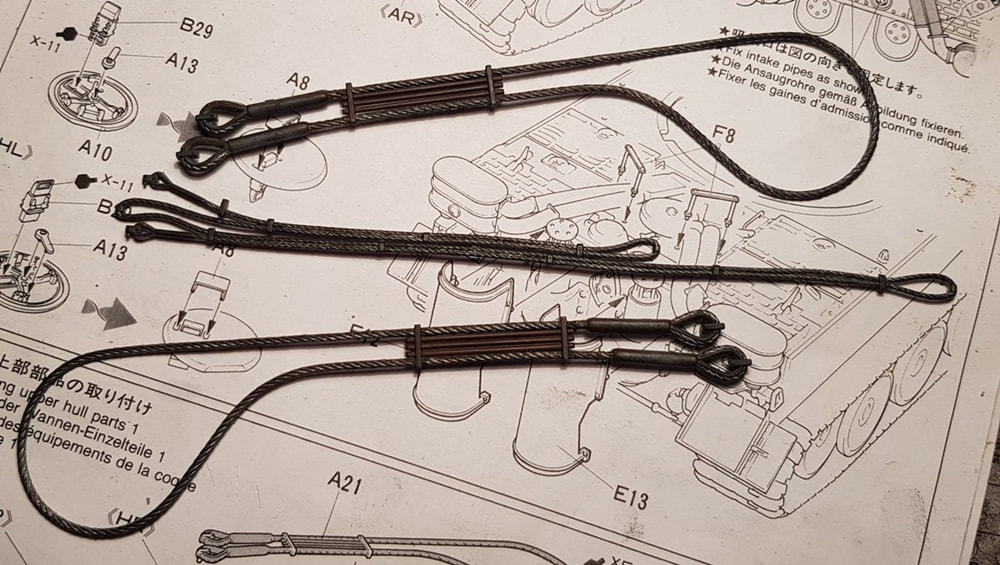
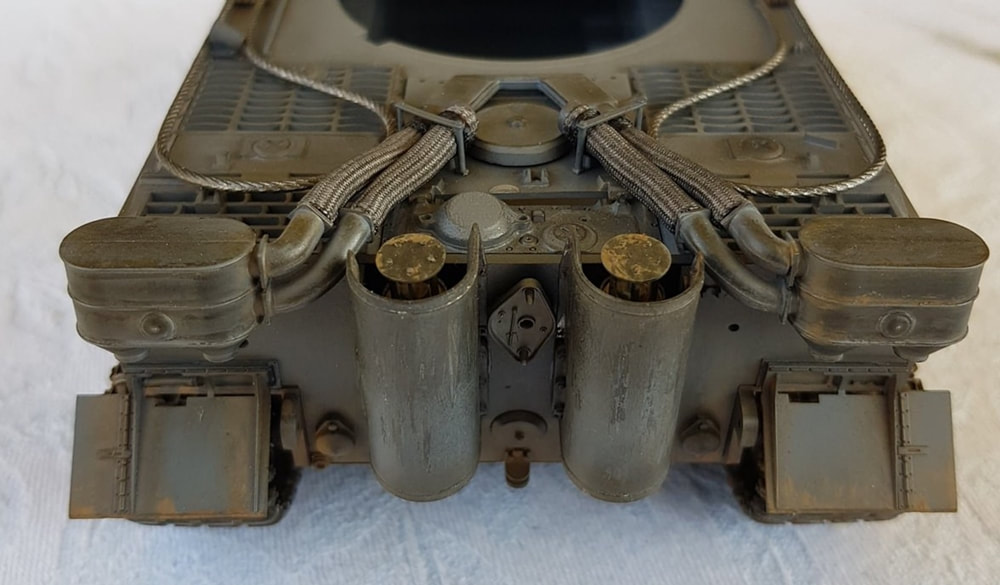
Tow cables before and after weathering. It took a bit of research to finally find out that the three pieces that sit in between the bigger cables are broken down wooden shafts that are screwed together to make the barrel cleaning rod for the 88! They should have a brass coloured looking tip on each end of the six poles, but i wasn't that confident in painting such small details so i went with red brown and then dirtied them up.
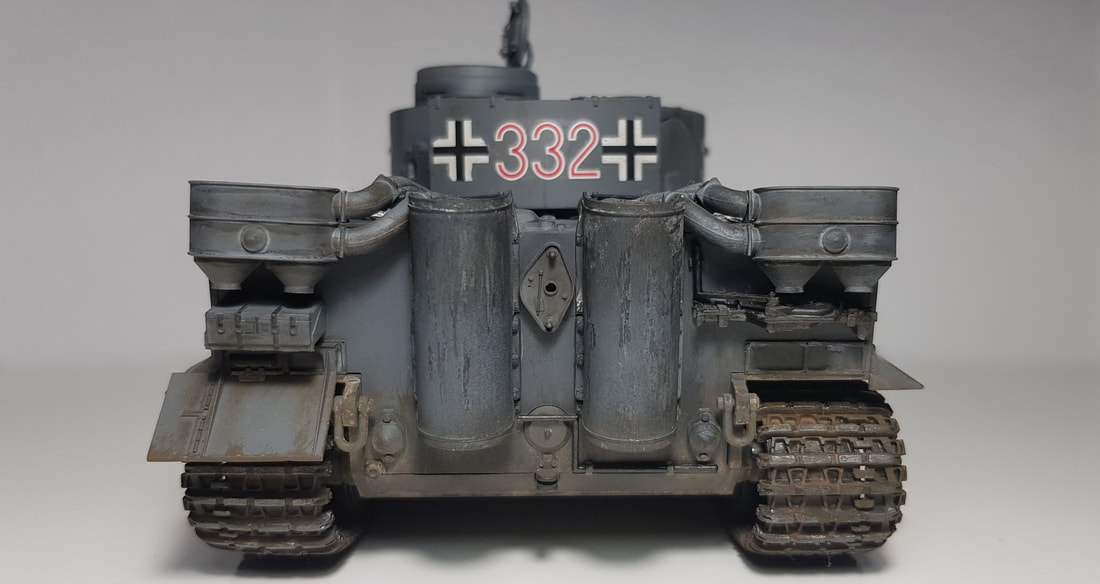
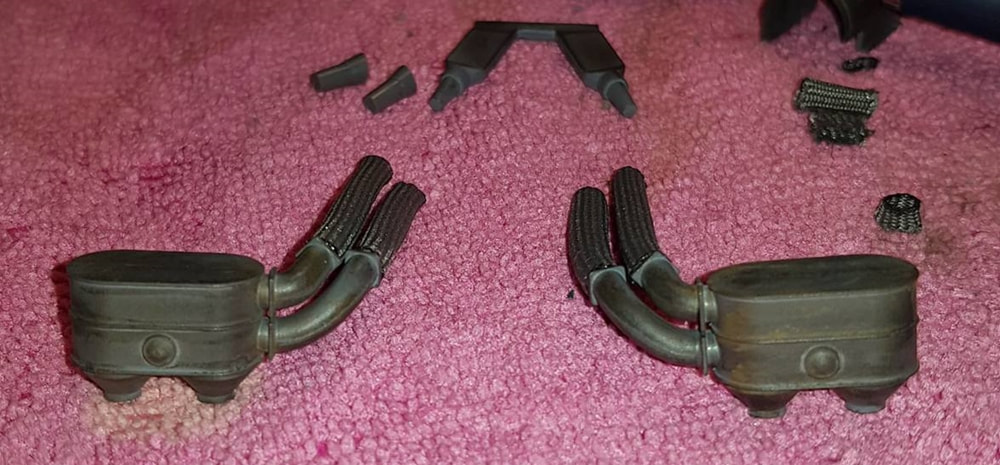
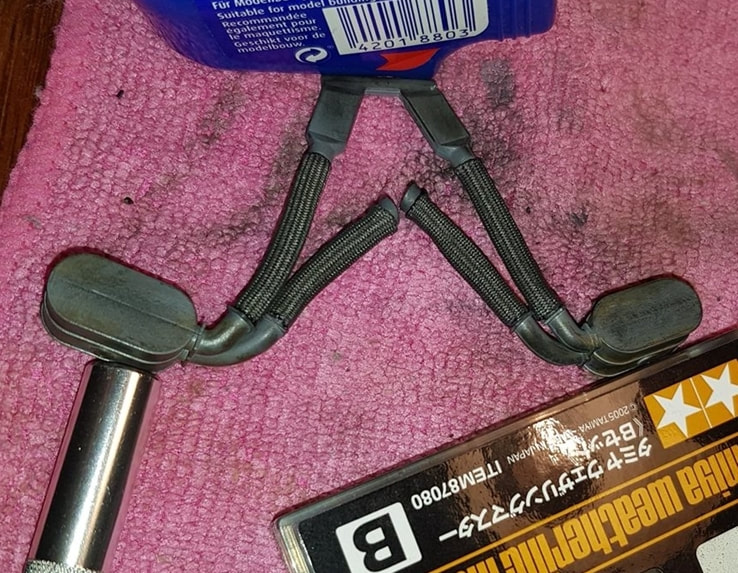
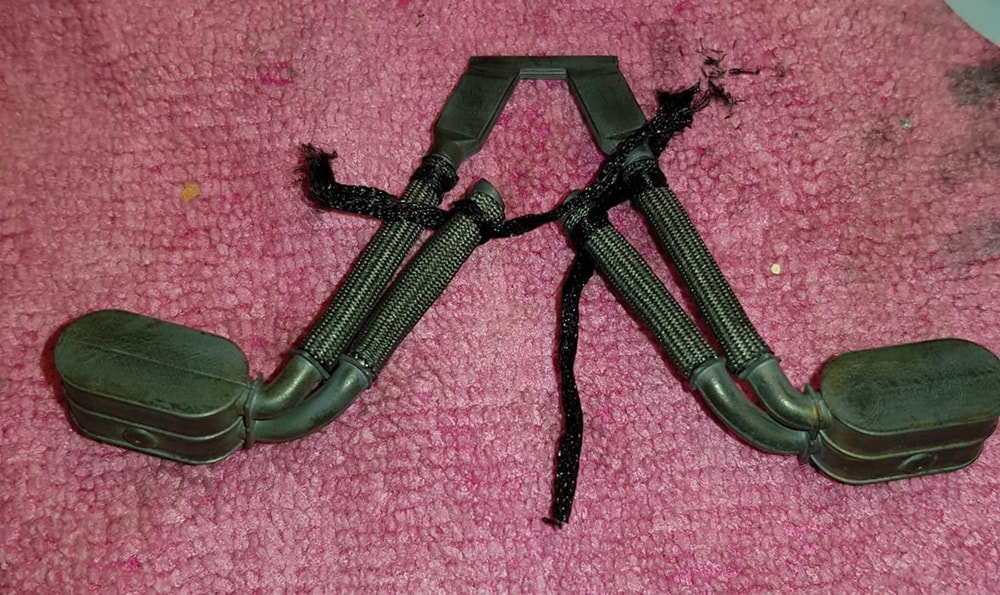
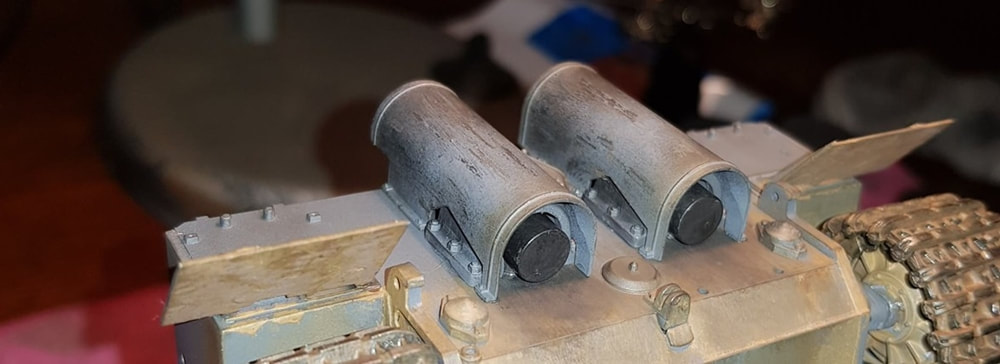
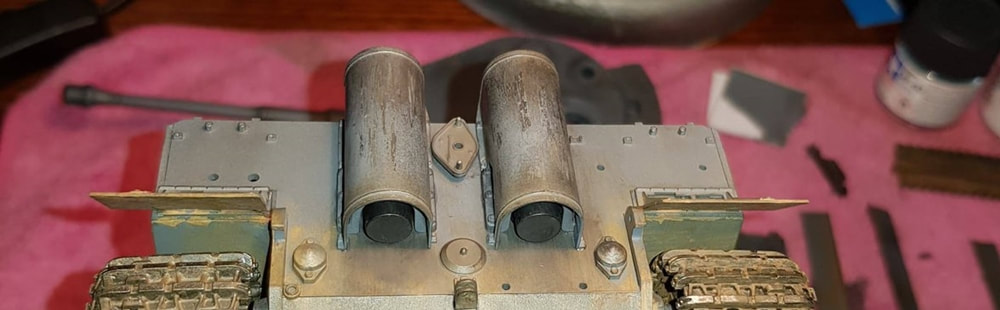
The pre cleaners and piping was more of the same, weathered with the rust and soot although i should have spent more time trimming off some of the joins. The camera will show every single fault with ones work, sometimes this is a good thing as it can pick up stuff one hasn't noticed. The material tubing supplied in the kit is cut to length and then i used a lighter to just briefly heat the end to tighten it up a bit for a better fit to the pipe. Once on it (the material section) looked a bit empty without some sort of clamping device so i used a small piece of ribbon to tie off the ends, trimmed once dried. I'm still iffy about whether i should have done that. I dry fitted this before gluing to make sure the pipes had the right angle as the pre cleaners sit on the rear and the pipes snake over the rear engine deck.
Time to start getting this beast together! The top of the hull was glued on and weighted then left over night. Same as with all of my parts, i dry fitted it first looking for gaps and trimmed or sanded anywhere that needed it. These Tamiya kits are really very good and do not require much fiddling around regards fitment but i would rather be sure before i apply any glue. With all of the hull together it was starting to come alive.
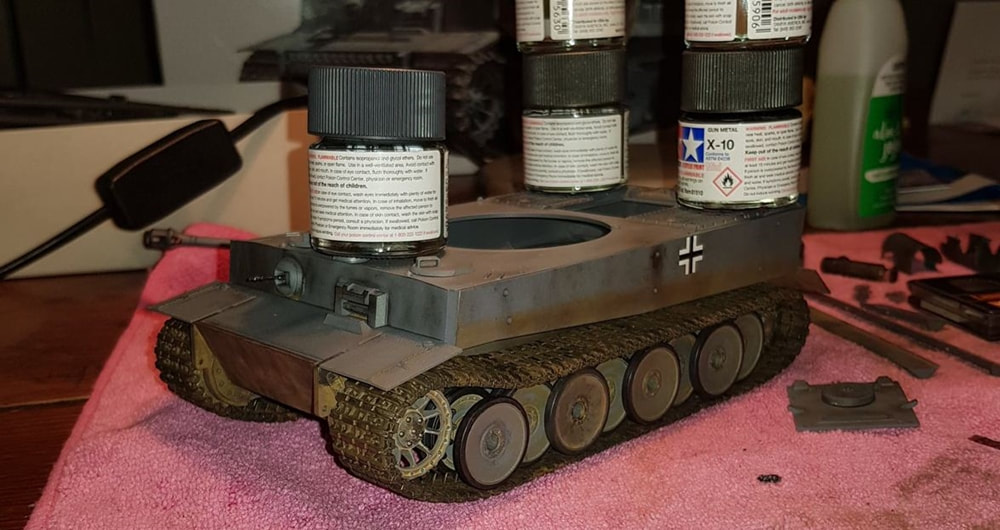
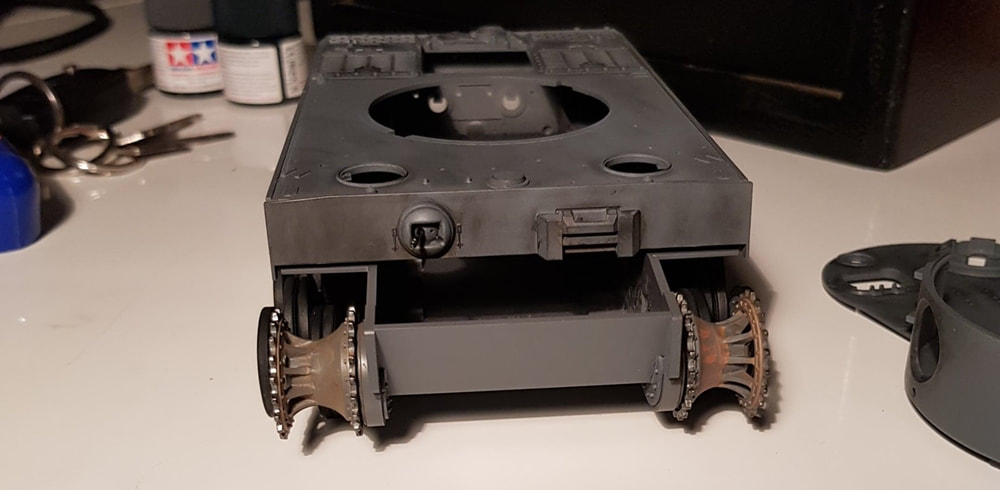
Next up was mounting the exhausts, exhaust shields and rear mudguards. The mudguards were fiddly. They give you two sets but one clearly doesn't suit and the others sort of it but don't locate %100 onto the mounting points. It was a case of dry fit a few times and then glue and hold until i could let them support their own weight. These two guards were weirdly the most fiddly part of the tank. One has since fallen off (six months after the build) and sits inside the turret awaiting me to reglue it. You can see several spots here where i missed putting on any weathering effect. Most of it i have gone back to after seeing the pictures and touched up. The rear lower half and underneath got a mixy mess of rust and soot that i attempted to fade up the rear. The lamp light makes the effect look a lot brighter than it really is. I have also, since my F-111c build, invested in a new led bulb that has made my pictures come out a lot better and not so incorrectly coloured or stark. In some cases they are the opposite, too dark and mellowed.Model photography is another whole subject in itself! Something i am also learning along the way.
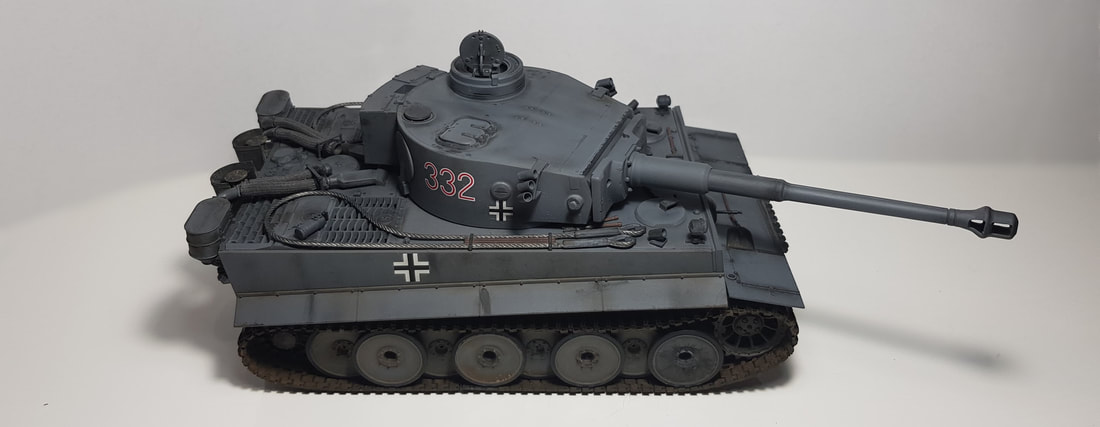
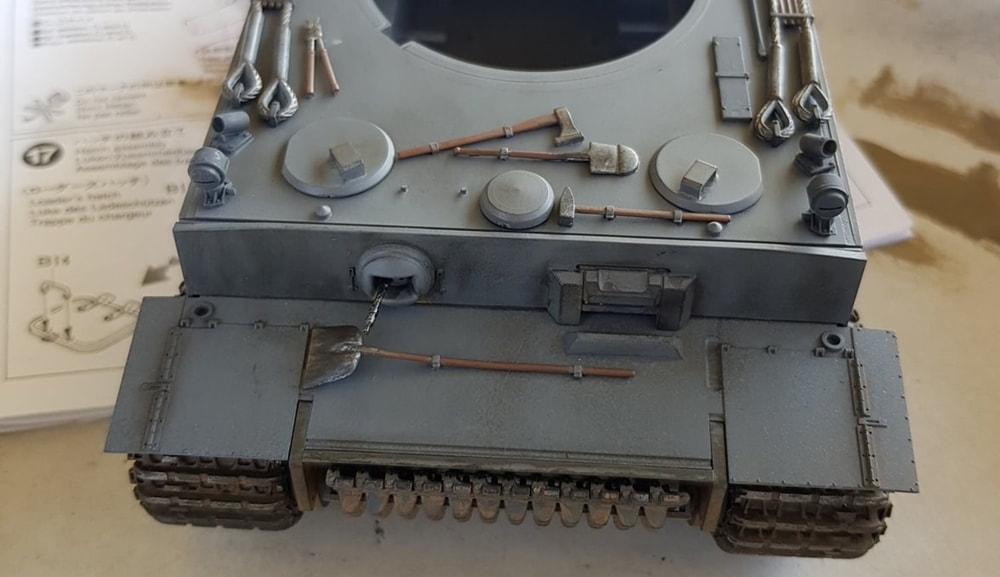
Finishing touches on the turret. Mostly just working some soot around the entry and exit areas and some rust for any mounting points. I also chipped away at some of the paintwork just using the wooden und of a paint brush. Nothing to violent, just softly worked it to see what sort of effect i could get. The stash bin at the rear of the turret needed some minor trimming to fit neat up against the rear. Dry fit everything first and glue second. With this kit i never had any decal solution like Mark Fit or the micro sol and set. They are just sat in water and then applied to the matte coat with no underlying gloss.

I did have some wip pictures of the tools, smoke dispensers and driving lights but the quality is poor and adds nothing unfortunately. The wooden sections of the tools i mixed up some red brown and a tanny colour in a paint cap with some thinners and the metal parts are iron with some silver and then the whole lot is sooted over with the weathering compound and a brush. The hatches and all other add on items like the cables were added at this stage to the front and top. The rear top was also completed with the pre cleaners and piping added.
Like previously mentioned, the left hand side shirt i left as one piece. The right hand skirt i cut the front section of, sanded the edges and then glued that skirt and the cut section on adding a slight tilt to the cut piece. Weathering was just brushing on the weathering compound trying to keep it around the edges where it joins to the tank body and down each skirt section. Most of it was still a bit heavy handed and really needed to be a lot finer. I added some soot compound to try and show fuel or oil spills from the top of the tank.
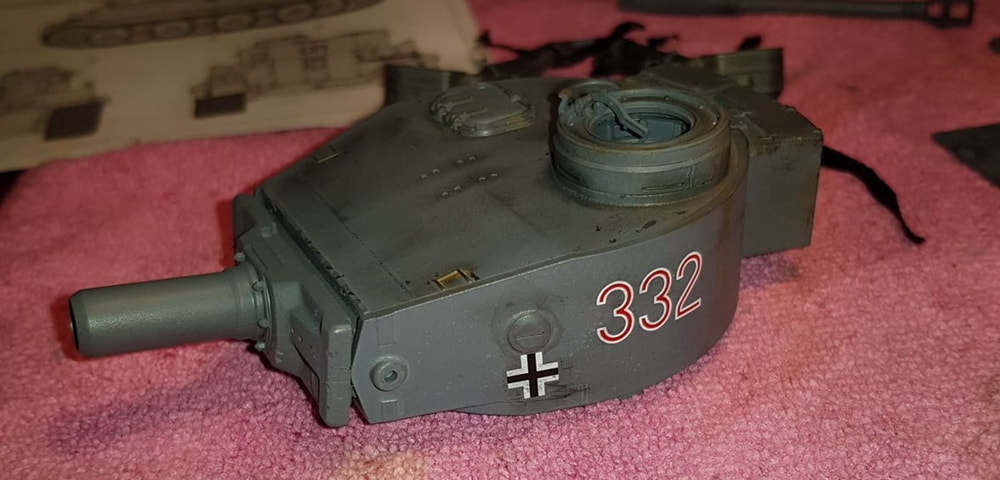
Turret was finished near by the addition of the smoke dispensers and the rear air vent/viewing vent. All that remained was to attach and glue the the turret hatch door. I was fairly happy with the effect i had achieved on this.

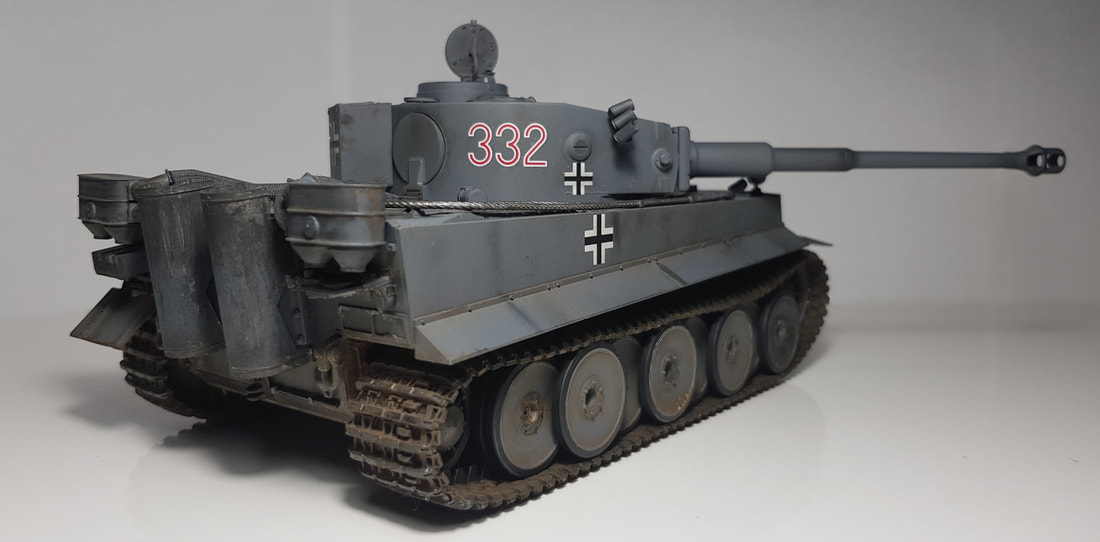
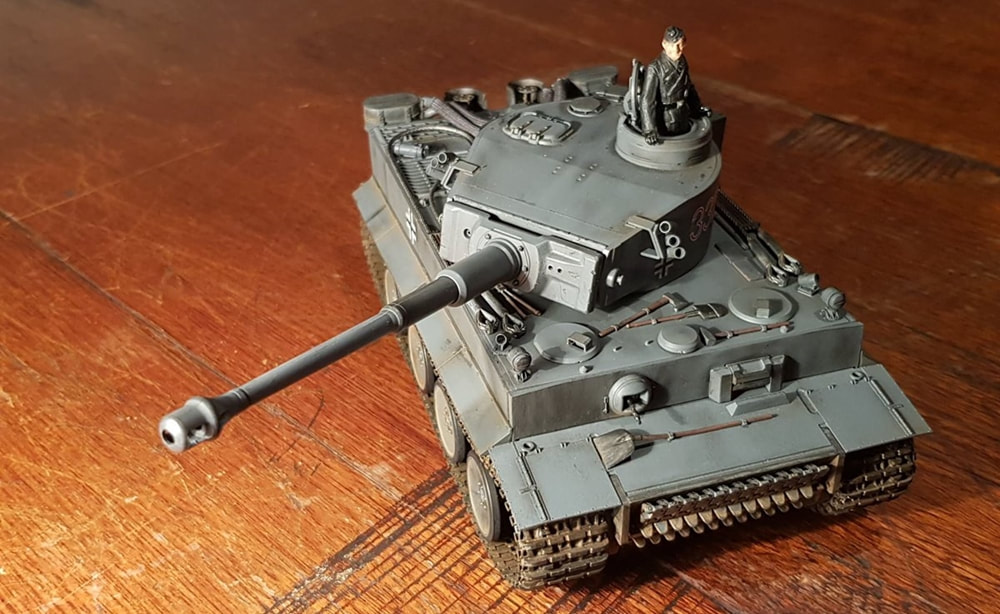
From here it was just adding the turret to the body and giving it all a once over to see if i had missed anything or if there were any areas i thought i could improve on. I mucked around a bit with the brush and some soot just trying to fade a few prominent over weathered areas and using a clean brush to try and take some soot off these areas as well. The big lesson i learned regards my first weathering effort was less is more. I can always go back and add, but it's harder to take it off. So at that stage i called it finished. I did paint the driver but he turned out like a burn victim, although i will include him in the finished pictures because it shows at what stage i was. Eight months on and I Still hate painting figures. Anyway, here is the completed kit!
My third model (Sherman Easy Eight) was the first time i used a clear coat matte to seal and help dull down decal shine. I went back and clear coated the Tiger and also took some better pics. Decent pictures had eluded me through this build and can obviously make a whole lot of difference for those final presentation shots so i did some basic research. I ended up getting a led bulb for my old trusty lamp and using sheets of A4 for a clean backdrop. The next step will be making a basic and cheap light box and investing in one more lamp. For the moment these are about as good as i can get out of my Samsung S8.