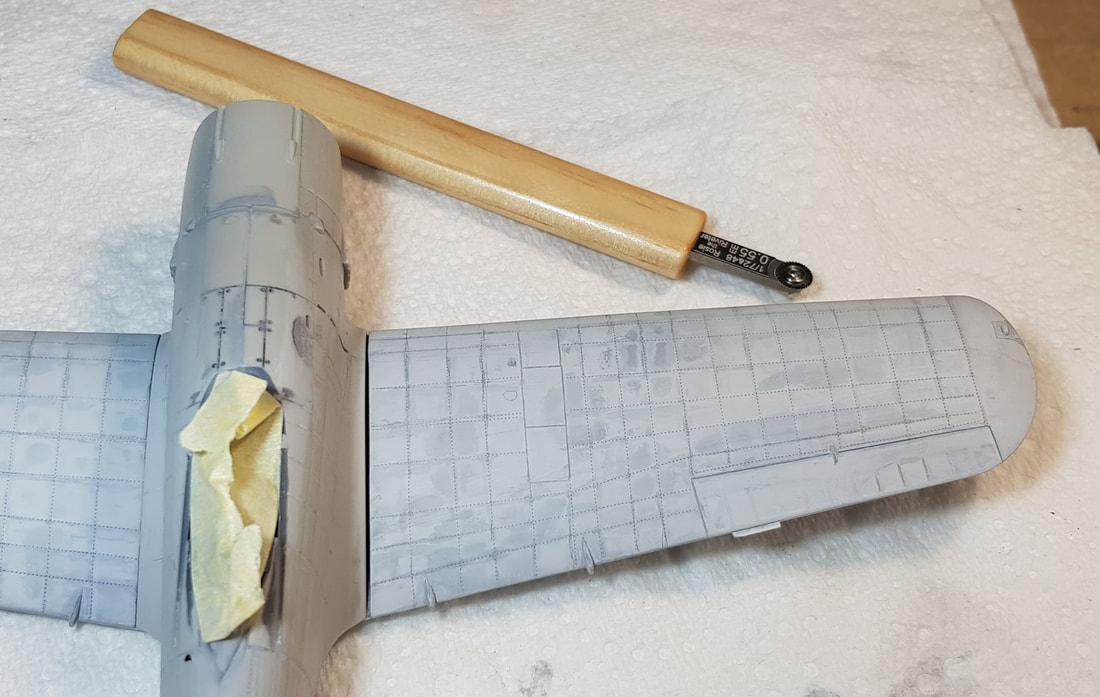
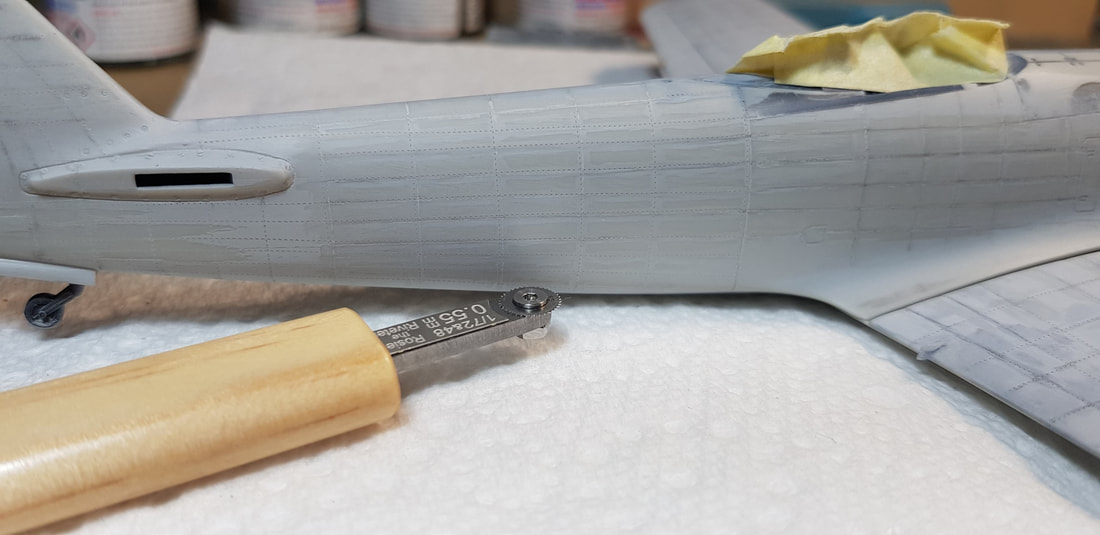
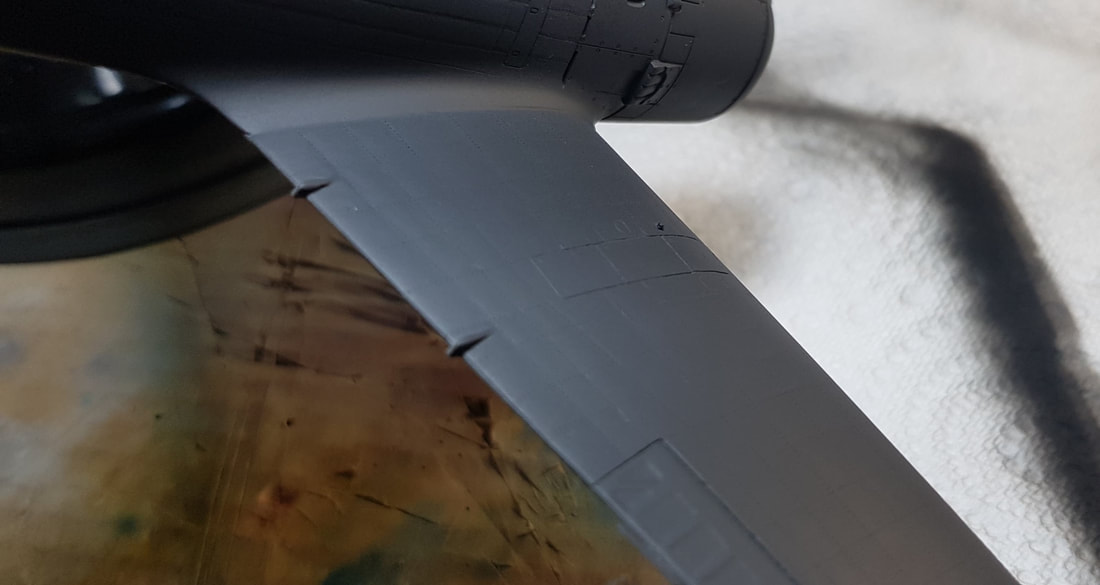
Week two and Rosie the Riveter turned up, another new thing to learn! This would help in adding some much lacking detail to the model i hoped. It was a case of just dive in and rivet away. I was surprised how easy it was in the end, although some of my lines could have been done better, i was happy with how it was looking. You can see here how large the wing gap was. With the wing angles in the frontal view sitting correctly it was going to soak up quiet a bit of zapagap and putty and require some rivets to be redone.
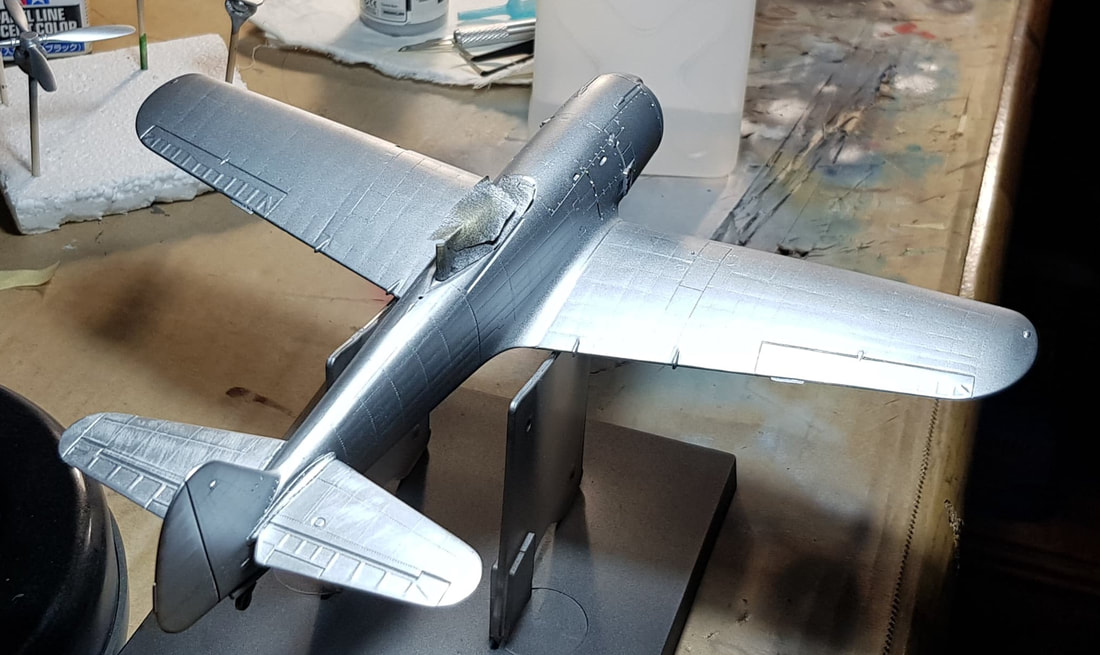
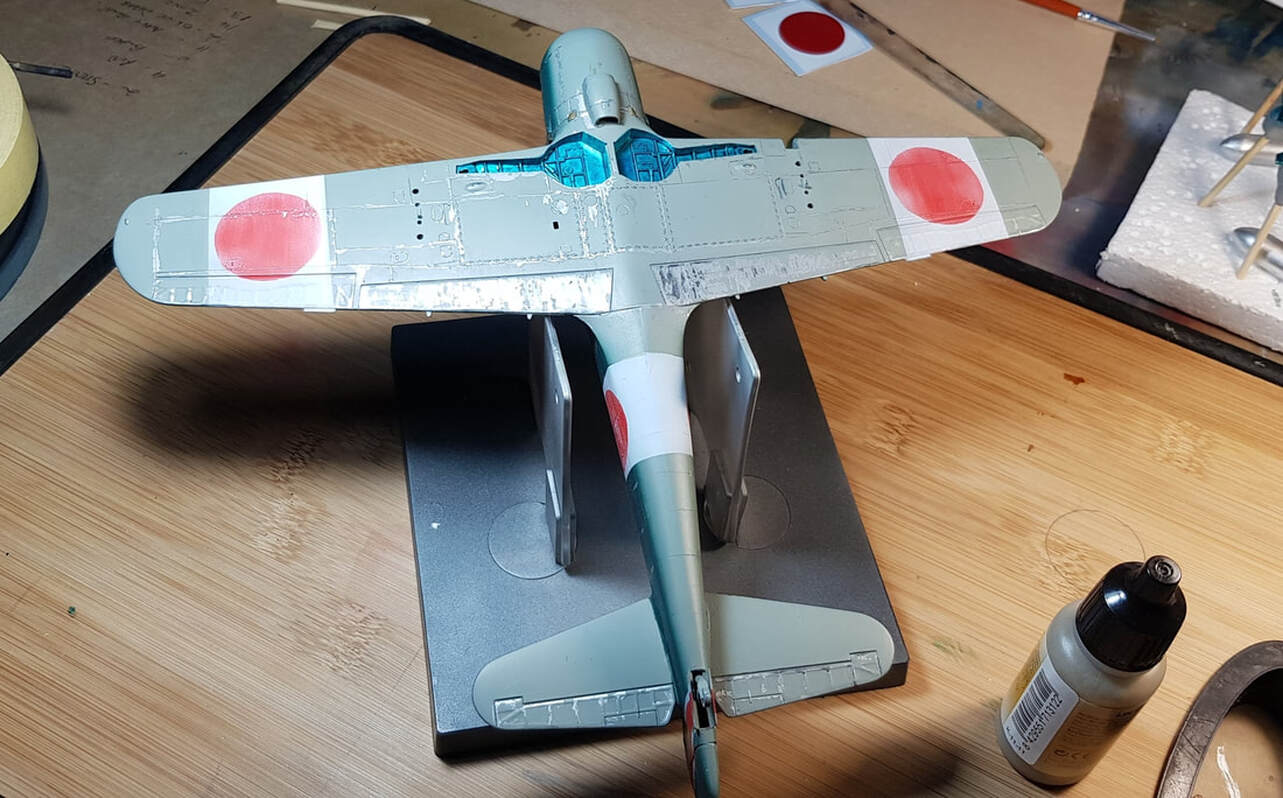
A base coat of Vallejo black followed by aluminium. I found it really hard to show of the stressed metal effect with my S8 photography (lack of) skills. It had to be caught at the right angle under lighting to show up. The aluminium colour showed it off better, it also showed off what i called the marianas trench on the left wing. I was hoping it would lessen under the hairspray chipping effect i had planned.
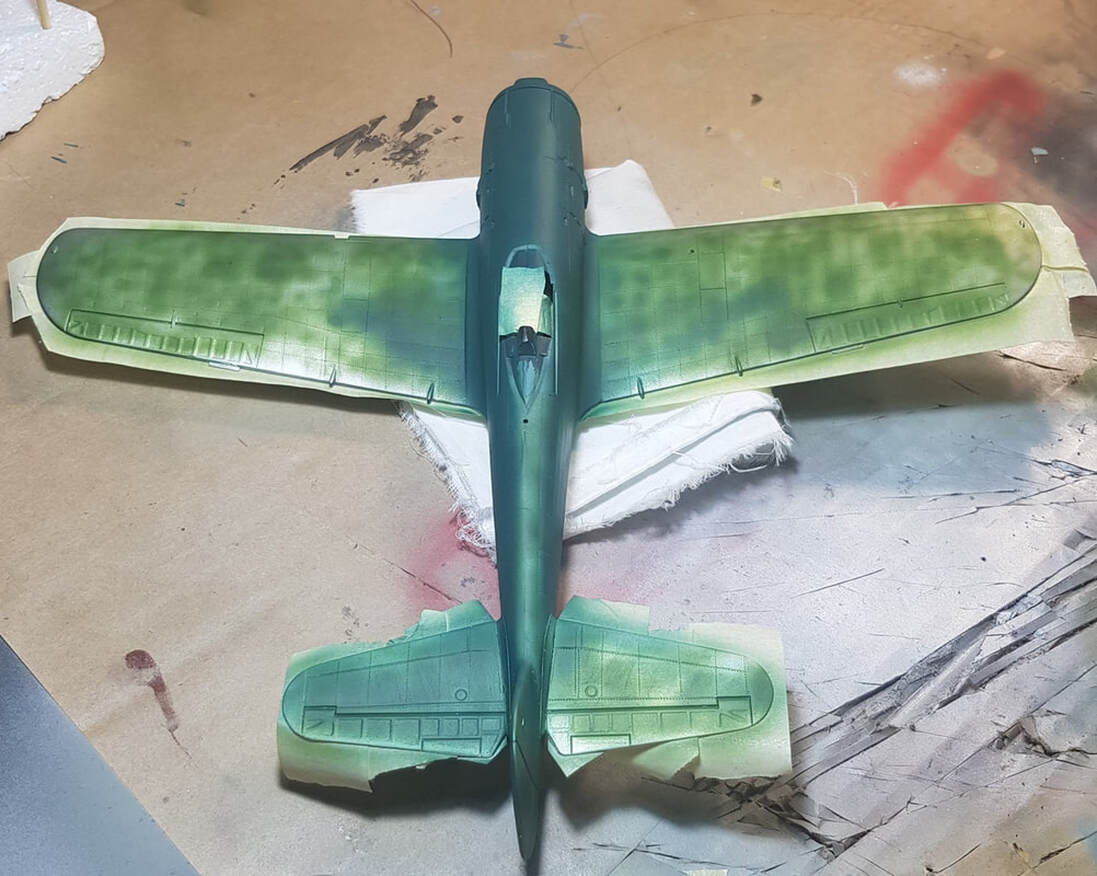
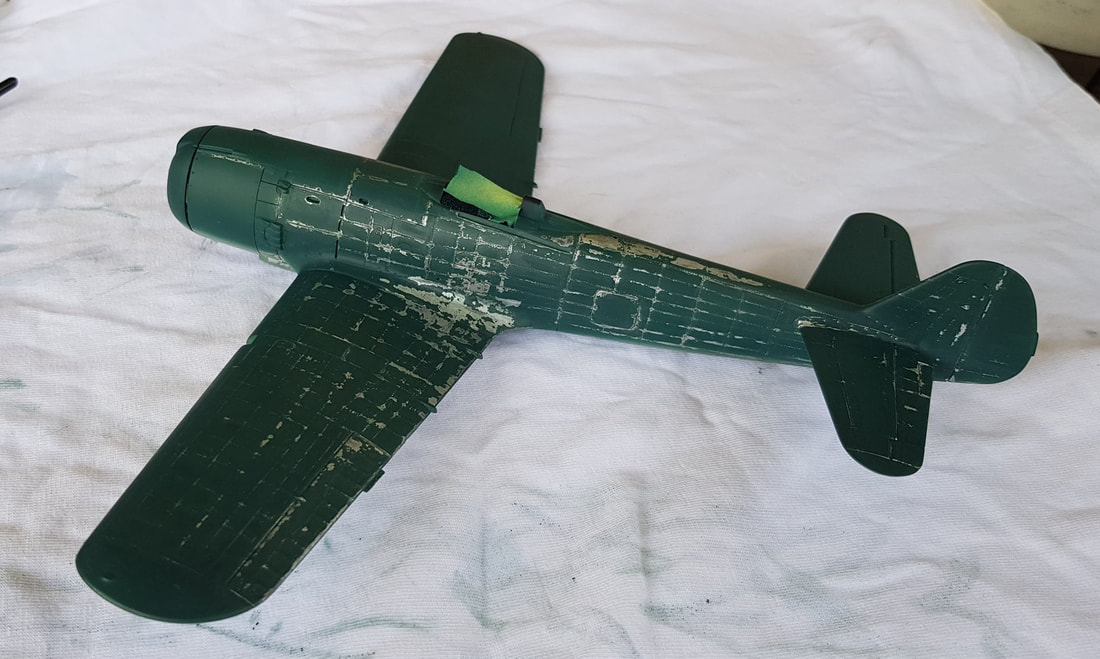
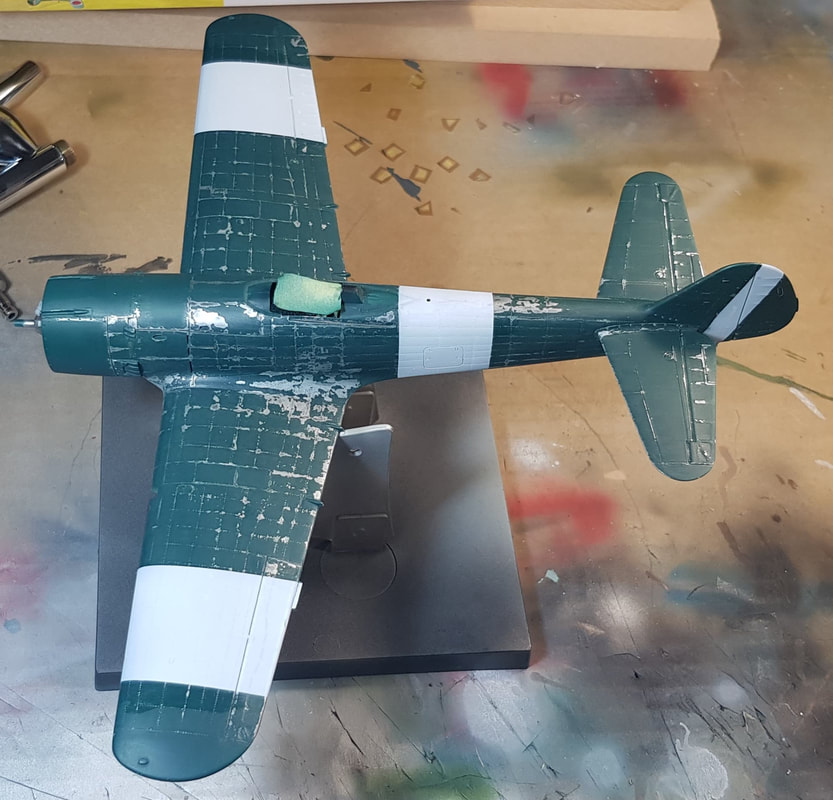
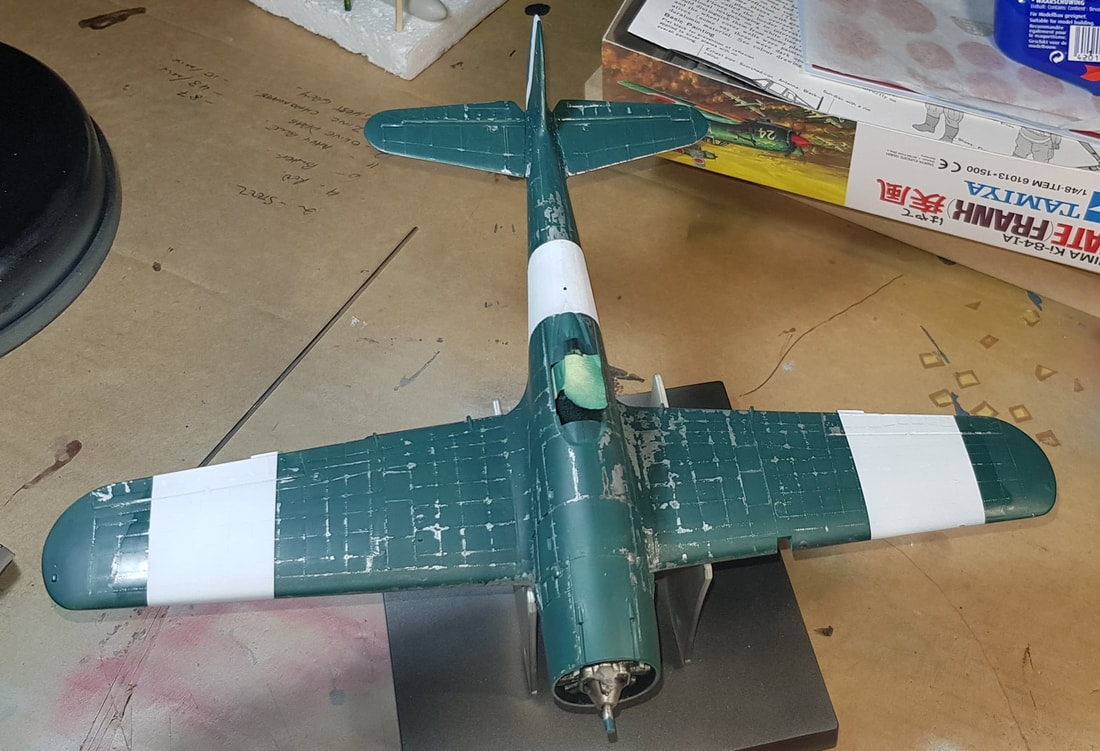
Once the aluminium was all down i gave it two coats of decanted hairspray and let it sit for an hour under the lamps to settle and cure. The start of top coat was several light mist coats of a splotchy IJN black green for some colour variation followed by the final coat of IJN dark green. I then let it sit overnight before in anticipation of the chipping to come the next day.
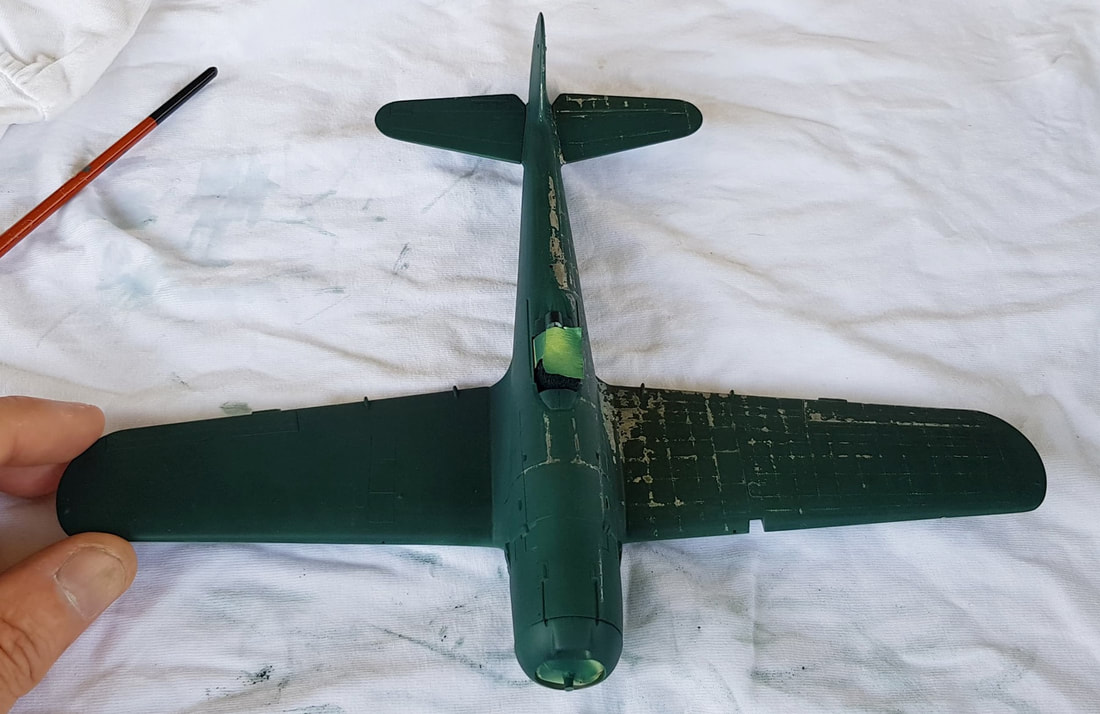
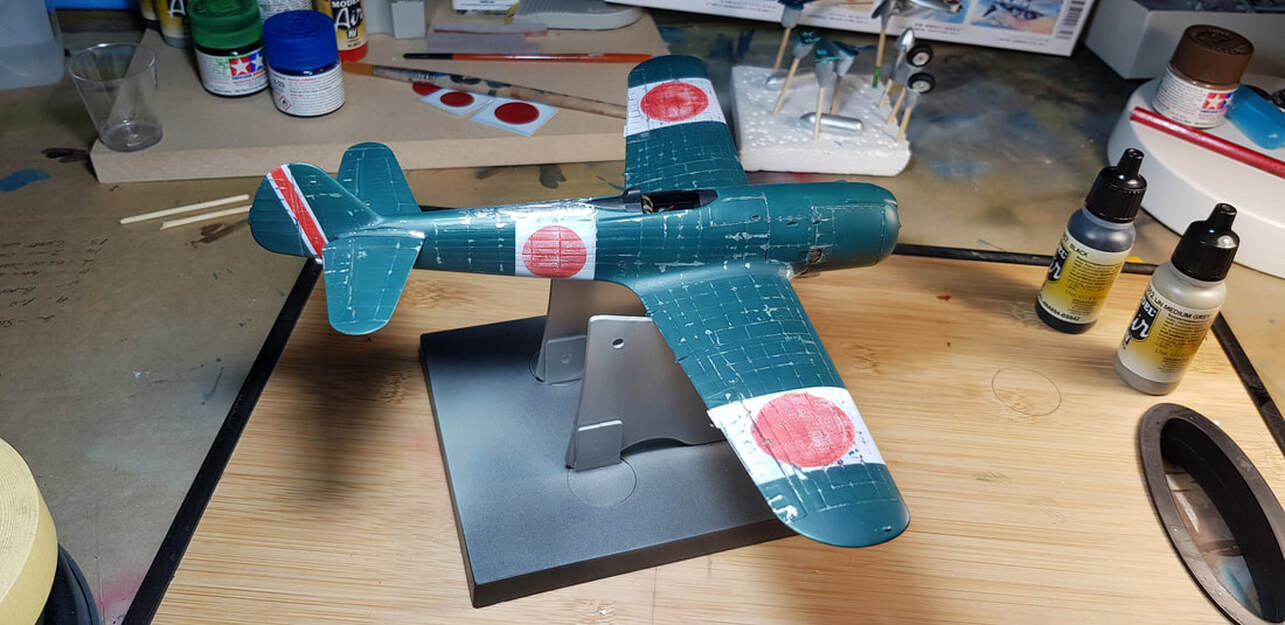
Chipping time, sweet. I really liked doing this on the Raiden so was looking forward to it. I had learned a fair bit from that build so approached this one confidently regards the effect. I knew how i wanted it to look and how much pressure and water to use to get that look. Previously i had used a bit too much water and the paint had started to 'sludge' off in some areas so this time it was minimum water and work a small area at a time.
I moved outside as it was far too hot in the garage and was keeping an eye on the 24/7 fire updates as the smoke from the fires drifted overhead but the wind was gusting so intensely i had to move it all back inside. We are about 80 k's from the closest big fire at Noosa on the Sunny coast so no issues here, but that wind must have made it hard for the firies today. It's going to be a scorcher of a summer here in Australia. I managed to get half of the top side done though before calling it quits.
I moved outside as it was far too hot in the garage and was keeping an eye on the 24/7 fire updates as the smoke from the fires drifted overhead but the wind was gusting so intensely i had to move it all back inside. We are about 80 k's from the closest big fire at Noosa on the Sunny coast so no issues here, but that wind must have made it hard for the firies today. It's going to be a scorcher of a summer here in Australia. I managed to get half of the top side done though before calling it quits.
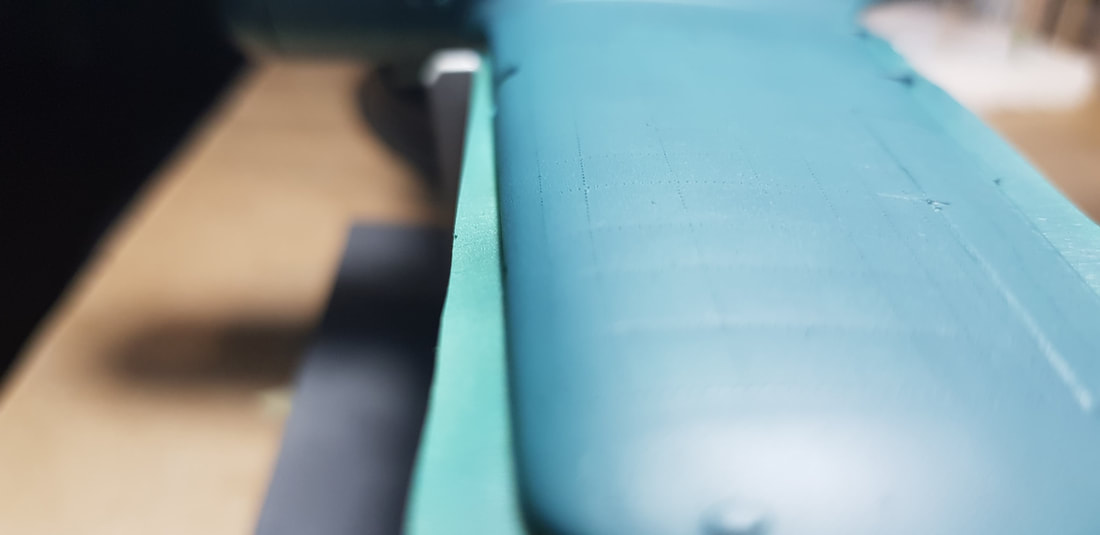
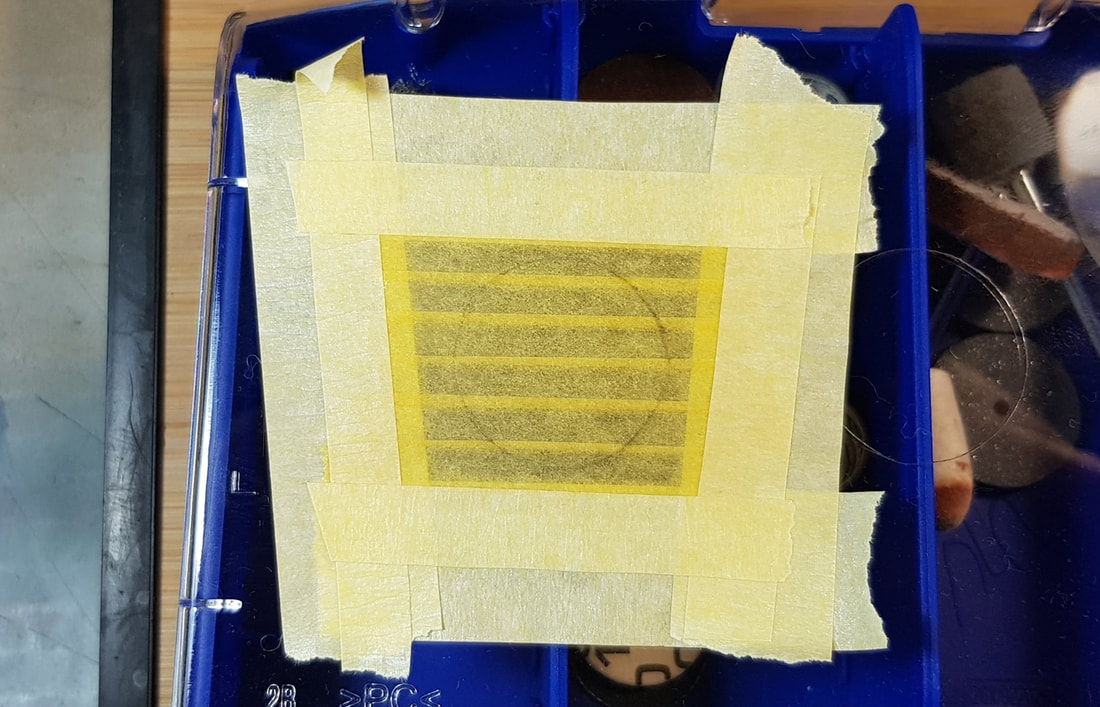
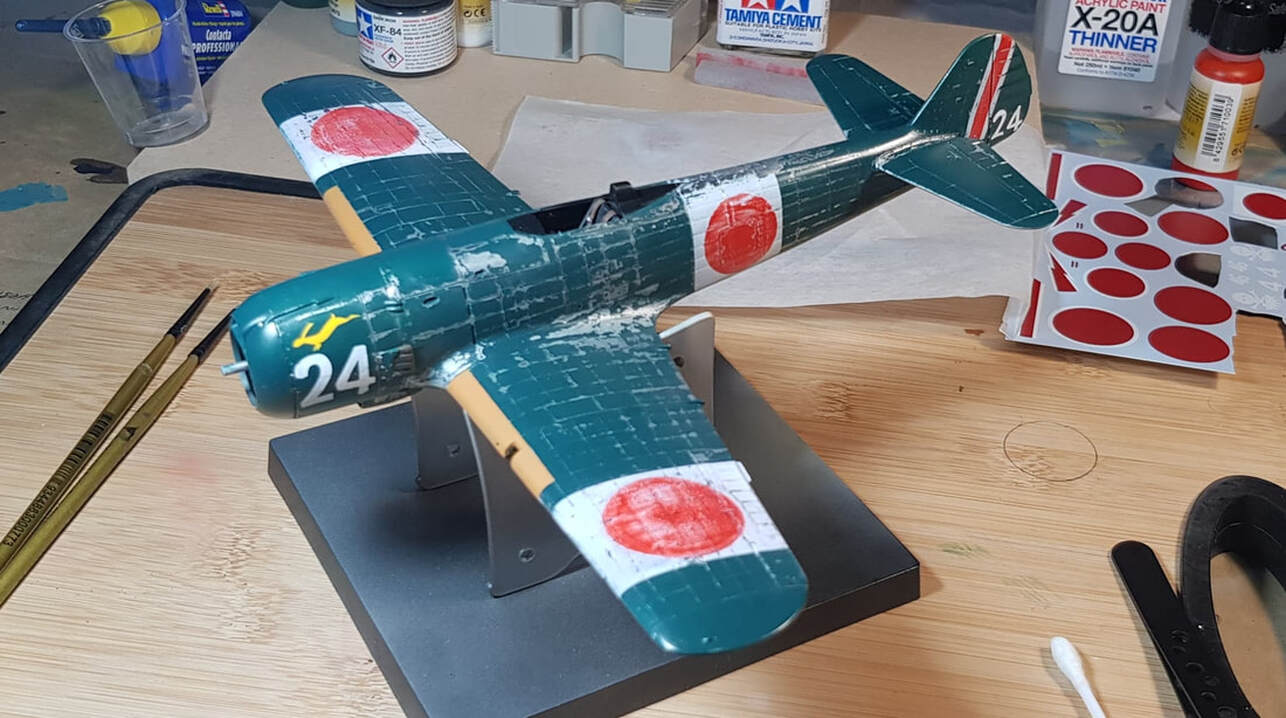
With the chipping all done i started to look at the decals, these were going to stand out terribly and i was not really a fan of my previous attempts at decal weathering on the Raiden. I decided the only way around it was to paint them, which meant i would have to make masks for the Hinomarus. The shiny square sections on the wings is hairspray in prep for the chipping to come after painting.
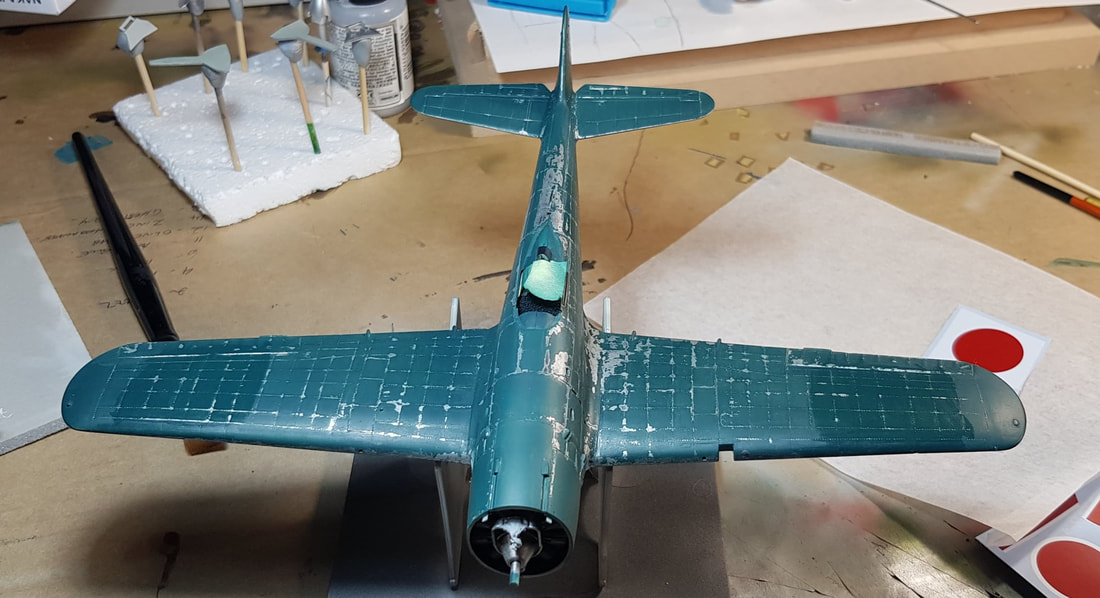

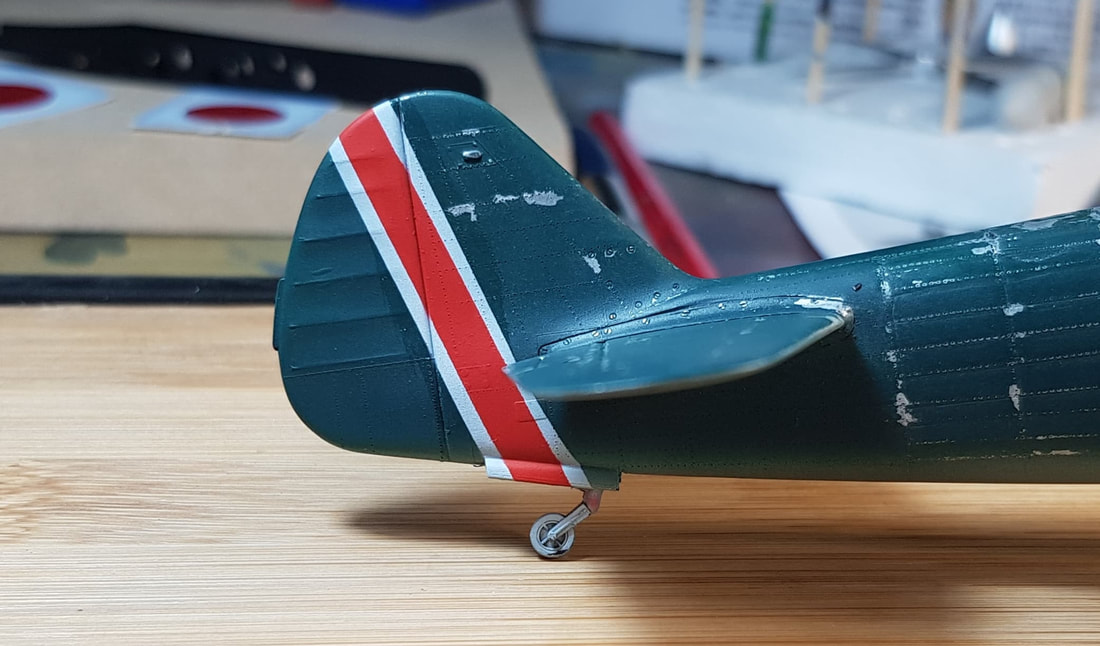
The white base for the Hinomarus and the tail section was an easy mask and paint and with some weathering would look far better than the supplied decals i thought.
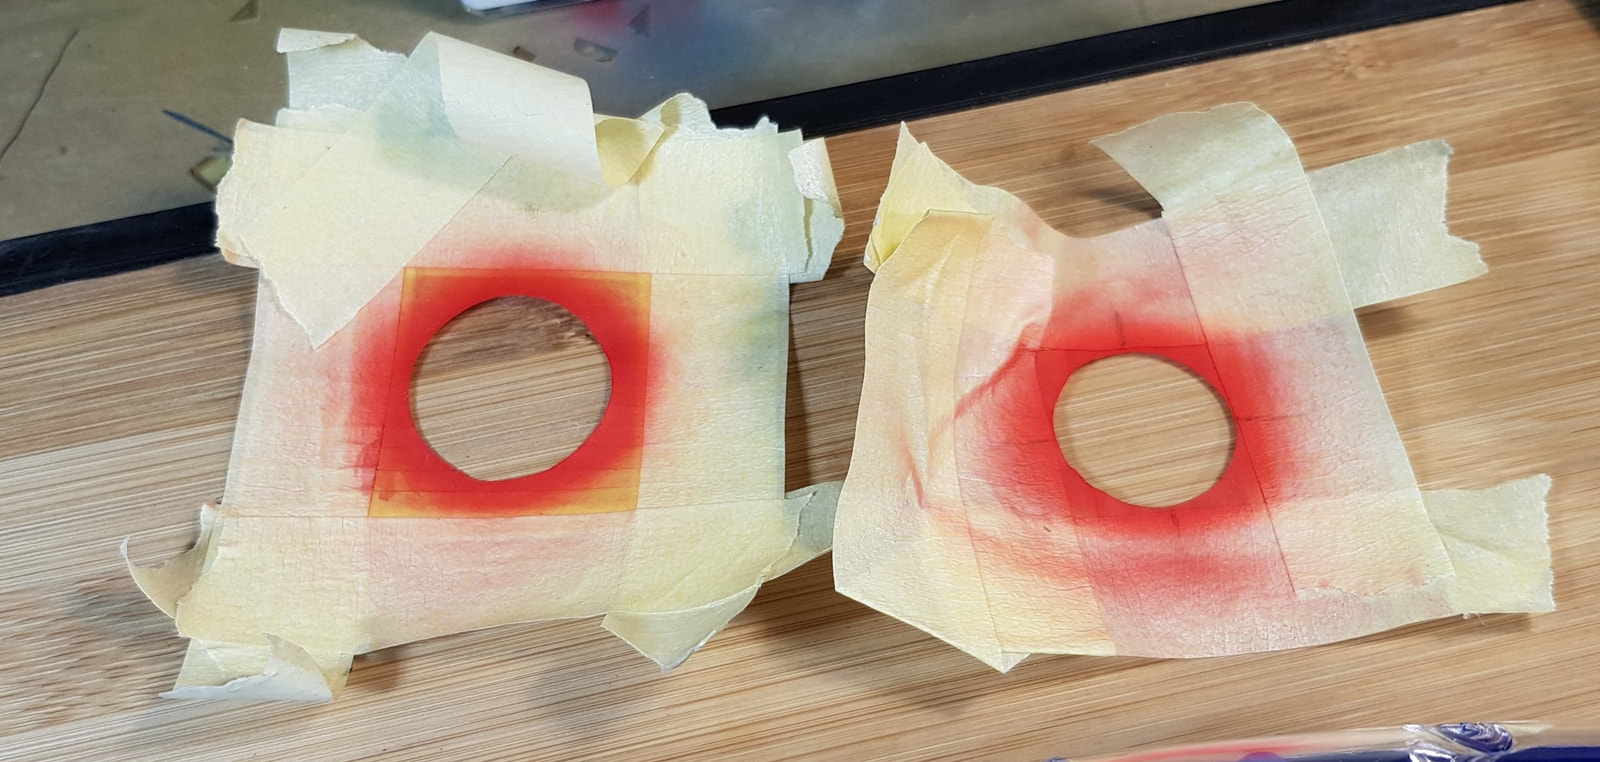
The masks i made out of Tamiya tape and just hoped for the best. The first set i made was too small so i ended up making six in total and having to overspray the upper wing markings which required a lot of mucking around to get correct. Next time i think i'll shell out for some Montex masks, but still, an interesting way to spend an evening.
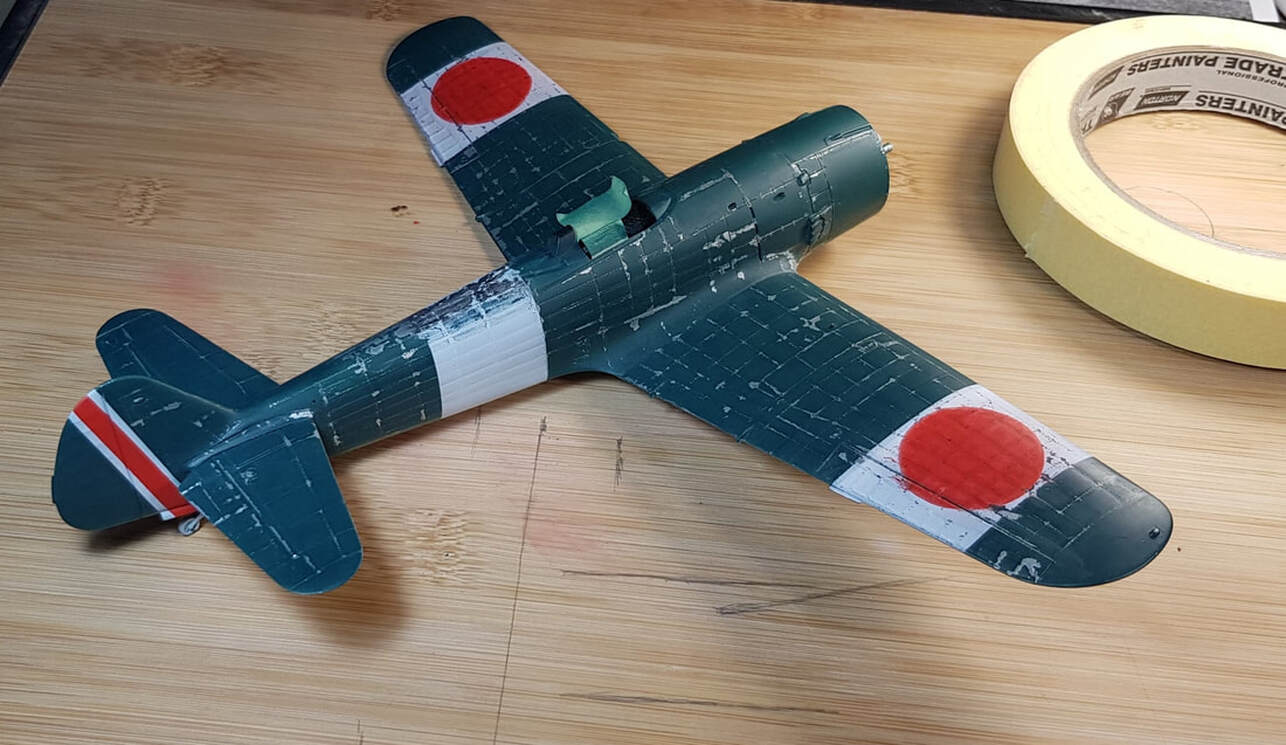
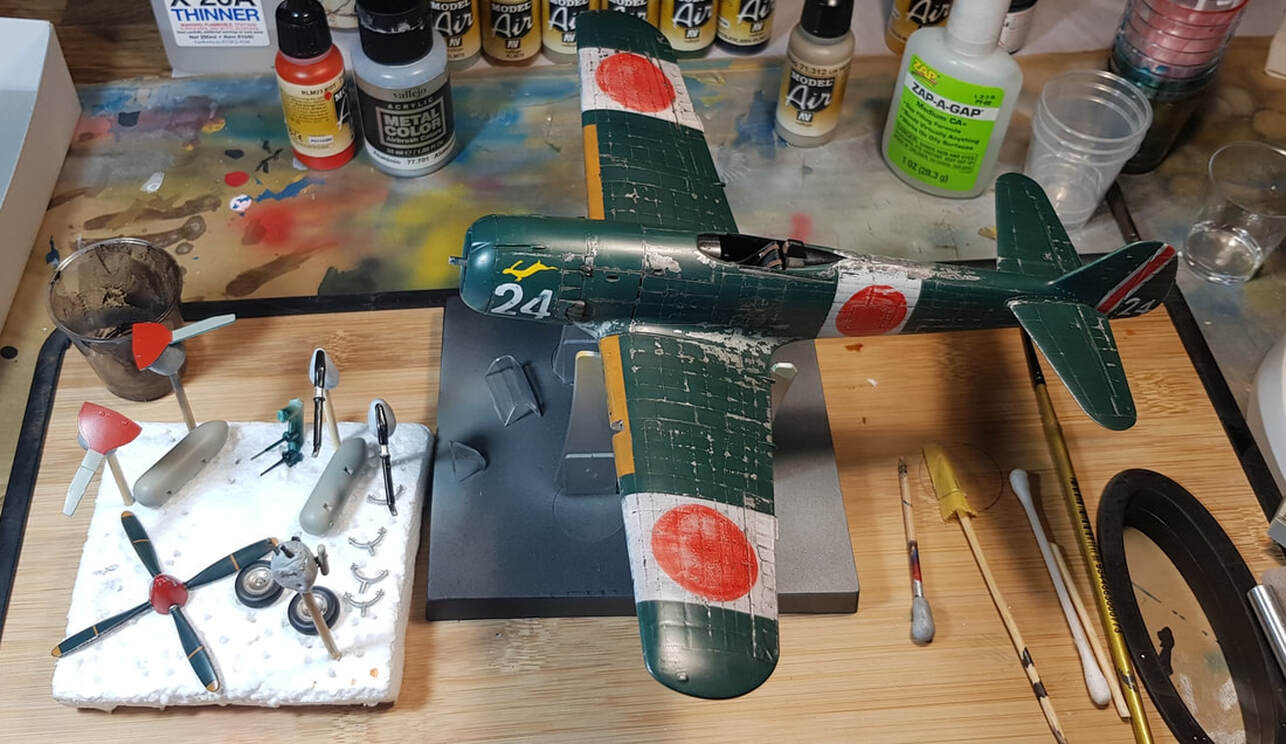
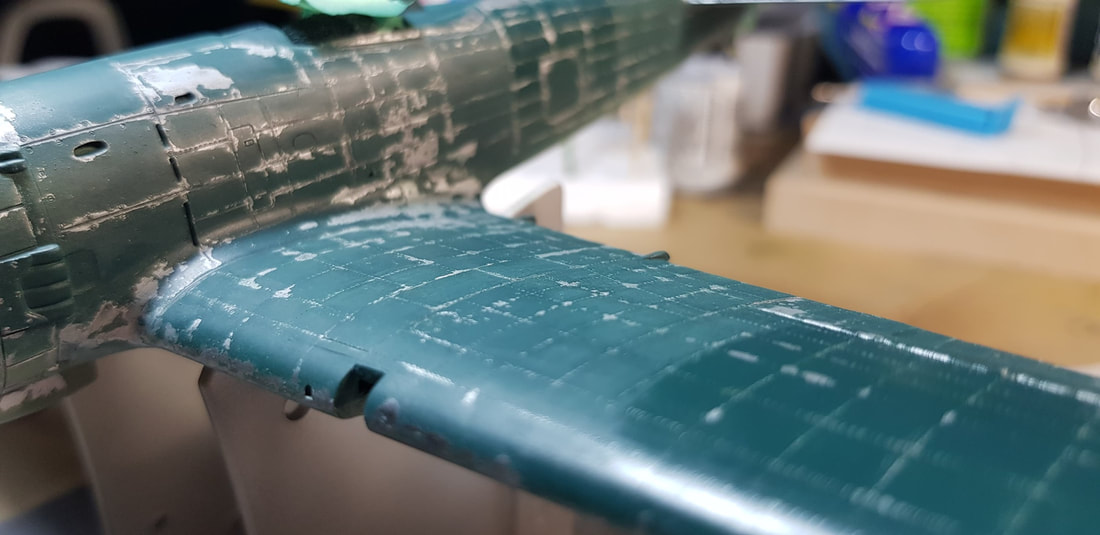
Once i had them all sprayed i sat it away for the night and then returned the next morning to weather the absolute guts out of them to match the rest of the plane. The white was chipped with a toothpick and my stipple brush and the Hinomarus i mostly worked away at with some dry 2000 grit. I also did some rework to the section behind the canopy as some of the black base has started to show through.
The nose and tail numeral decals i could not cut and spray so my plan was to try and weather them in as best i could once they were laid down. With a light oil wash i was hoping they wouldn't stand out too much. Prior to that i had to spray the wing leading edges in a yellow/orange mix as i had completely forgotten about it. Apologies in advance for the following blurry shot, it was late and i was shagged and it's the only one i took at this stage of the build.
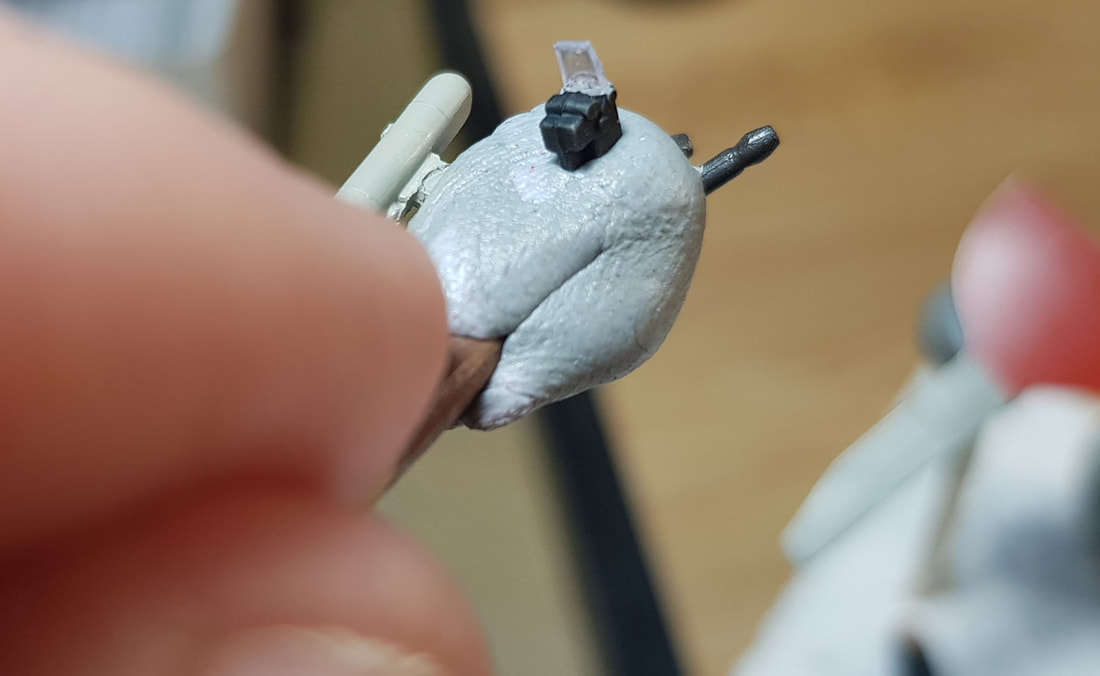
Some chipping work on the leading edges, silvered inside of the wing lamp slot and general touch ups all round before she was shot with a future substitute clear prior to an oil wash. It was starting to look half decent. In between all of the main body work i had completed all of the fiddly bits and chipped the leading edges of the propeller blades. The gunsight comes with no clear section so a piece of plastic cut out of a battery packet sufficed. All that was left was to glue all of those fiddly bits on, do an oil wash and then finish it off with a flat coat.