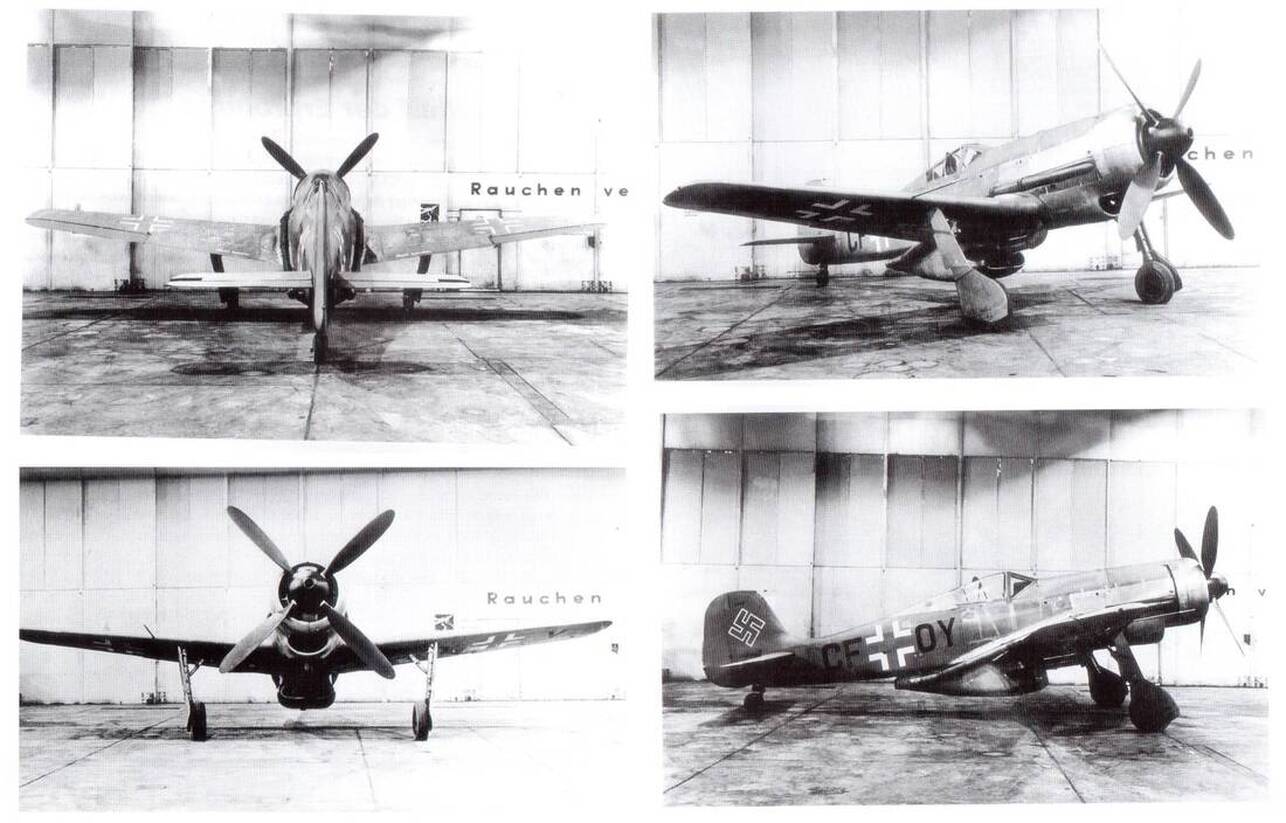
The FW190 V series was the development to the FW190 to resolve its achilles heel, high altitude combat and flying in general. Tank started looking at ways to address the altitude performance problem early in the program. In 1941, he proposed a number of versions featuring new power plants, and he suggested using turbochargers in place of superchargers. The V18 prototype was the first to feature the full high-altitude suite of features from all the previous development. A pressurized cockpit, longer wings, a 603G engine driving a new four-blade propeller, and a Hirth 9-2281 turbocharger. Unlike the experimental B models, V18 had a cleaner turbocharger installation, running the required piping along the wing root, partially buried in the fillet, and installing both the turbocharger air intake and inter cooler in a substantially sized teardrop shaped fairing under the cockpit. This pouch or scoop led to the "Känguruh" (Kangaroo) nickname for these models. V18 was later modified to the V18/U1, with a downgraded 603A engine, but a new DVL turbocharger that improved power to 1,600 PS at an altitude of 10,700 m.
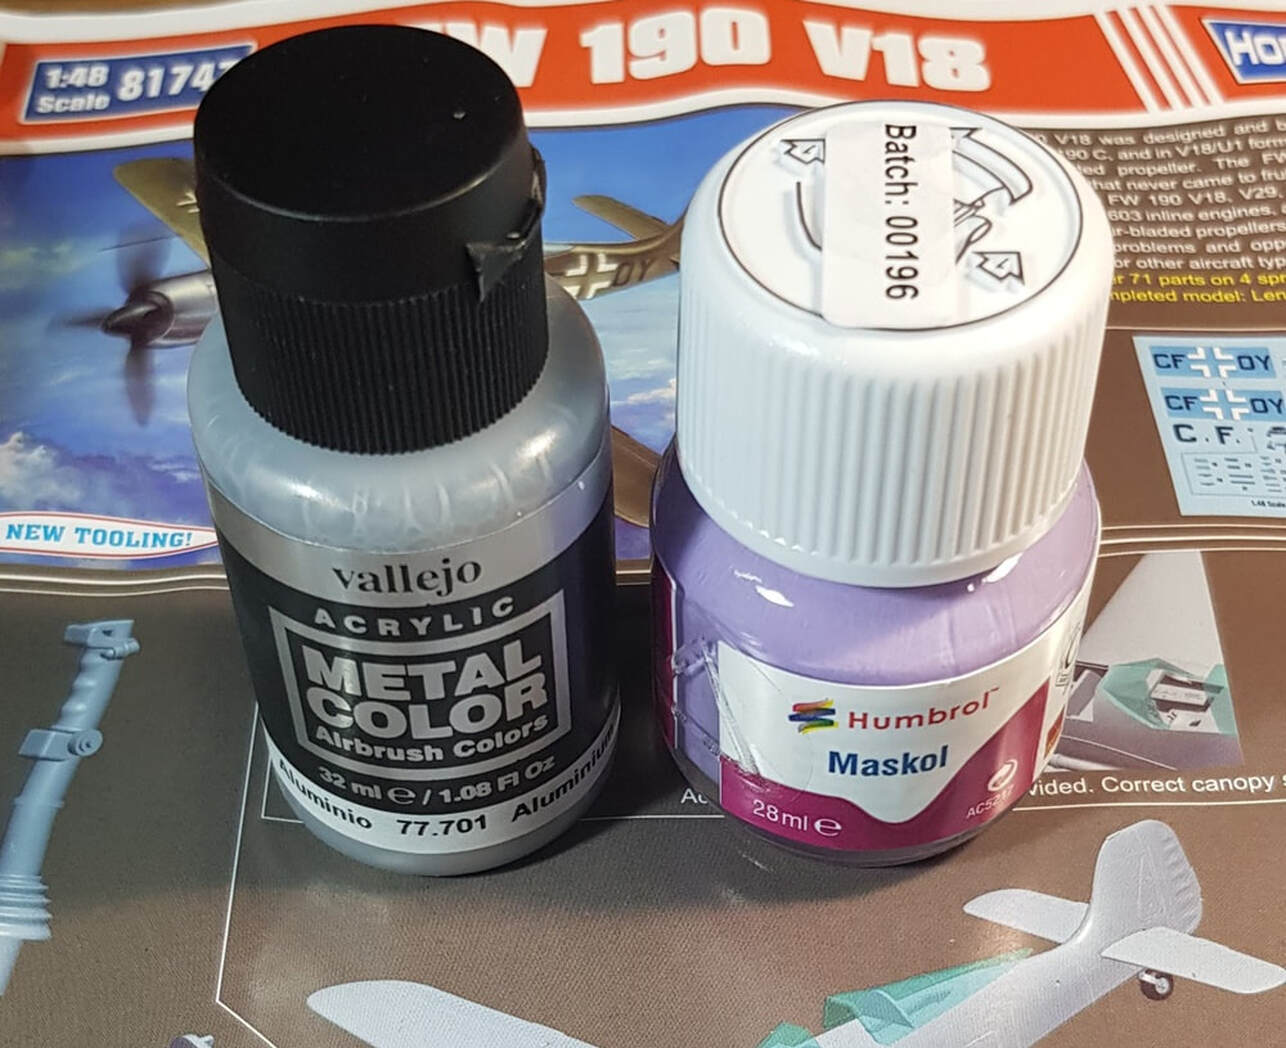
Overall it's just a cool looking plane and nice niche version in the FW line. The HobbyBoss 1/48 kit is fairly basic, three sprues plus the canopy, but a very tidy little kit. FoR a while i have had this on my wish list but it has only ever been an overseas order item and fairly pricey, until last week when one popped up at BNA models. I jumped on it instantly at only forty dollars, great price! To go with the kit i also grabbed some Vallejo flat aluminium and i thought i would give the Humbrol Maskol fluid a run for the canopy and see if i can save myself some masking.
Overall it's just a cool looking plane and nice niche version in the FW line. The HobbyBoss 1/48 kit is fairly basic, three sprues plus the canopy, but a very tidy little kit. FoR a while i have had this on my wish list but it has only ever been an overseas order item and fairly pricey, until last week when one popped up at BNA models. I jumped on it instantly at only forty dollars, great price! To go with the kit i also grabbed some Vallejo flat aluminium and i thought i would give the Humbrol Maskol fluid a run for the canopy and see if i can save myself some masking.
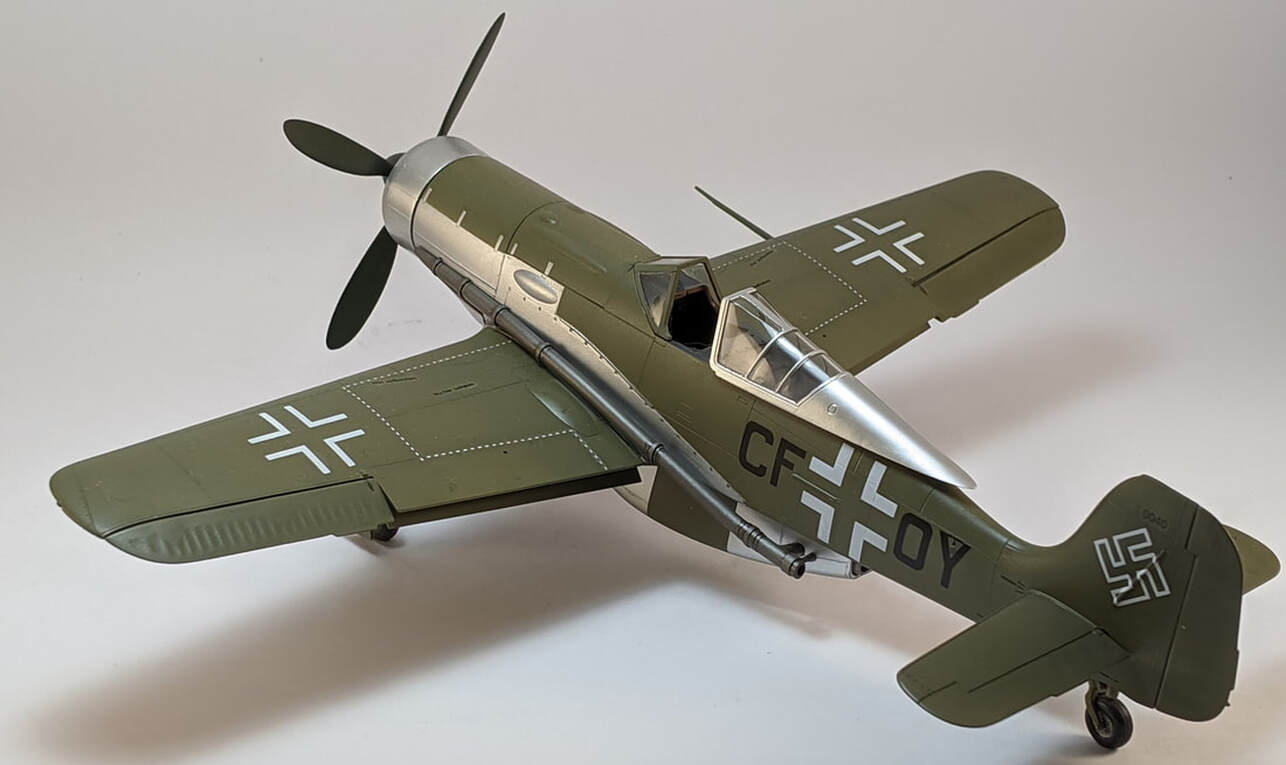
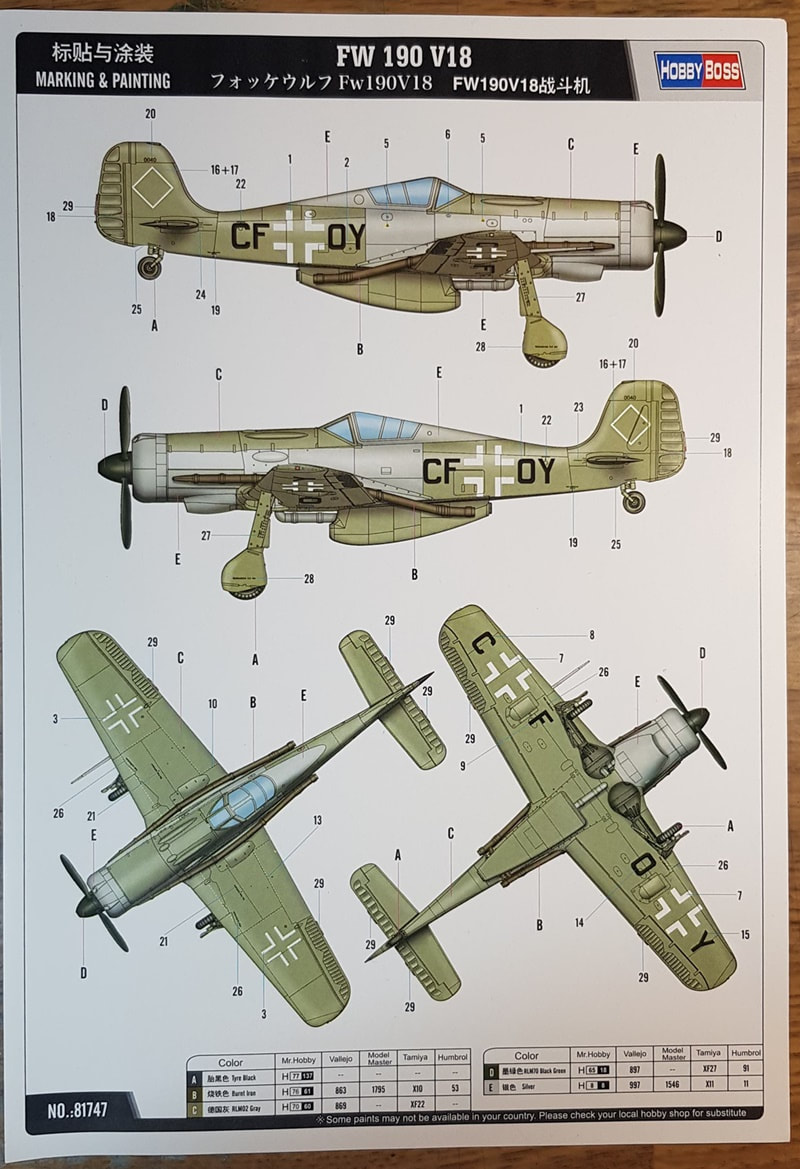
Paint guide. RLM02 and Aluminium.
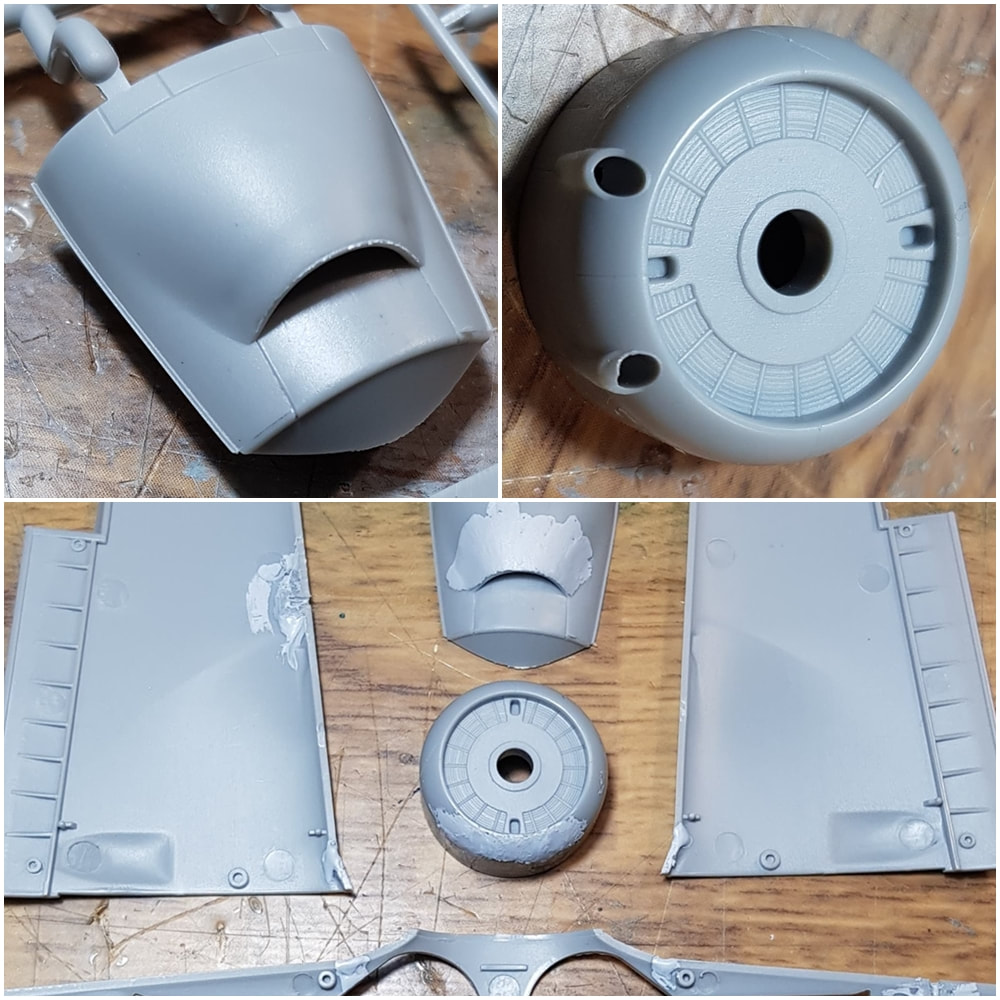
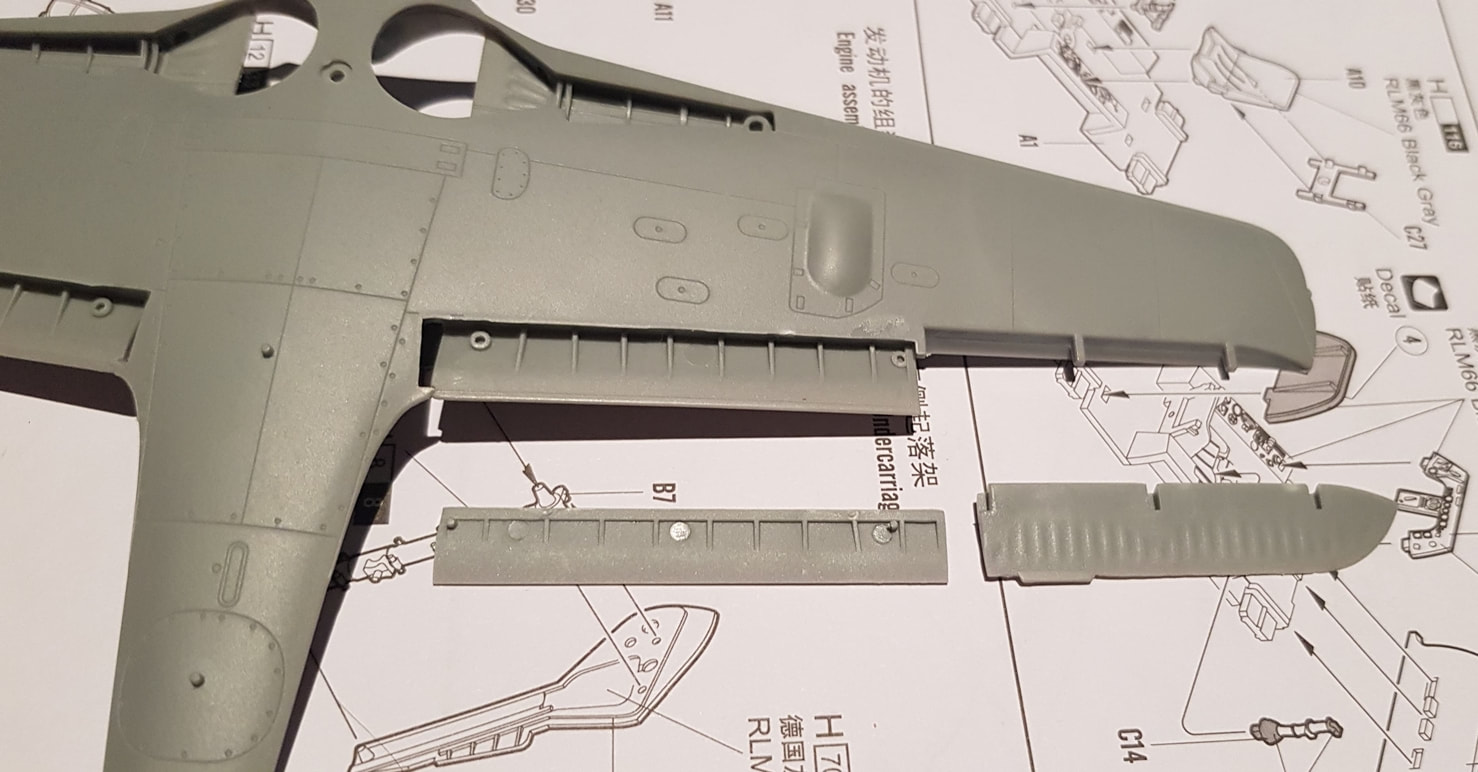
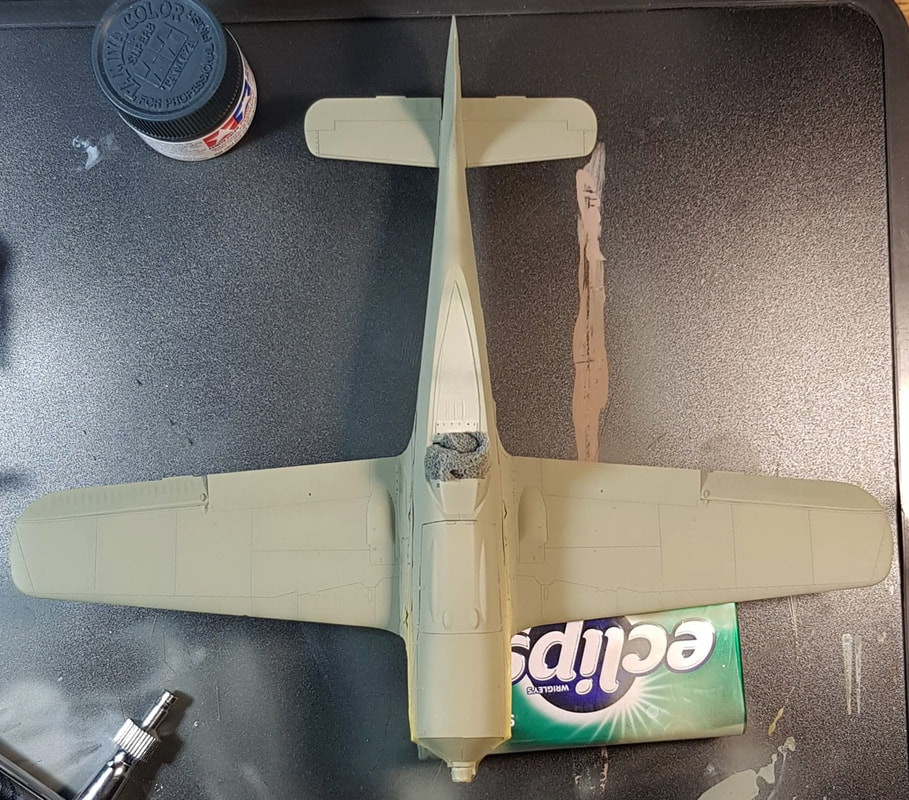
First steps were to putty up a few bits. The cowl has gun ports that need to be removed and filled, as do the wing gun ports, the lower nose scoop, belly scoop and wing joins. The lower nose section had a small sink section on either side and across the top of the mouth that needed work. I find my putty work is always a bit messy, but it's the sanding that counts in the end so i live with it. I accidentally puttied the antenna wing hole so had to dig it out. Doh.
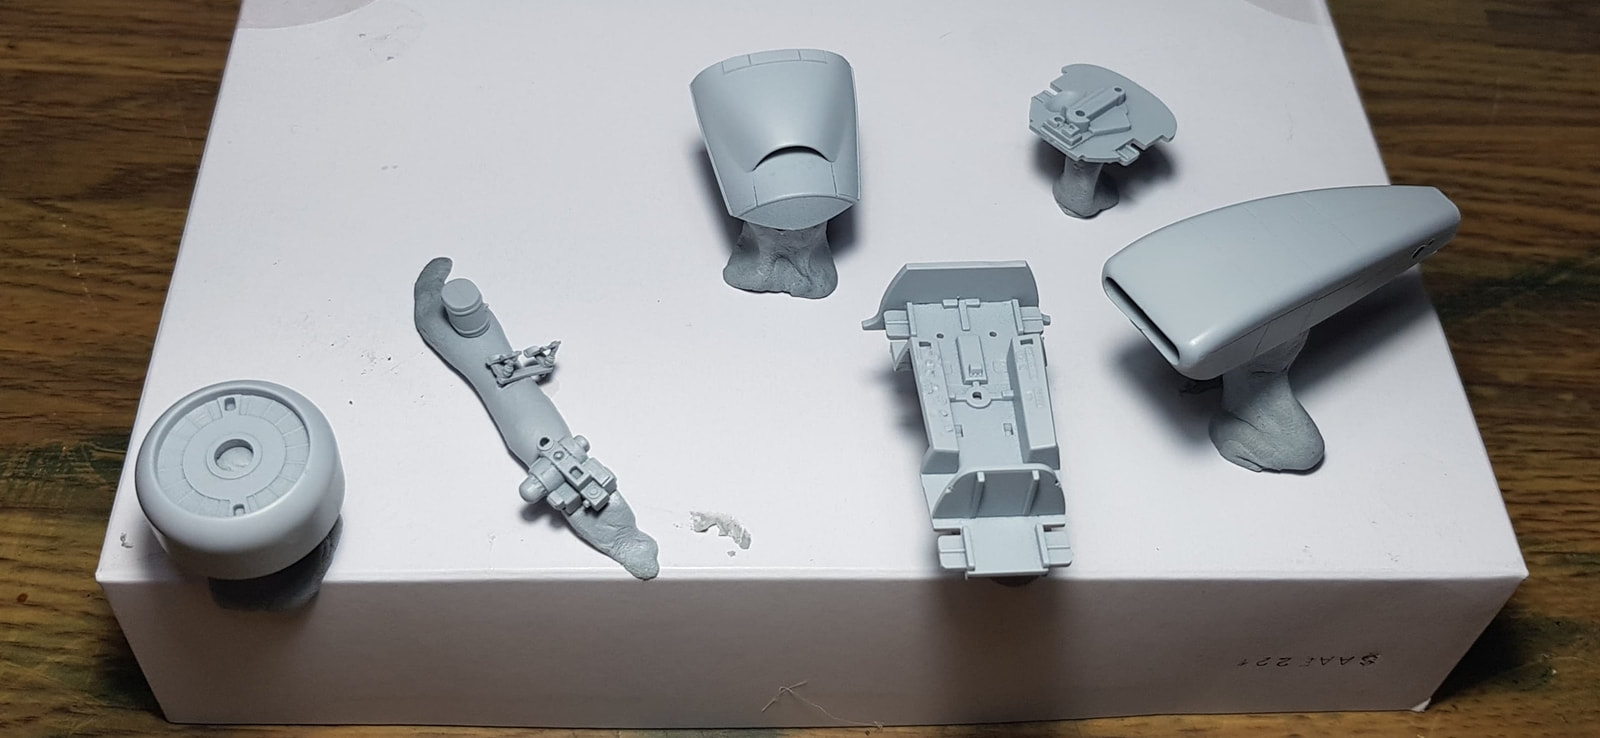
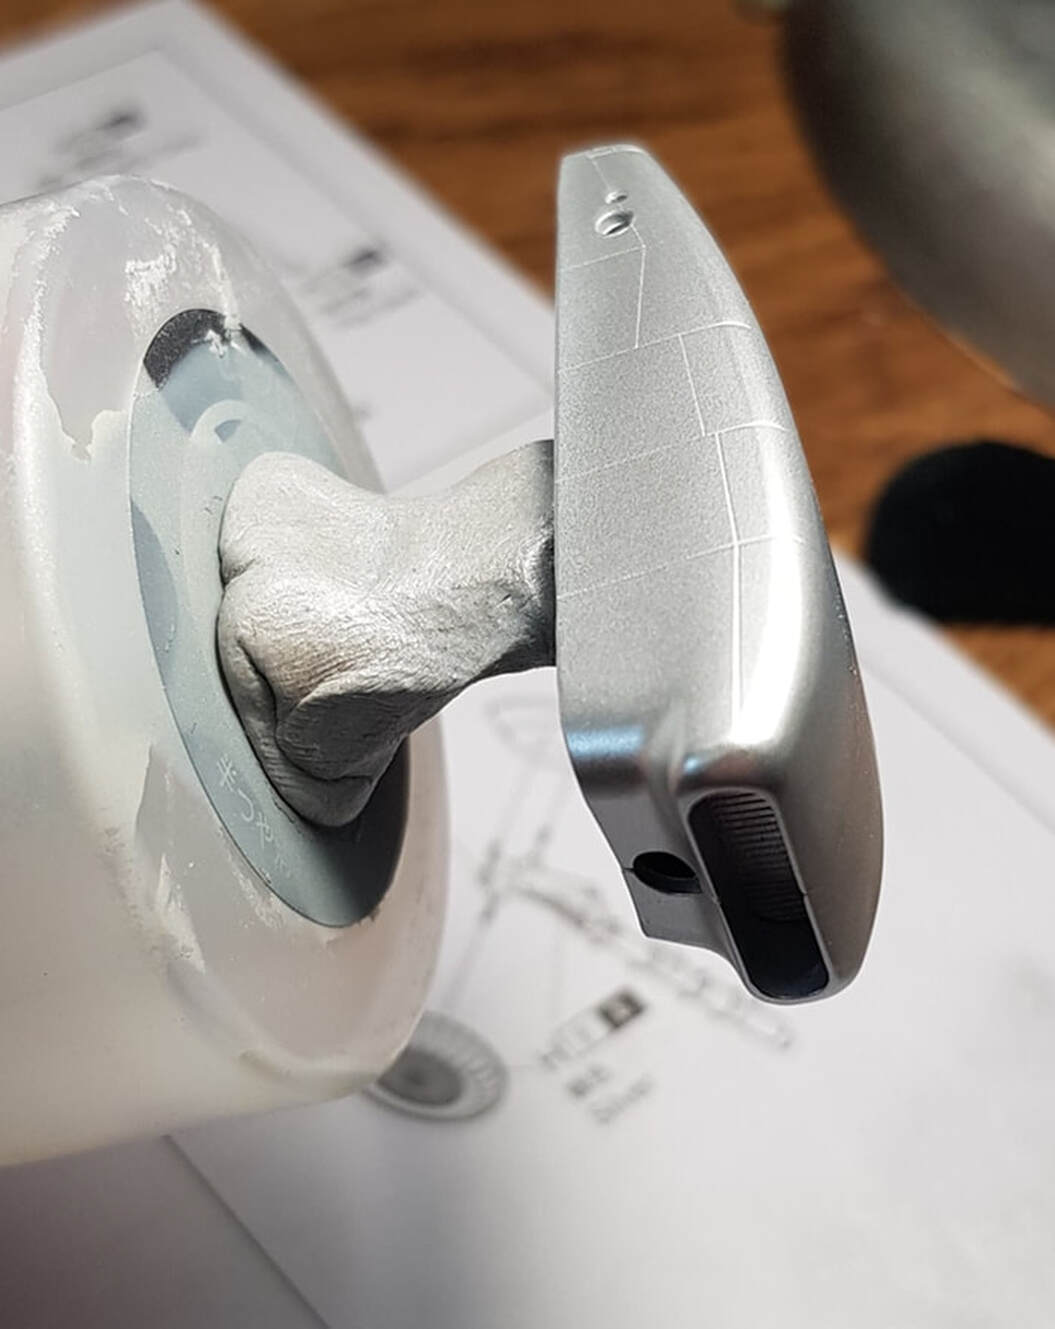
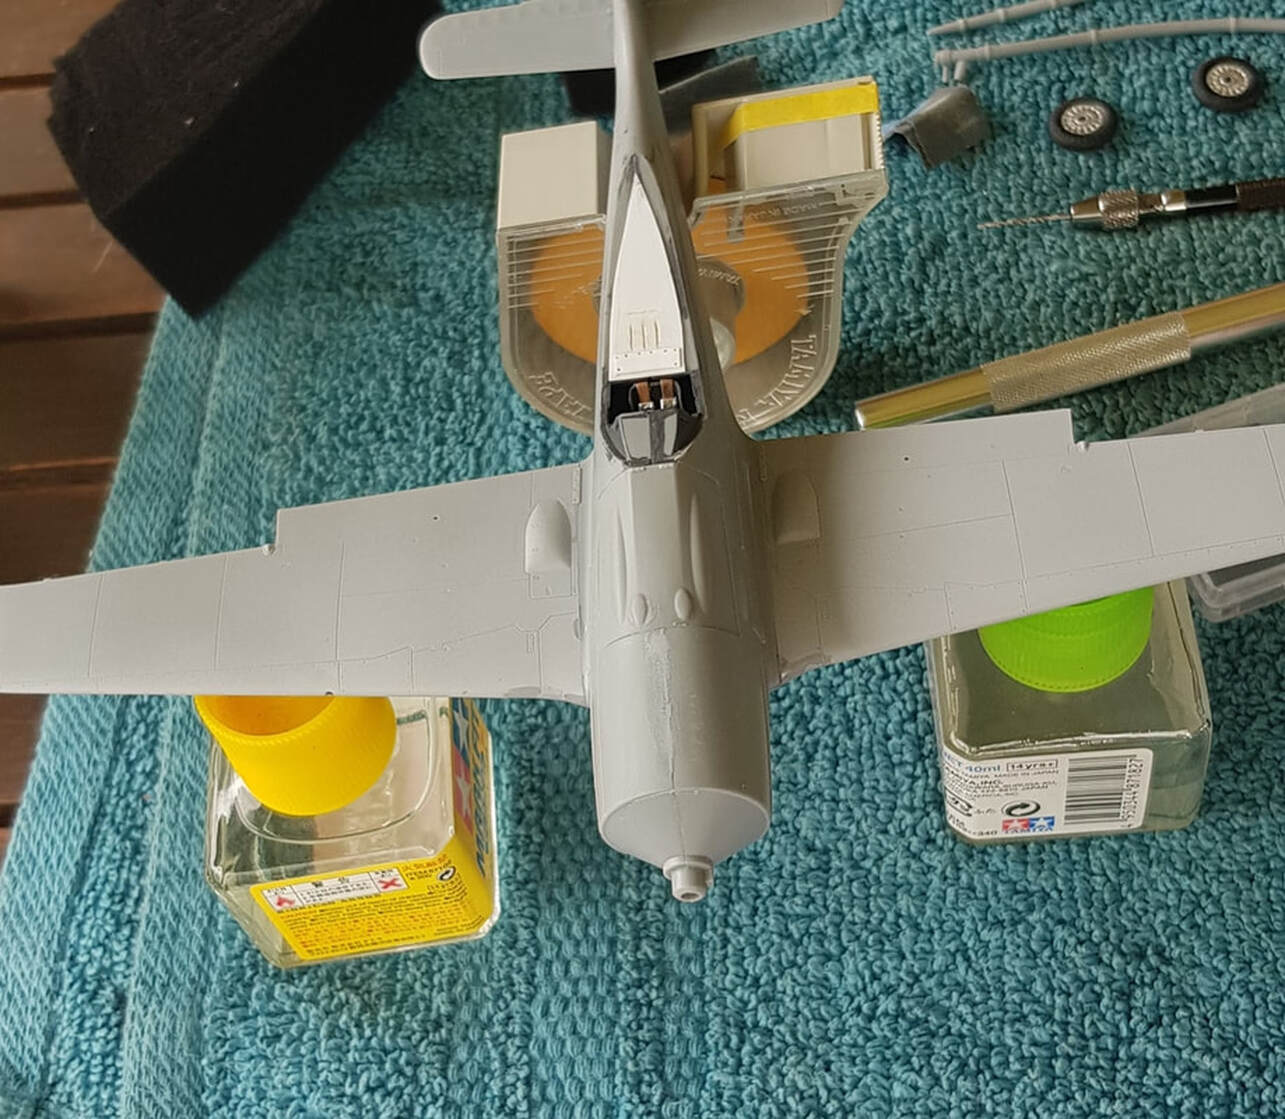
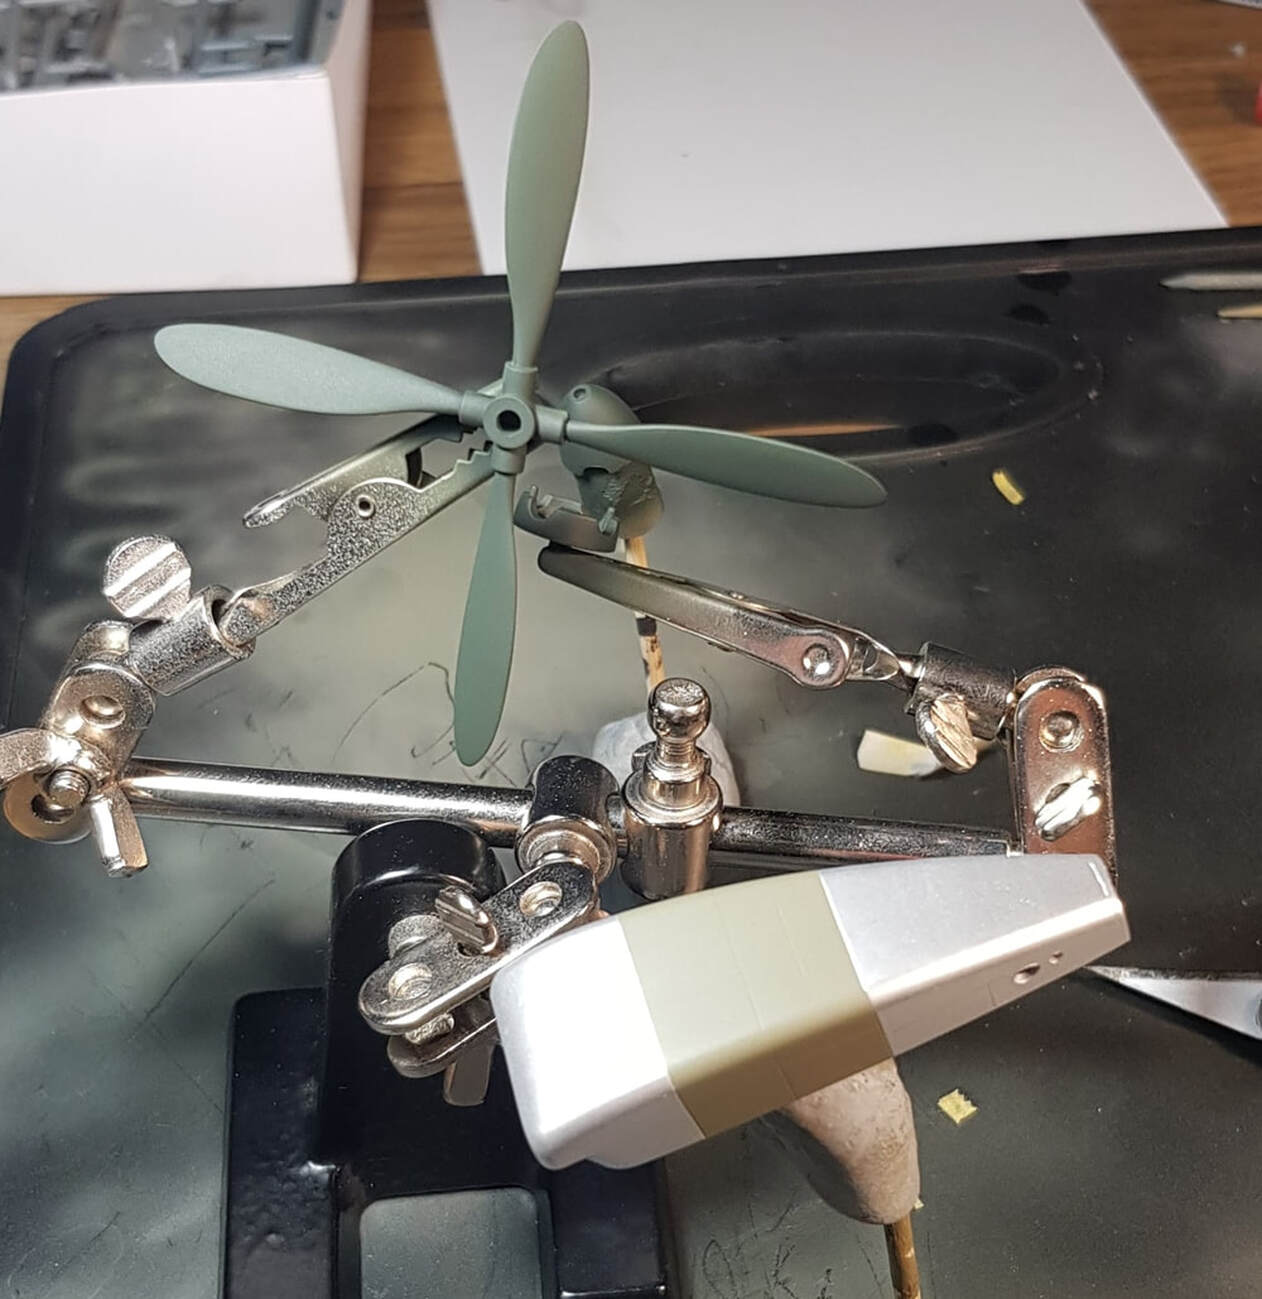
Belly scoop sitting on the bottom of the wing, couldn't resist checking out the cool factor. Parts primed including some pieces that will bolt to the turbo, pedals, cockpit and firewall.
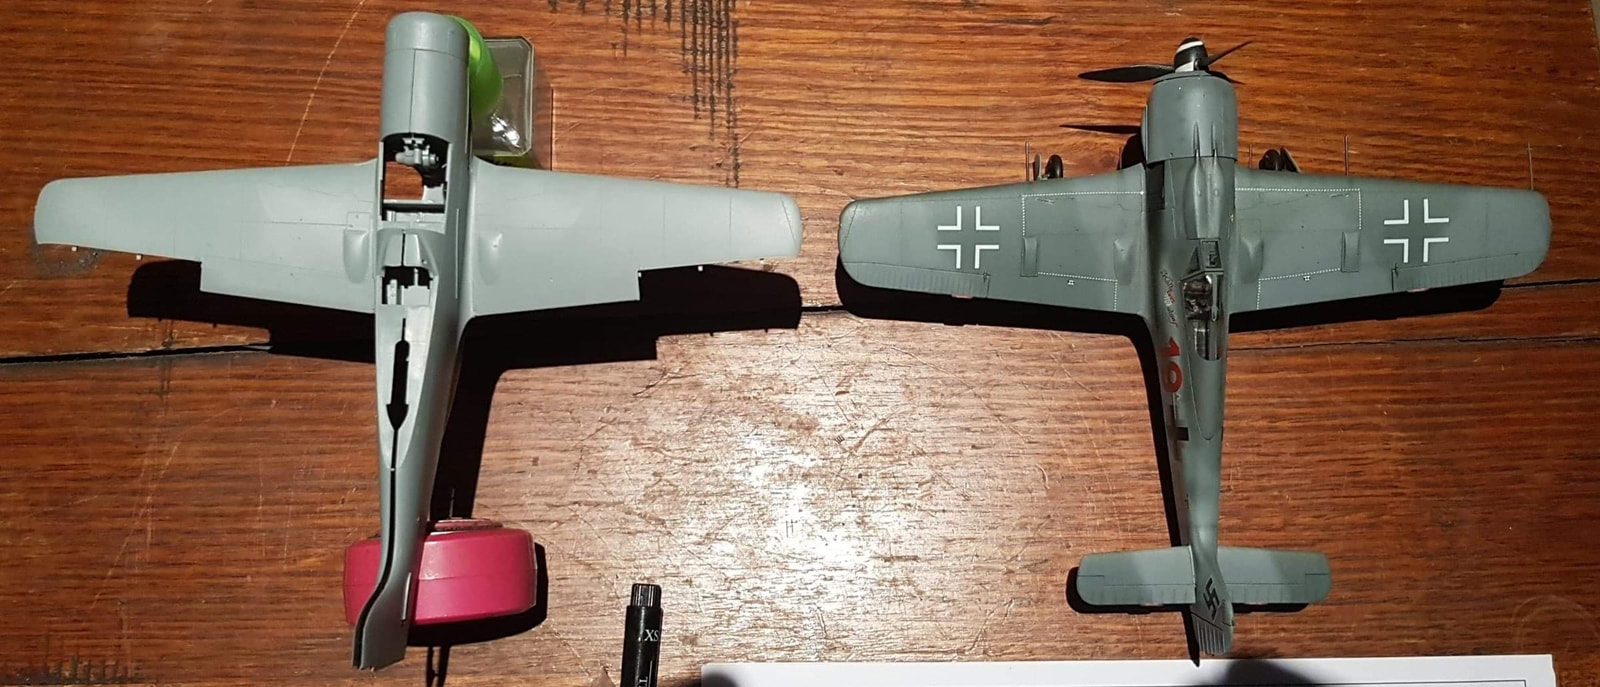
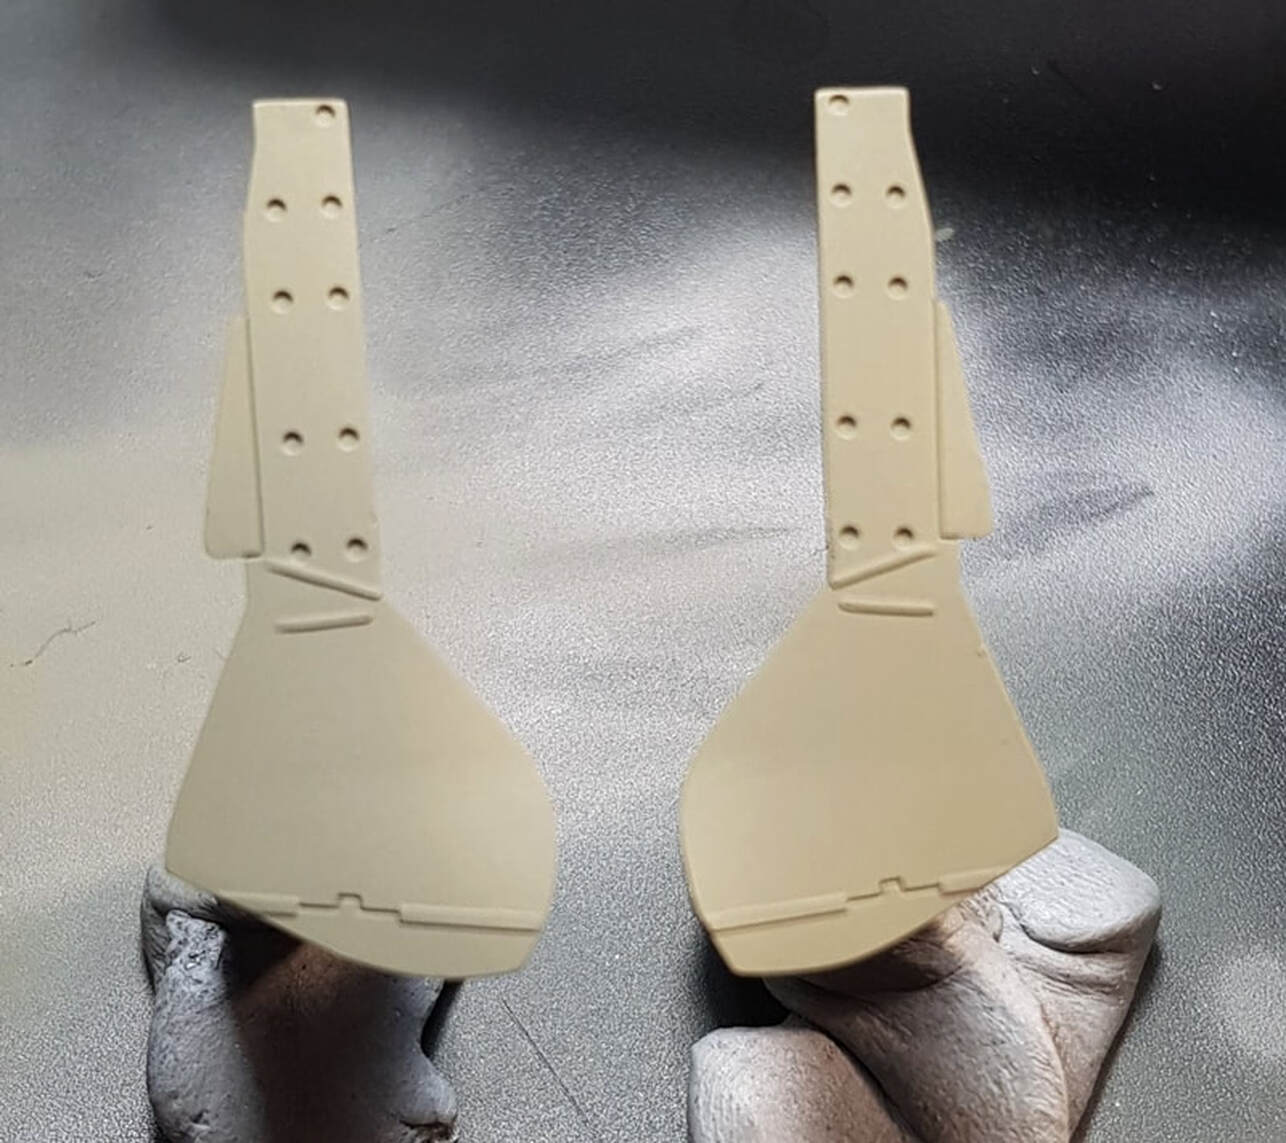
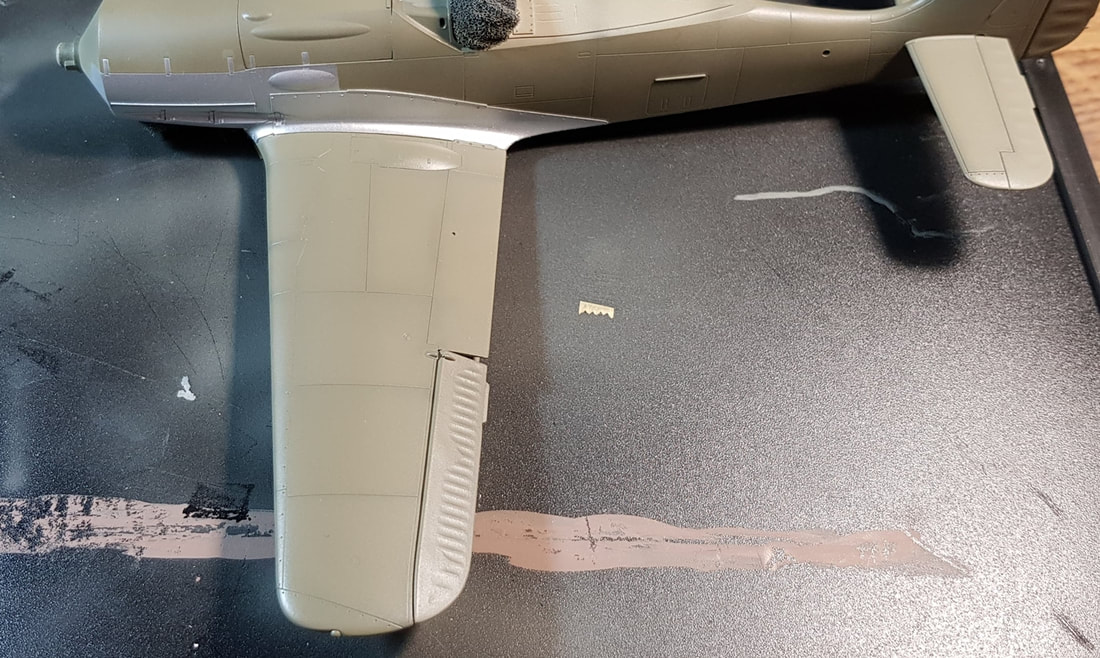
Gun ports will need another light pass of putty and a comparison of the V18 to an A8
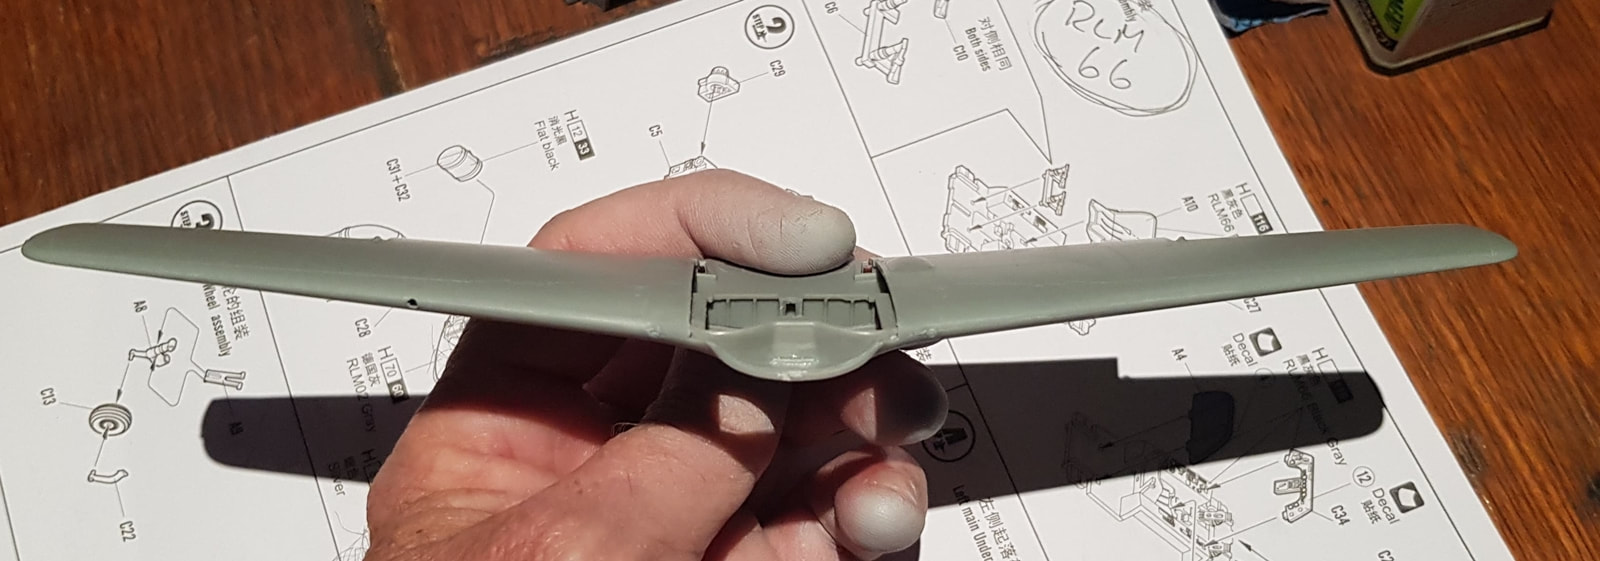

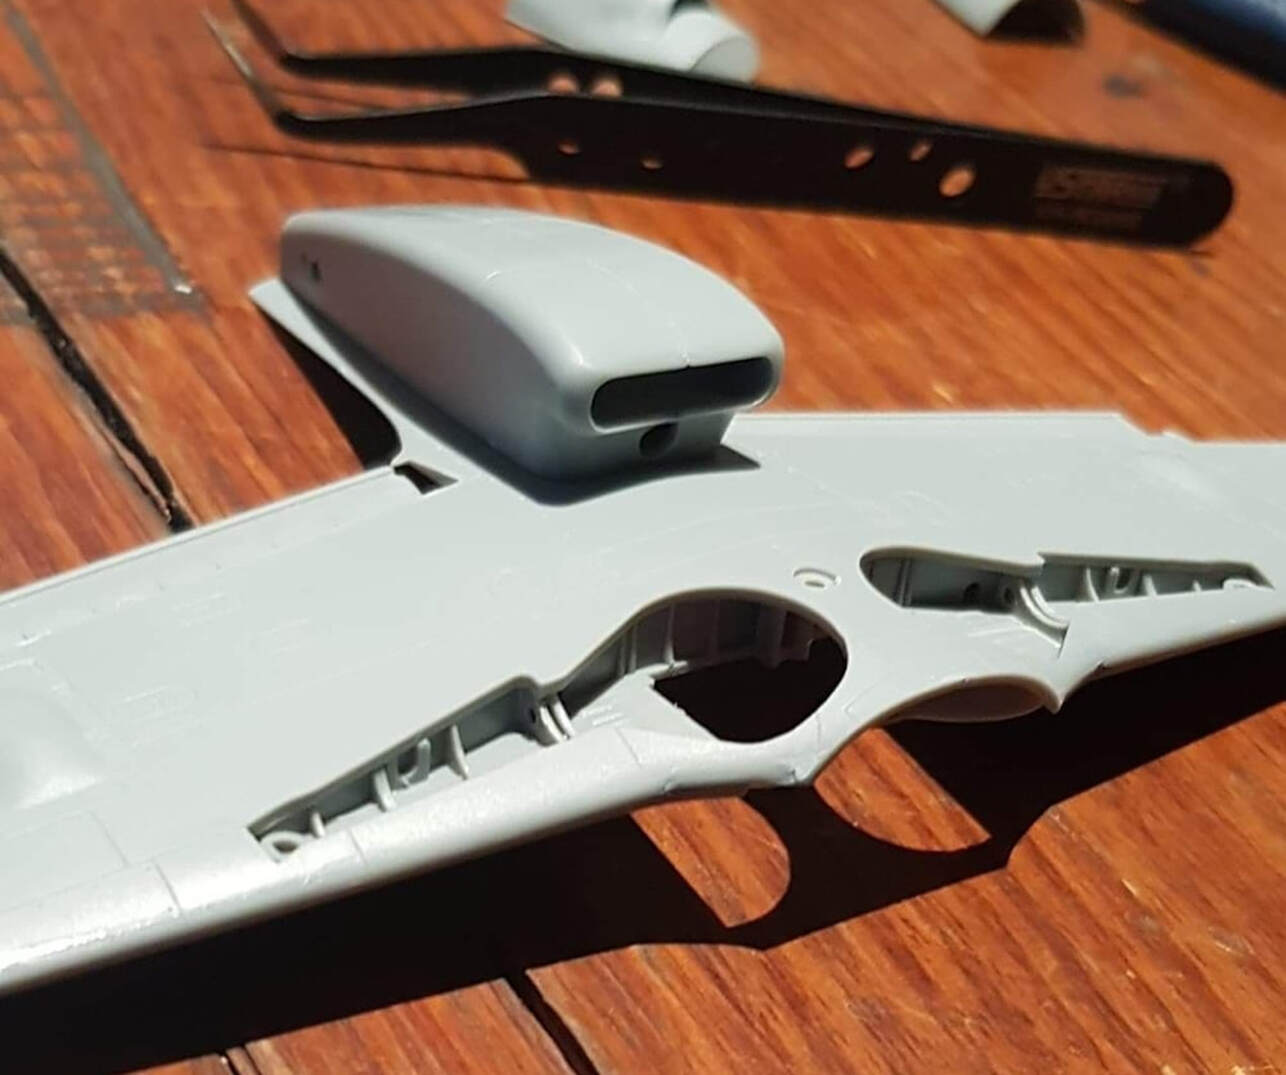
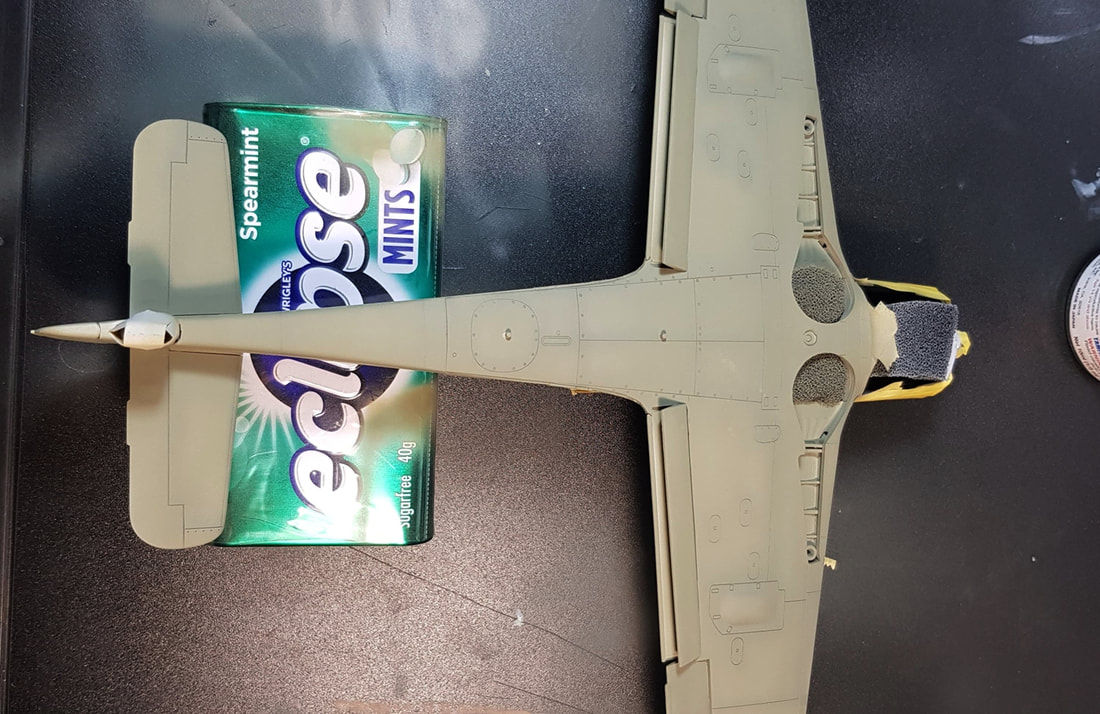
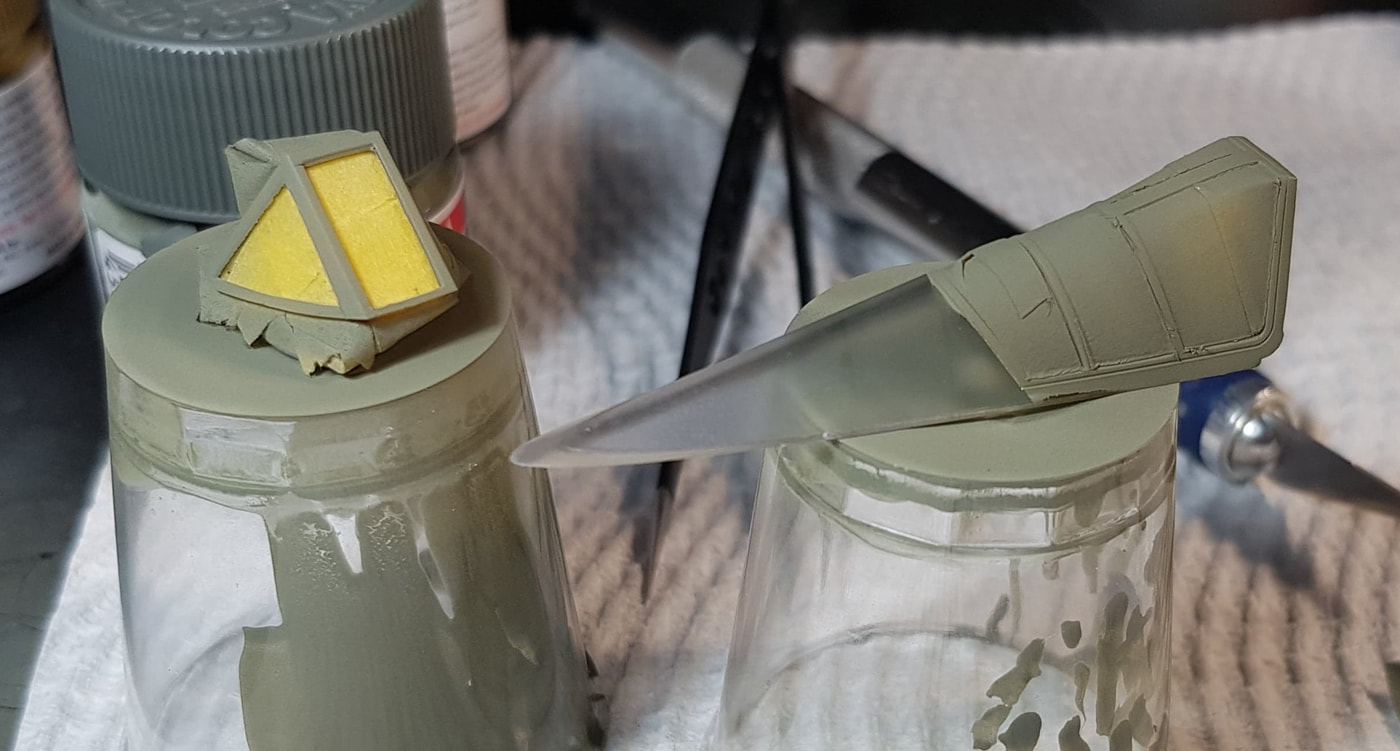
Flaps are seperate pieces in this kit so i don't have to muck around as i did with the A8 to add detail. A little bit of cleaning up needed on the inners as they are quite a tight fit.
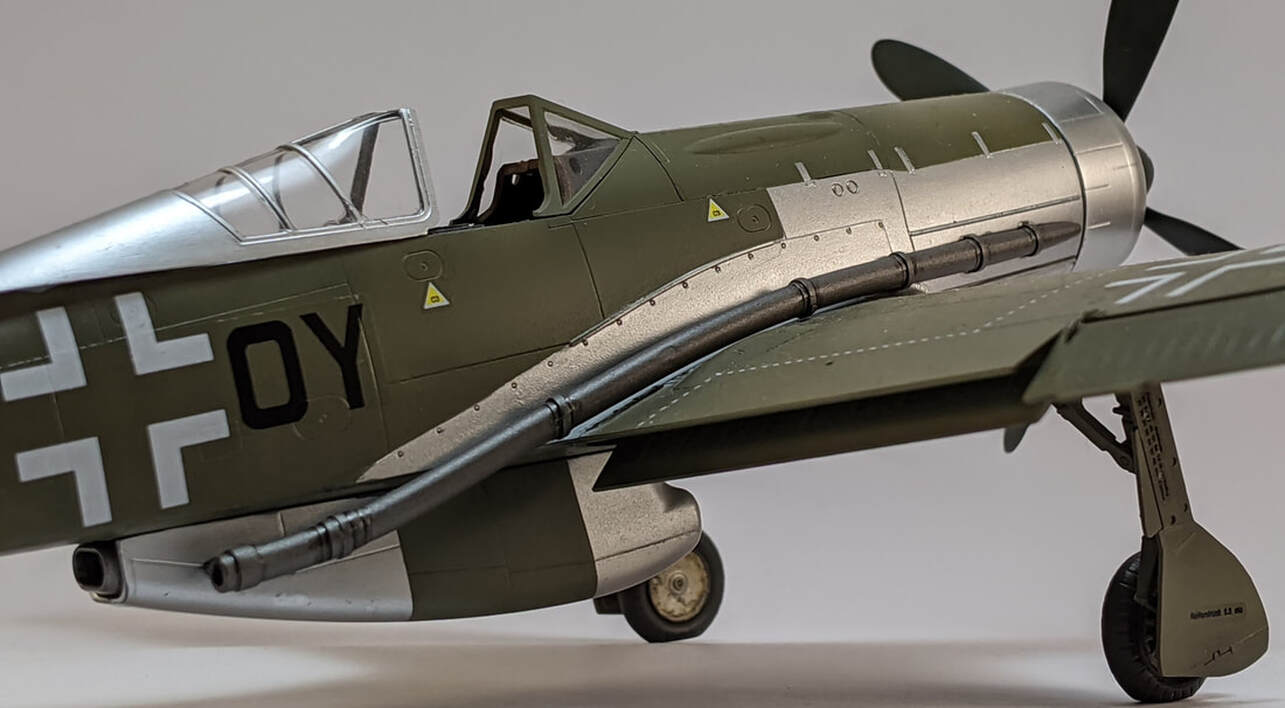
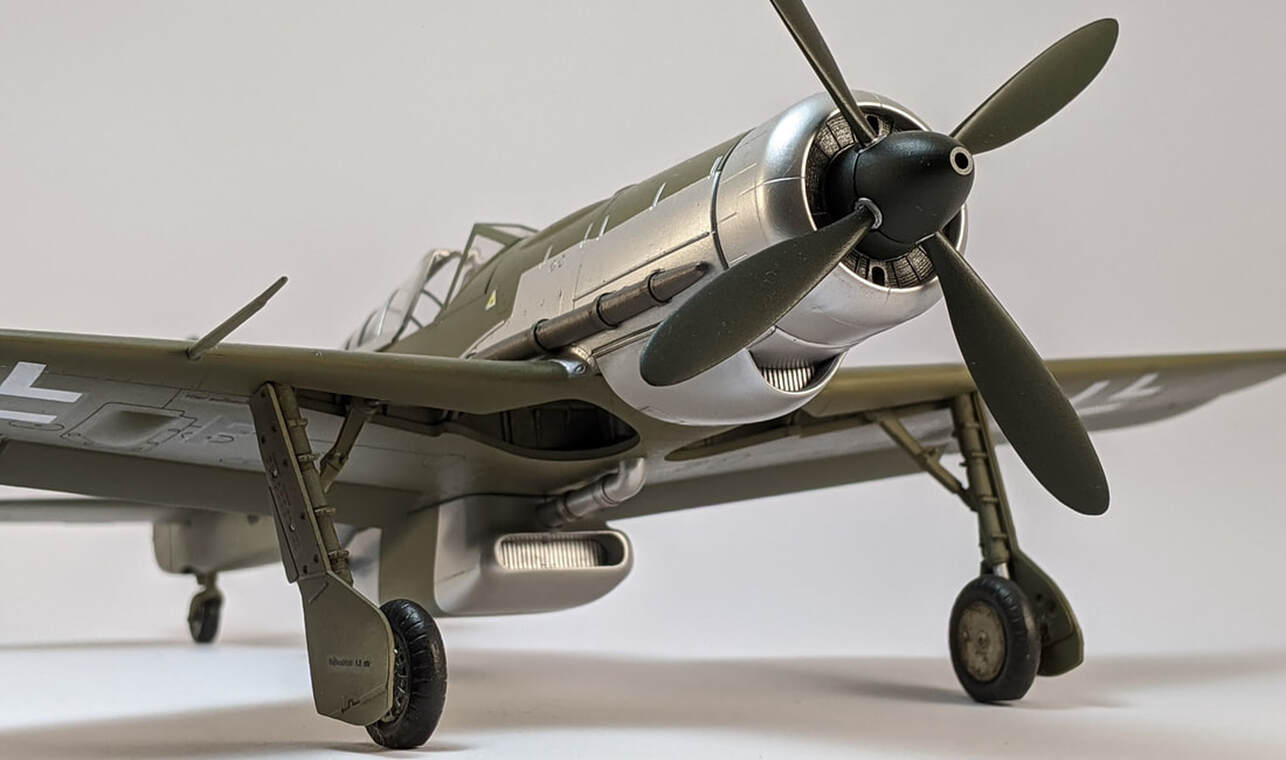
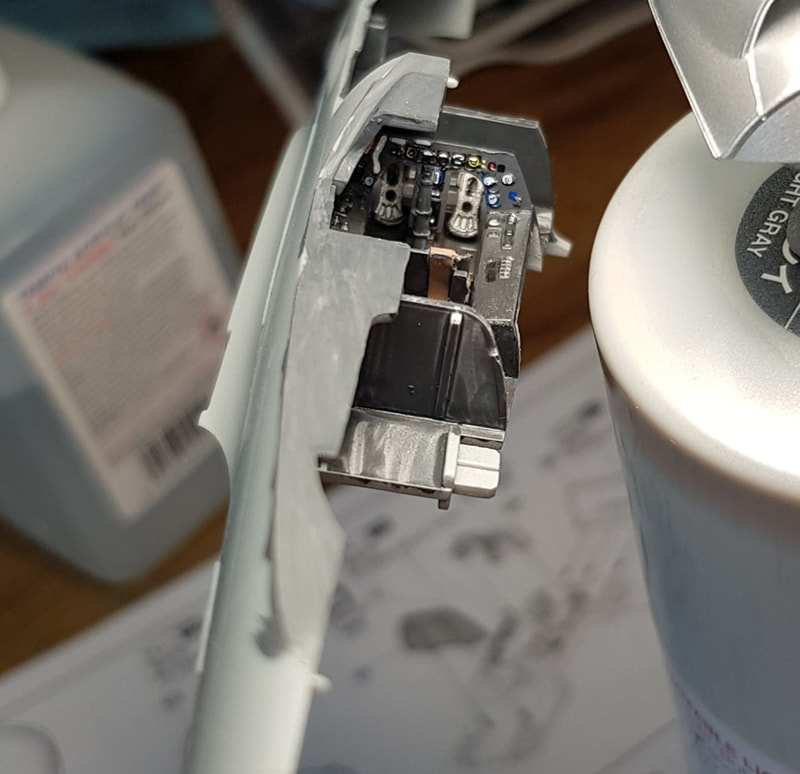
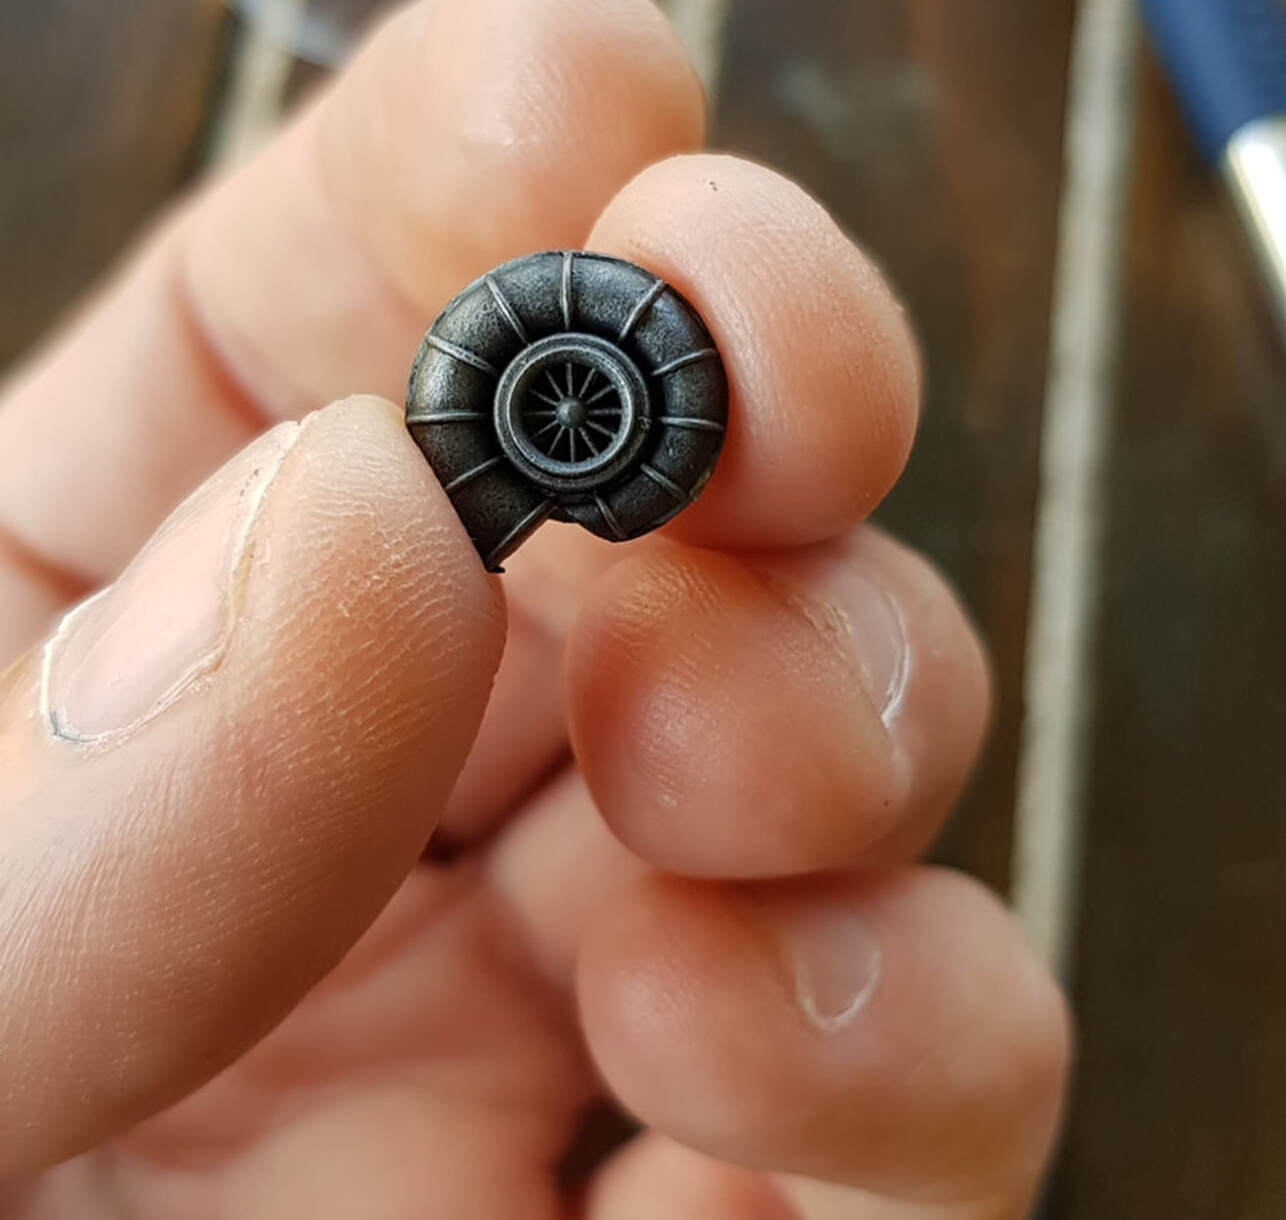
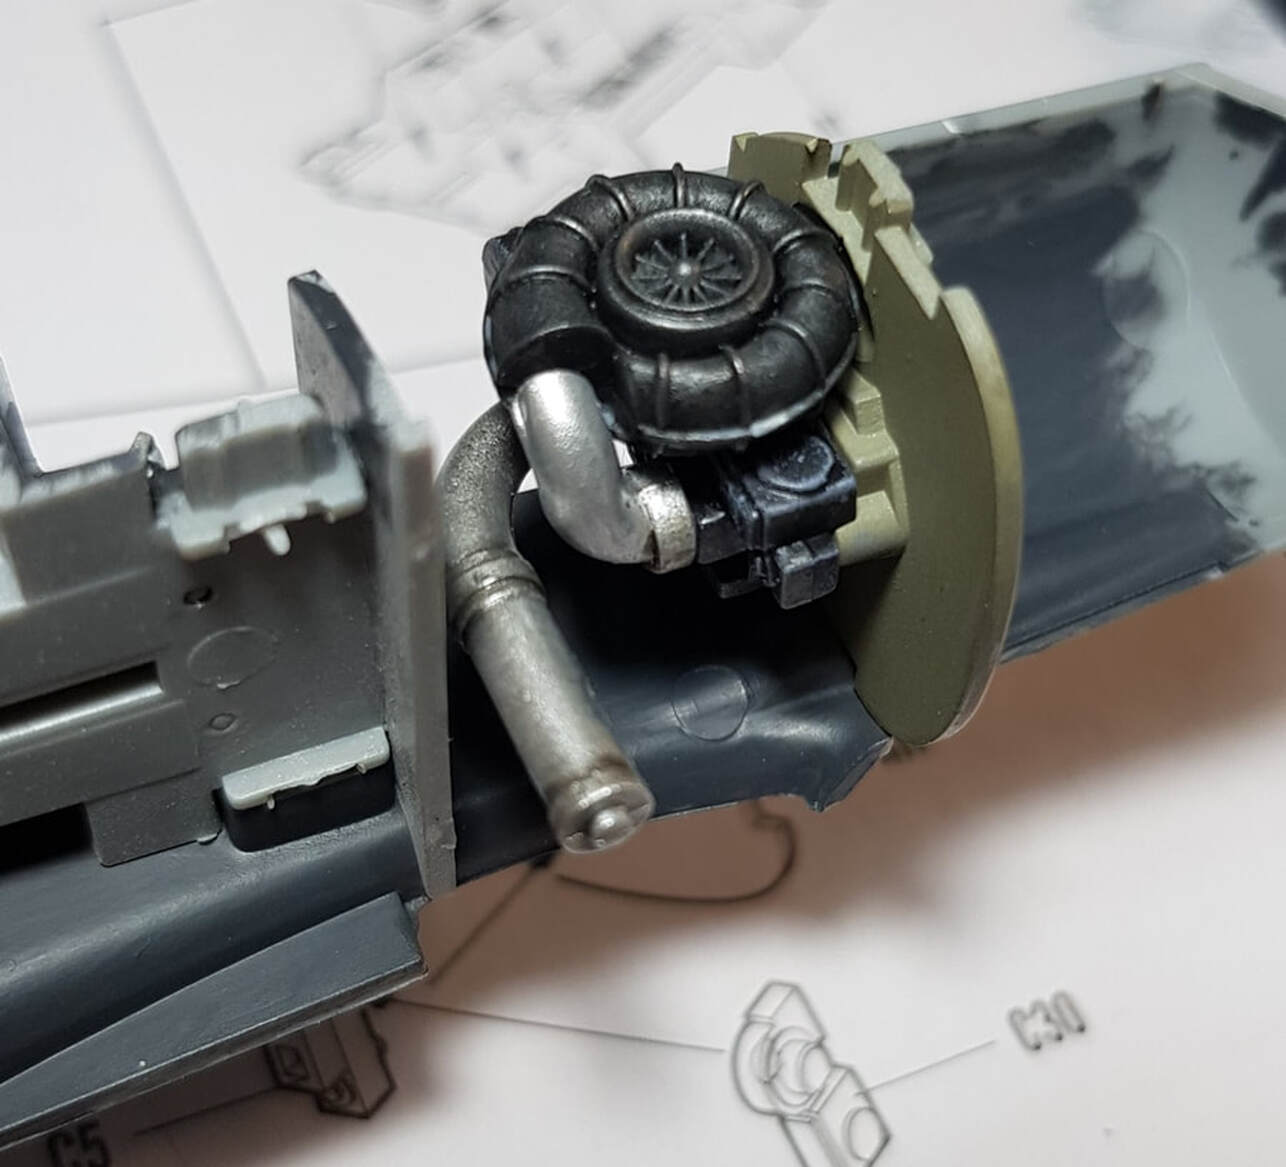
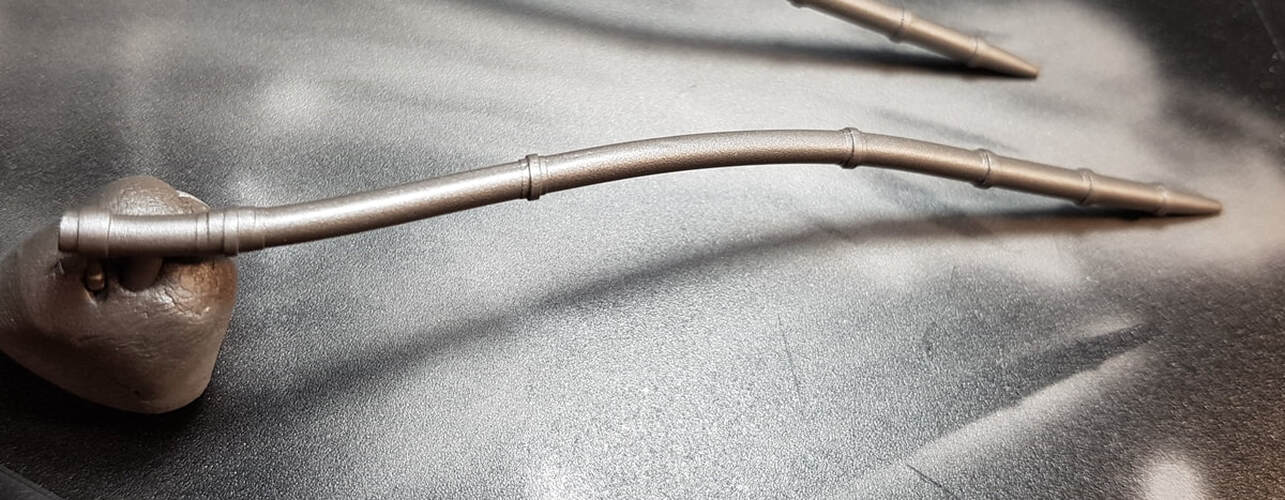
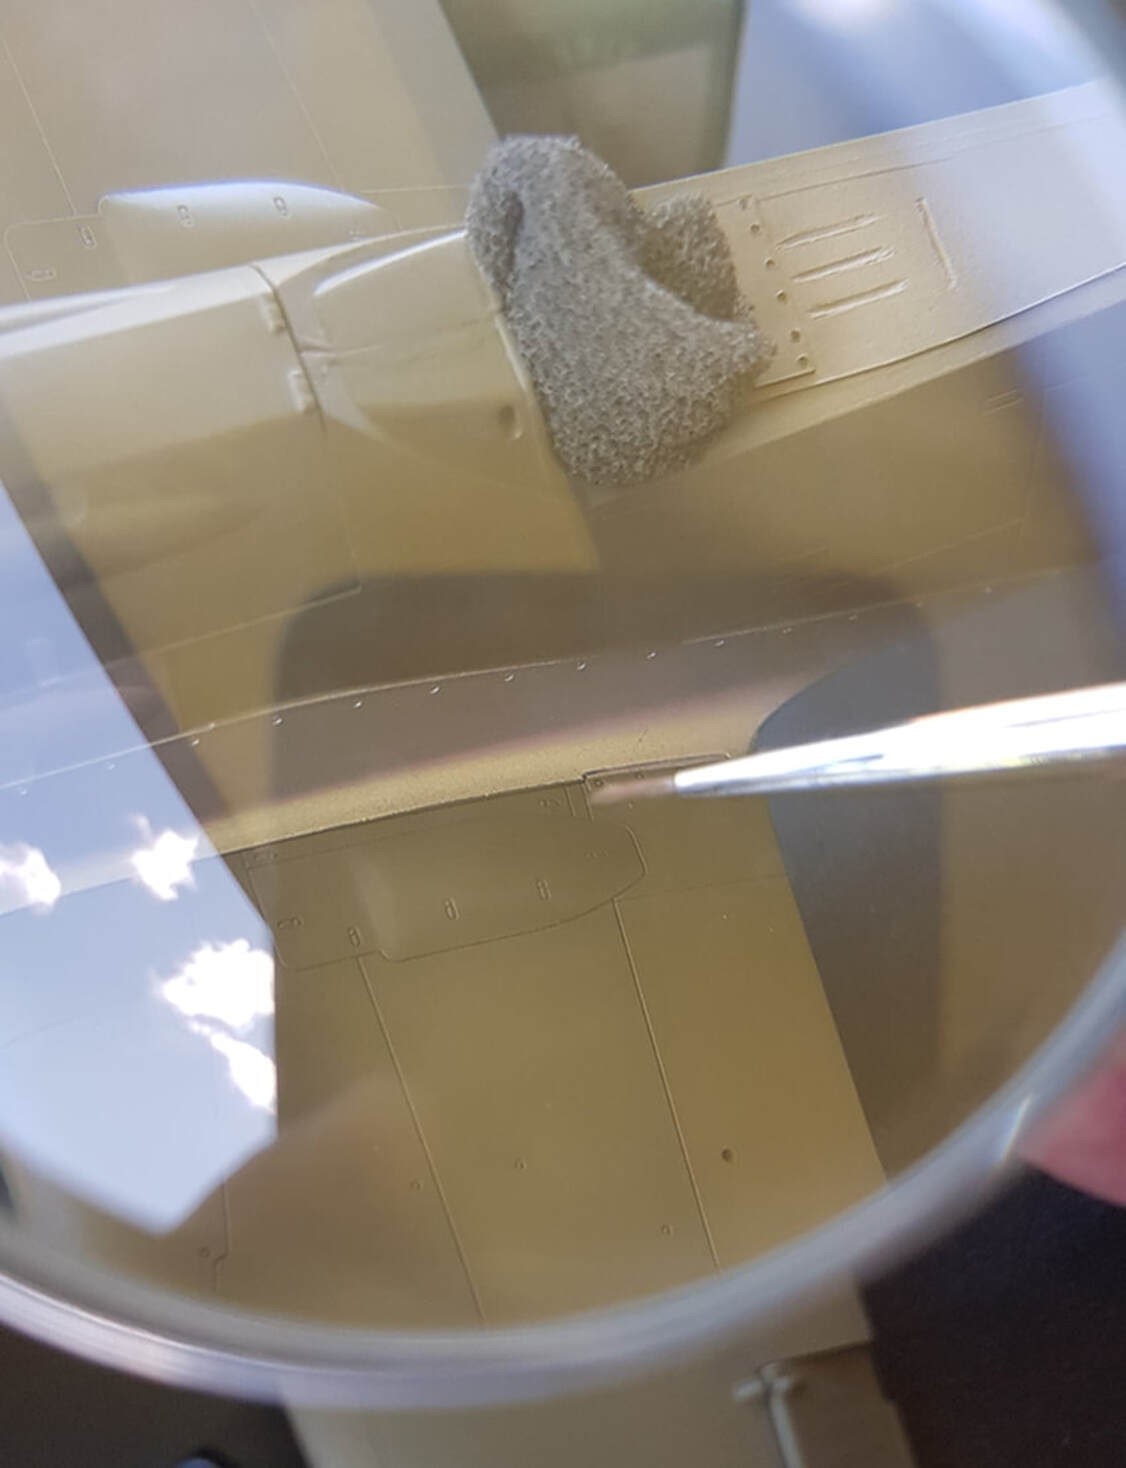
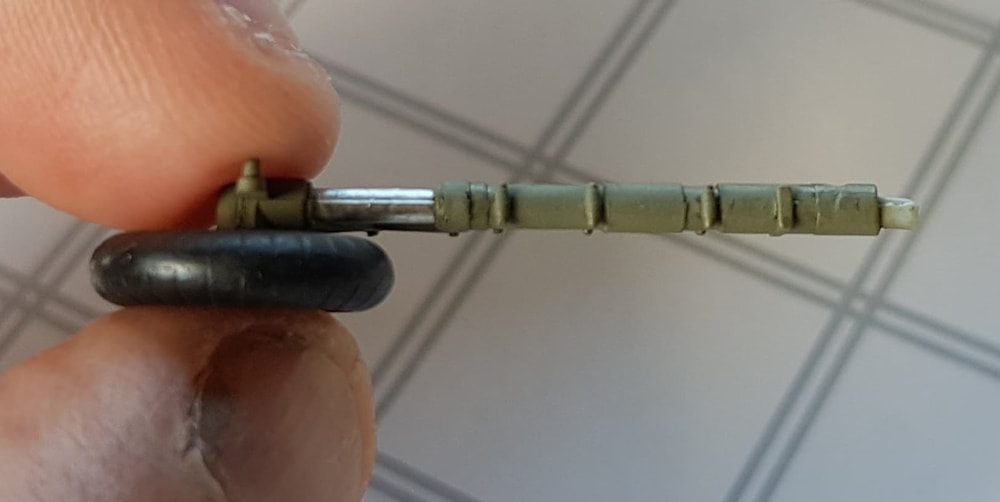
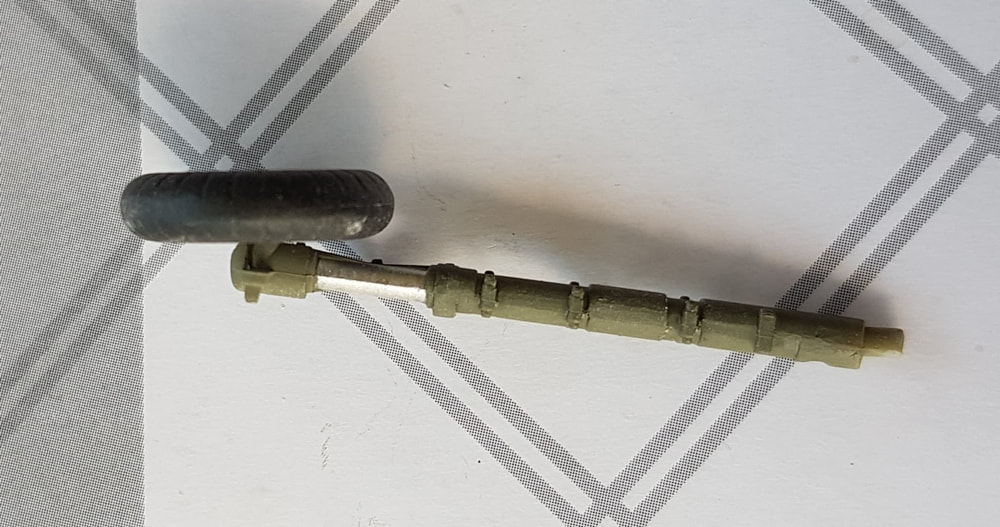
I made a set of seat belts, in the same style as the ones i made for the FW190A8 , the cockpit looked too bare otherwise,. The instrument decals wouldn't line up with the moulded gauges so i simply centred them, next time i will scrape the mould flat. The turbo is a cool little piece of gear, i painted it rubber black and then dry brushed all over with gunmetal and silver. The firewall is a mix of tamiyas XF22 and XF49 at a 1:1 ratio to make RLM02. Turbo piping is the Vallejo aluminium.

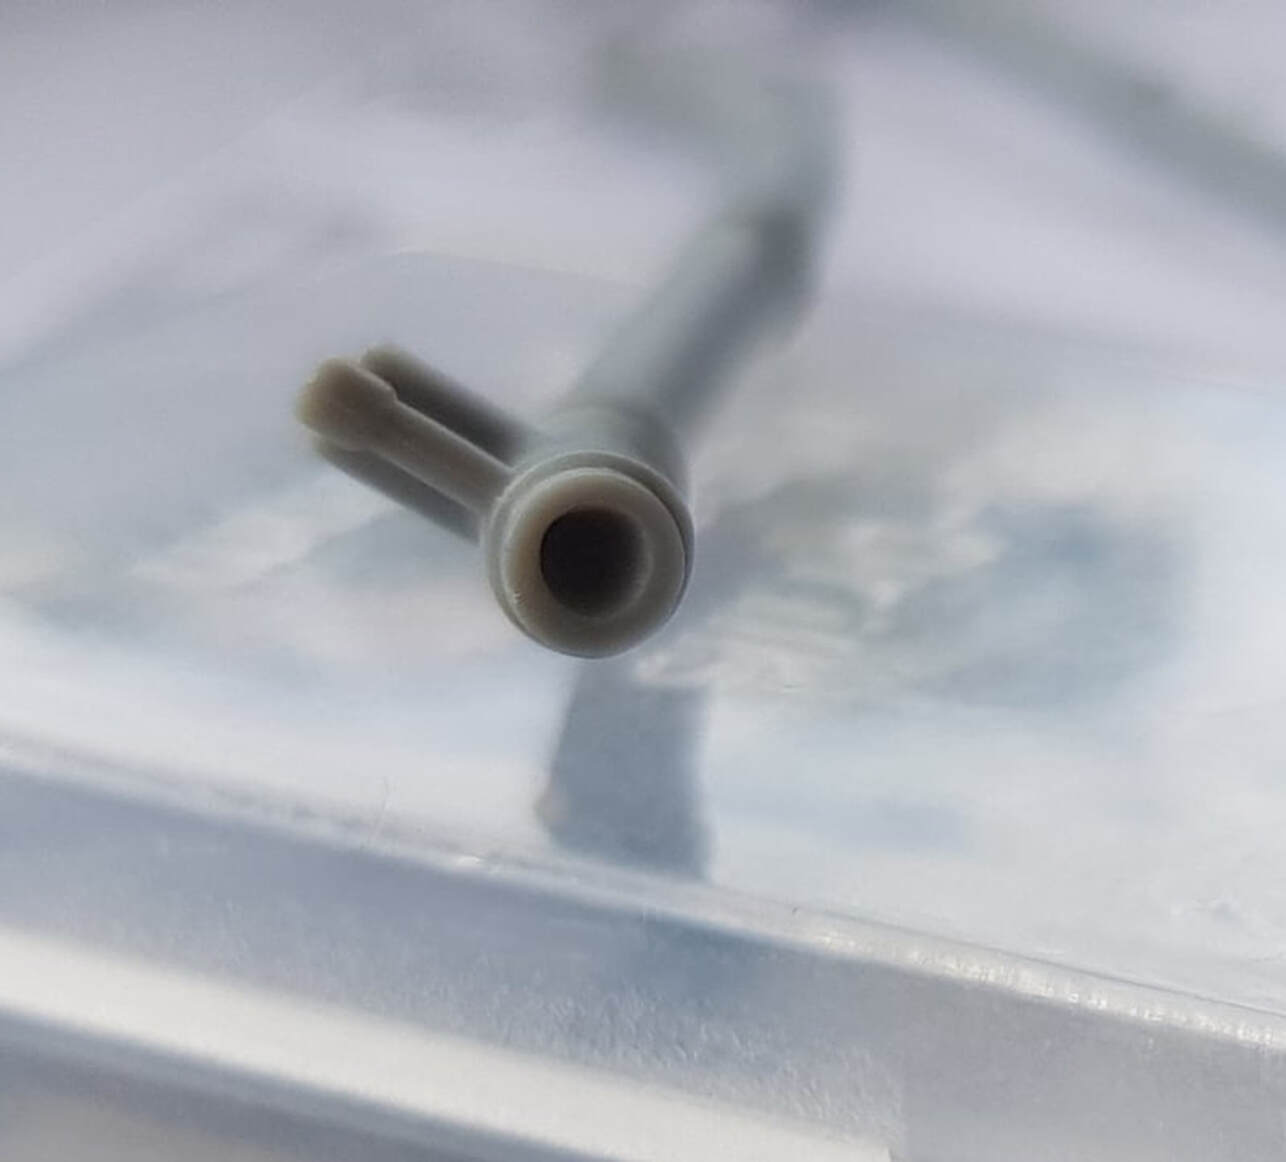
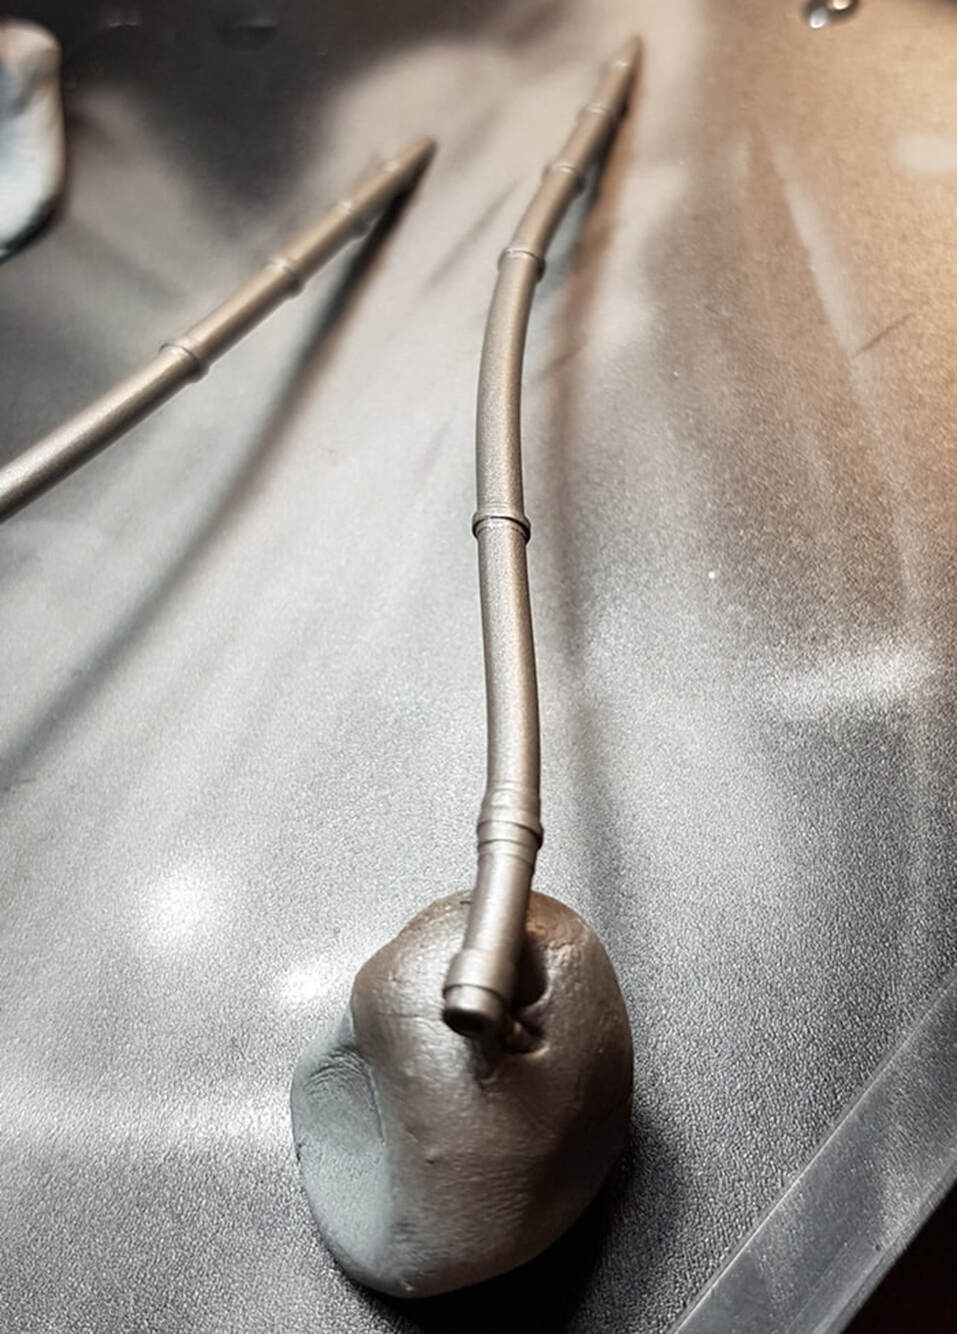
Exhaust tubing needs drilling out which is easy enough, you just have to make sure you center the hole. I always use the smallest drill bit first to get started then work up to the needed size. The colour mix is a home brew of the Vallejo aluminium and Tamiya gunmetal with a drop of grey and black.
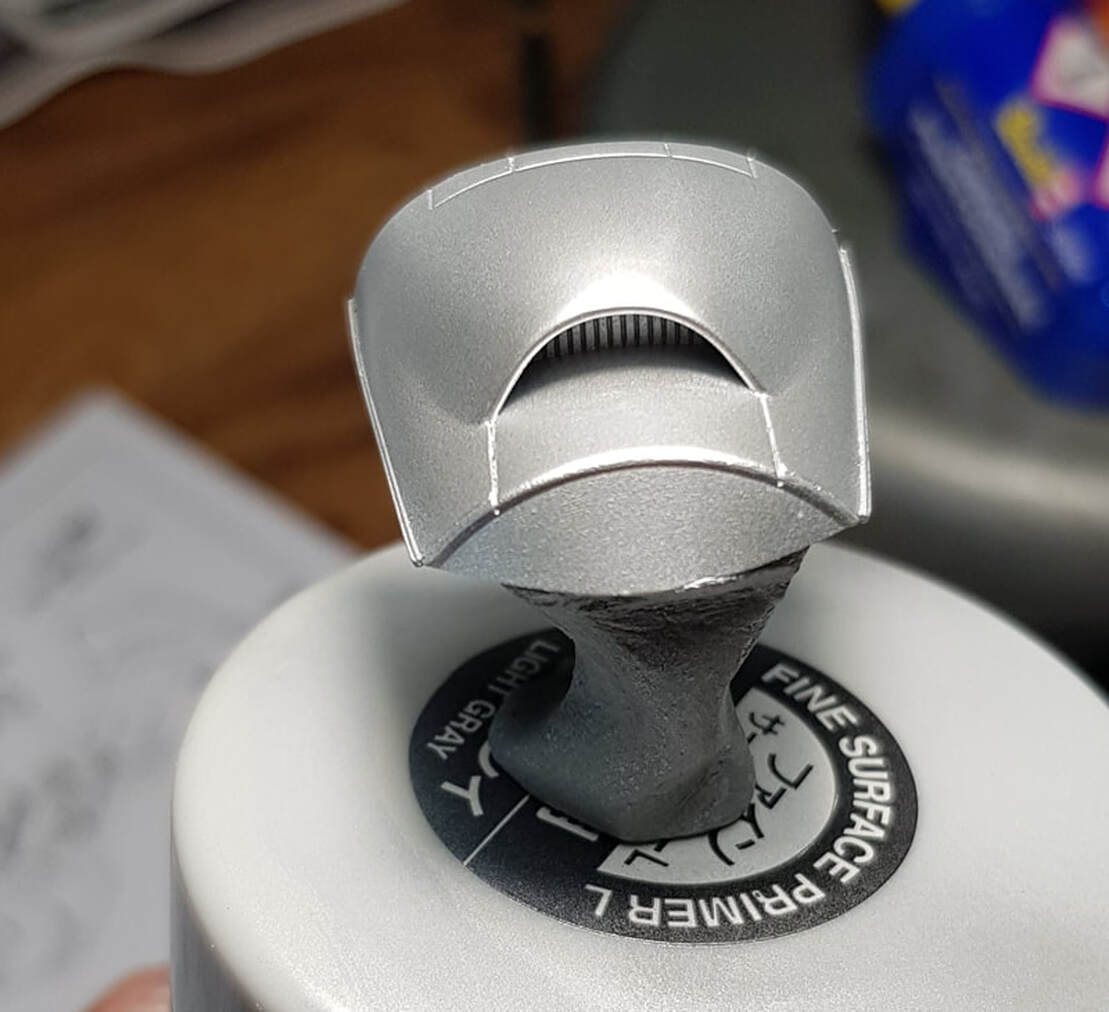
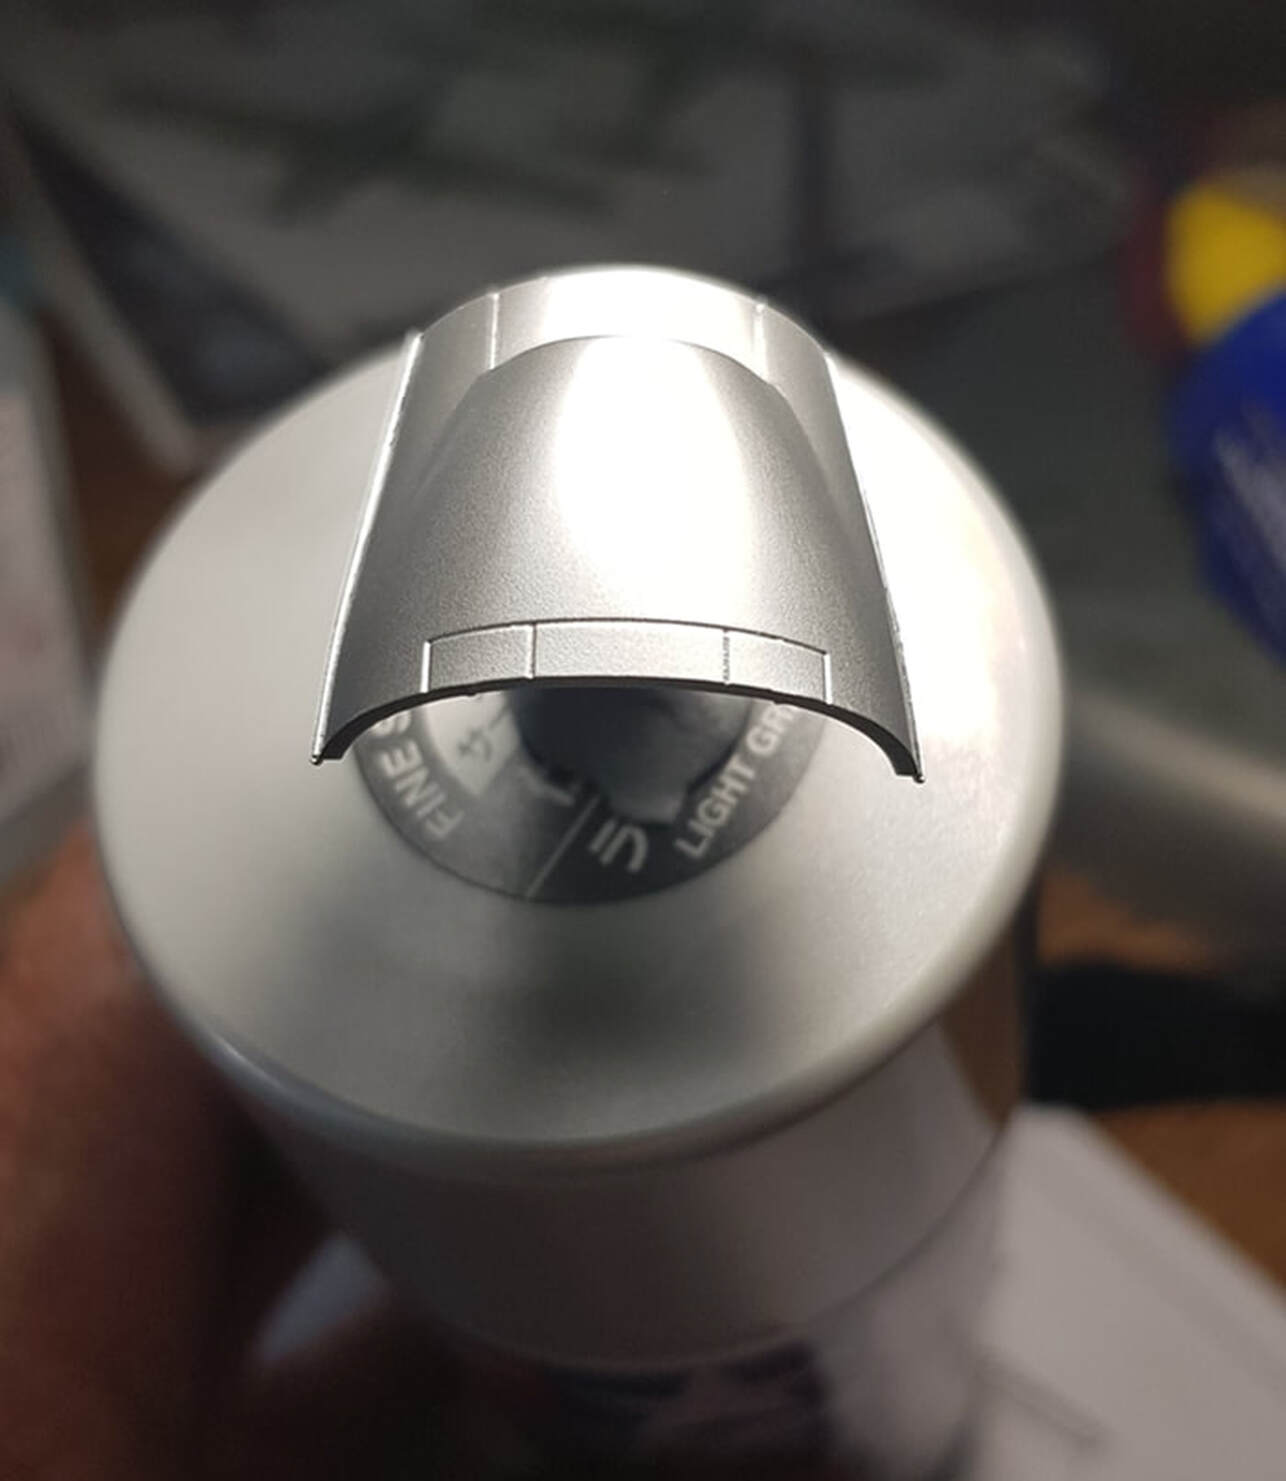
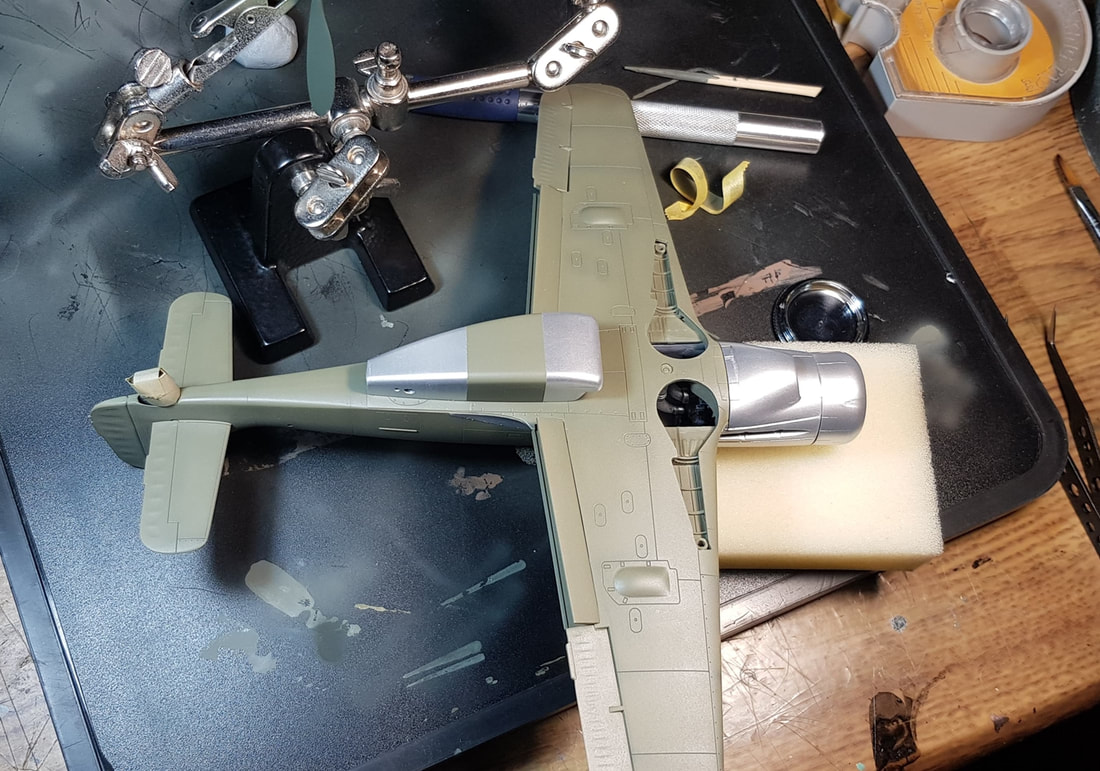
The Vallejo aluminium came up neat and sprayed awesome straight out of the bottle, which was a nice surprise. This is two coats so far, i need to give the belly scoop another sand and putty at the front and the centreline again and then recoat it. The nose cowl scoop sink issue that i had puttied came up sweet.
Filled the seam along the nose and primed it with Tamiya spray can primer, i find it easier and quicker to use the cans for priming, plus i don't have to clean out an airbrush. You will have to make up the piece behind the seat out of card or steal it from your left overs box to cover a large hole as the kit does not supply a part. It ain't great, but it'll do.
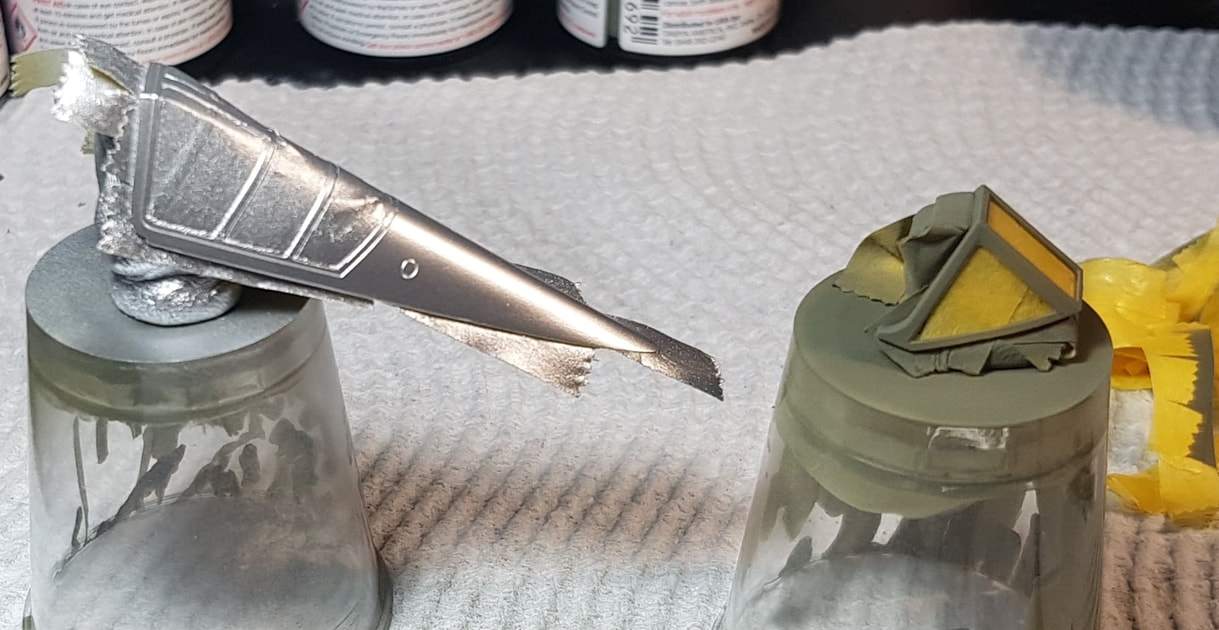
My pre shading work still leaves a lot to be desired, but, it's all in how you cover it so i don't worry how terrible it looks at this stage. I'm looking into getting a .20 airbrush for pre and post shading work and finer details. By this stage i had also painted the Vallejo aluminum sections, three coats in all and was in the process of masking it off prior to painting
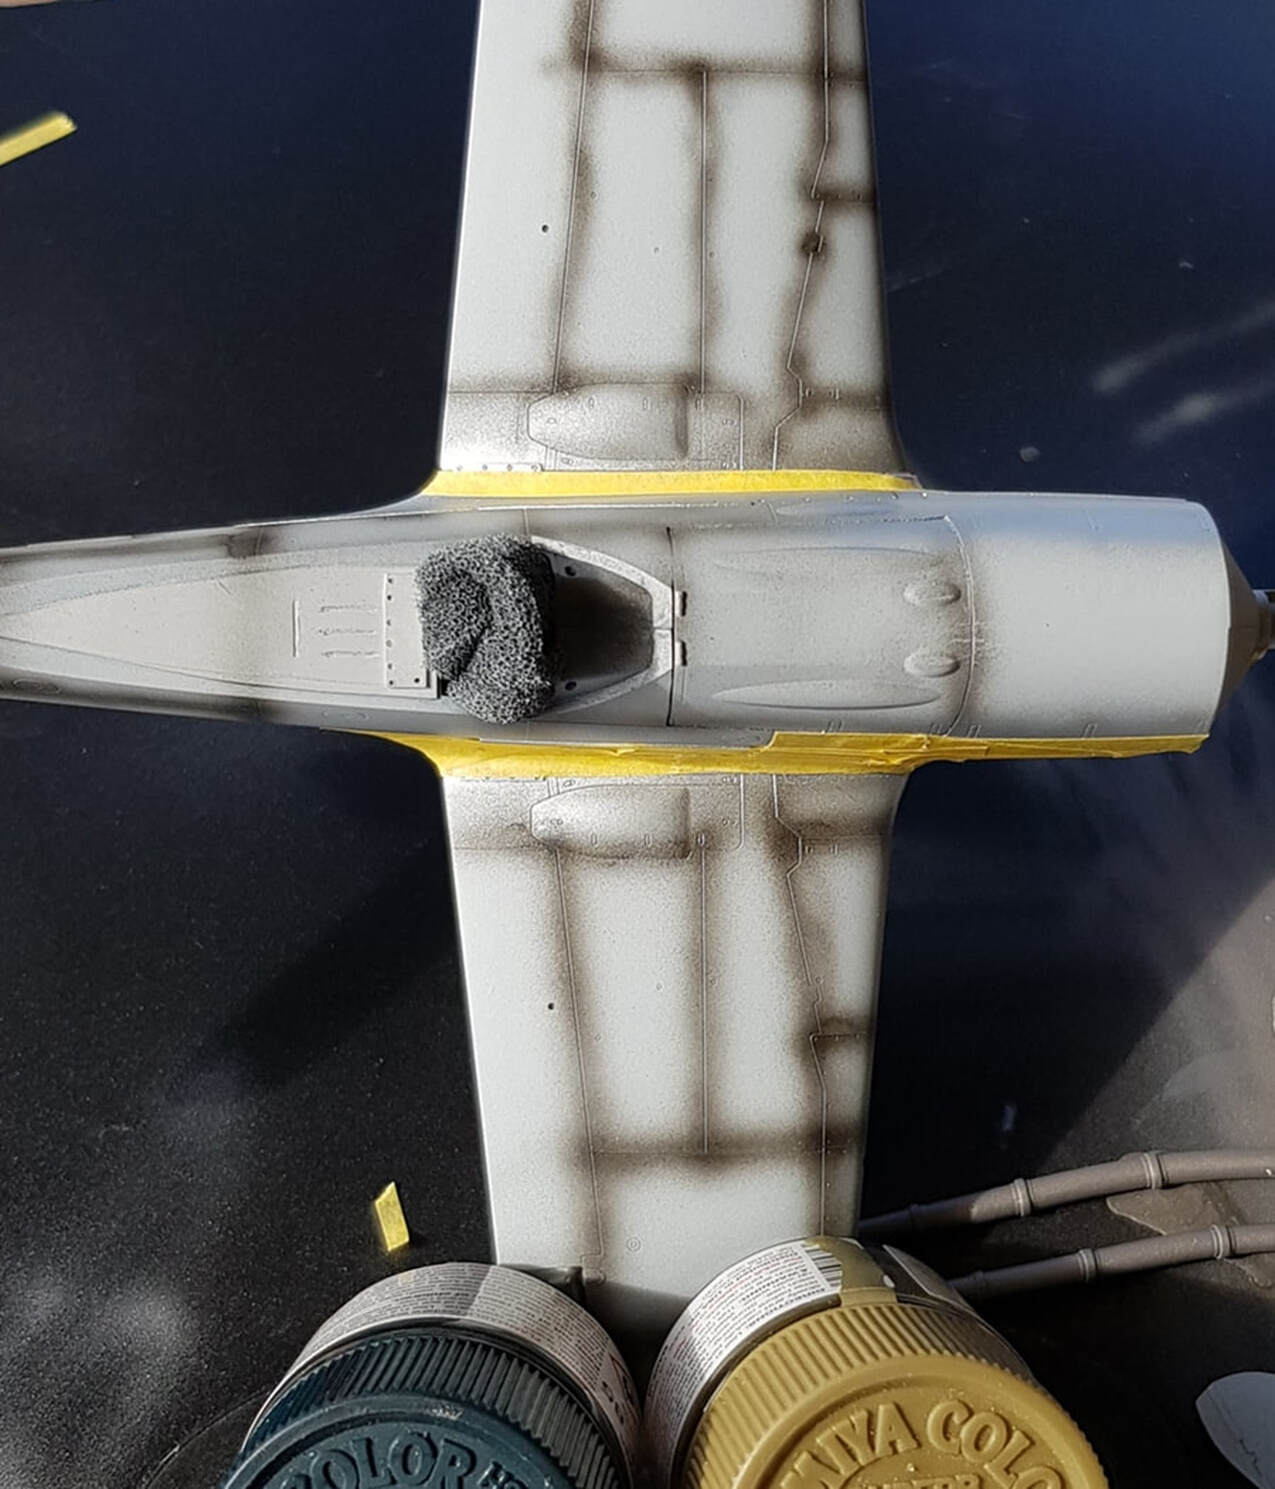
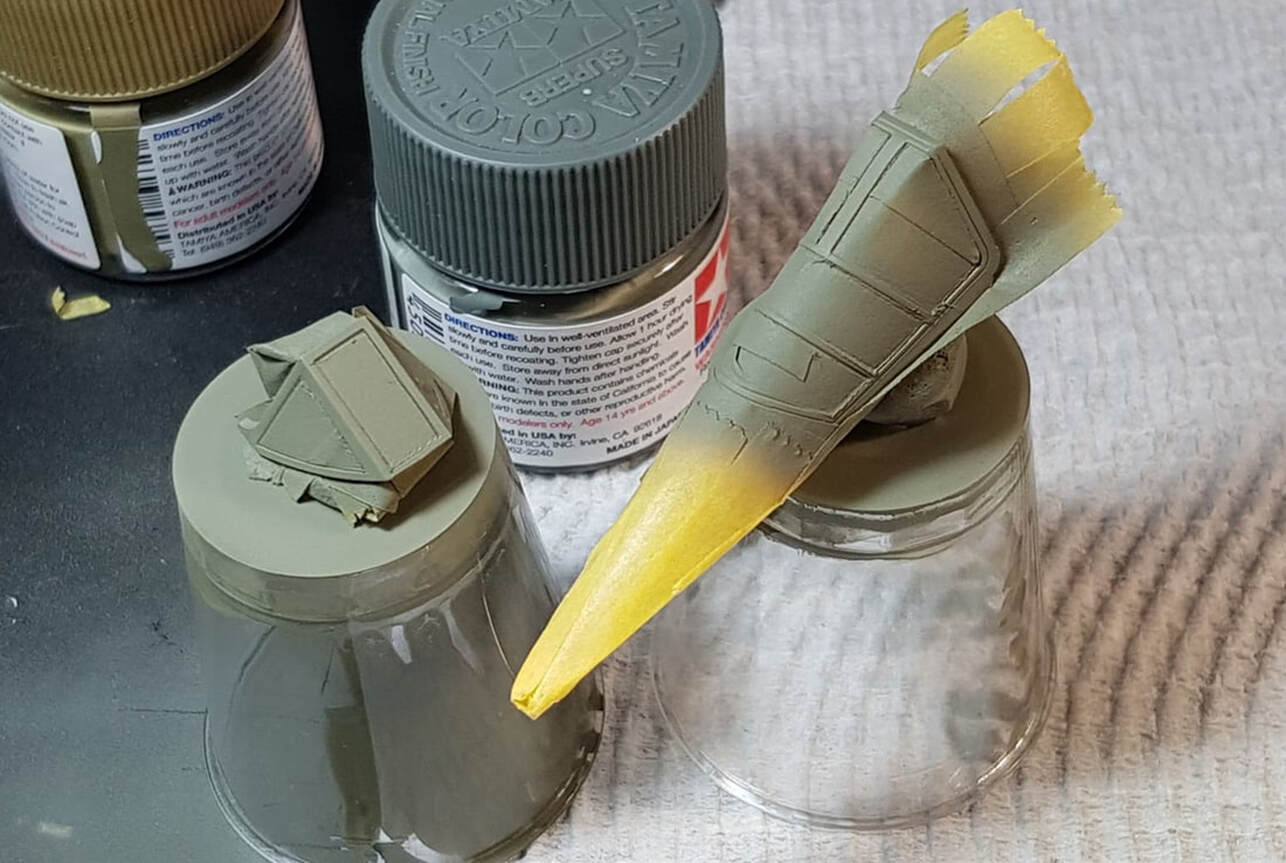
Still working out my mix for the RLM02, i was unsure if i preferred the more khaki look, or the greener look. It only takes one drop either way to make this much of difference.
I went with greener. This is two layers of colour on and shows how the pre shading comes through, i don't mind it, but i'm also up in the air about it. The next kit i will try the marbling effect over this 'follow the panel lines shading'. It definitely adds a bit of depth and does make a model more interesting though ,regardless of the great and ever continuing pre shading debate.
Masking off and touch up time. Once i have done any needed touch up work i will remask the aluminium section and then spray a gloss coat in prep for decals. I didn't want the gloss to affect the aluminium finish in any way.
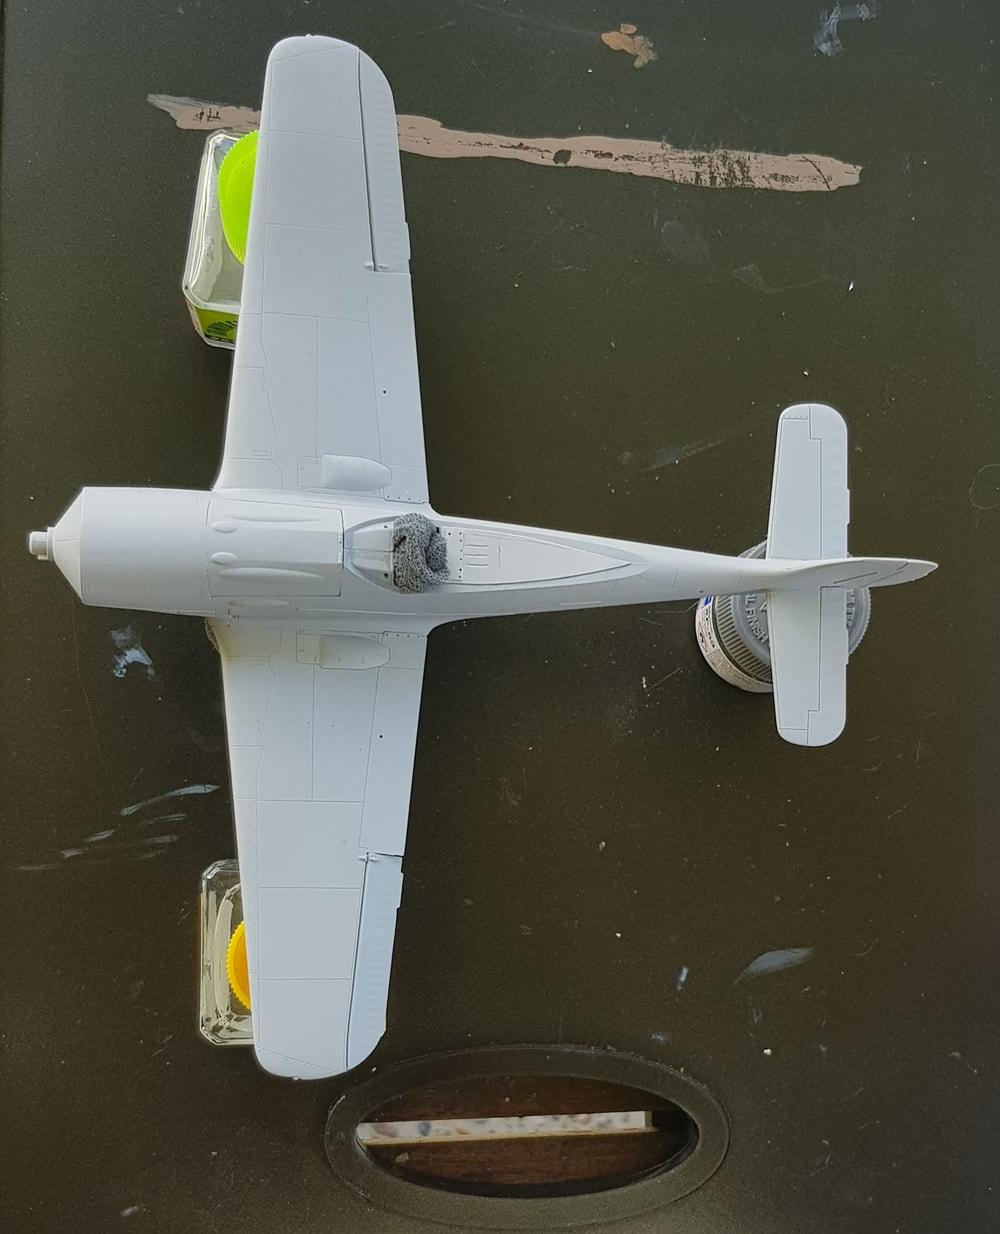
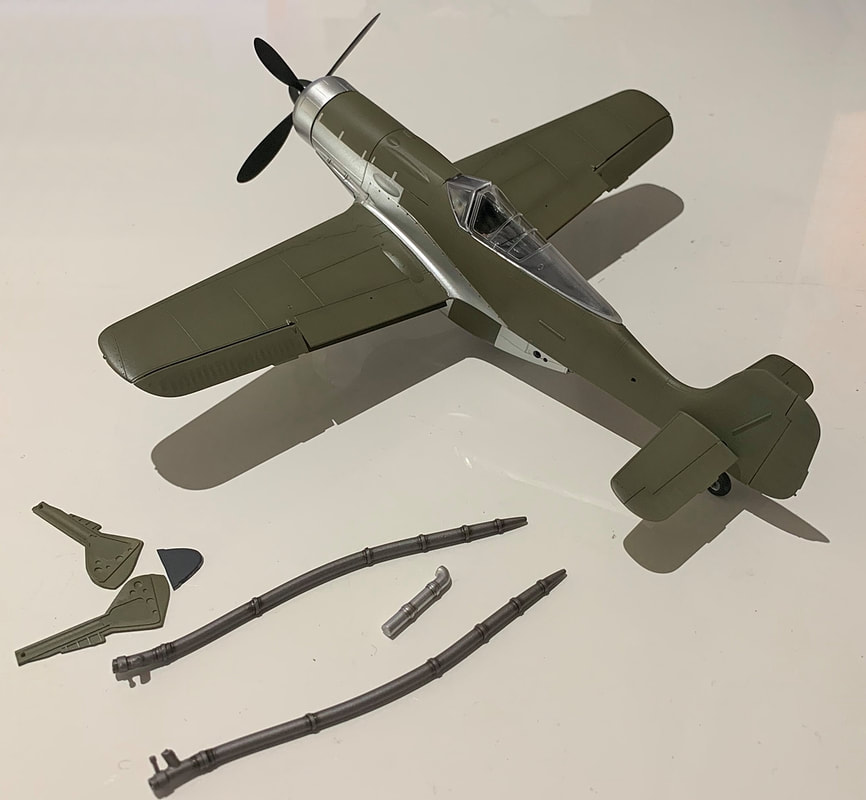
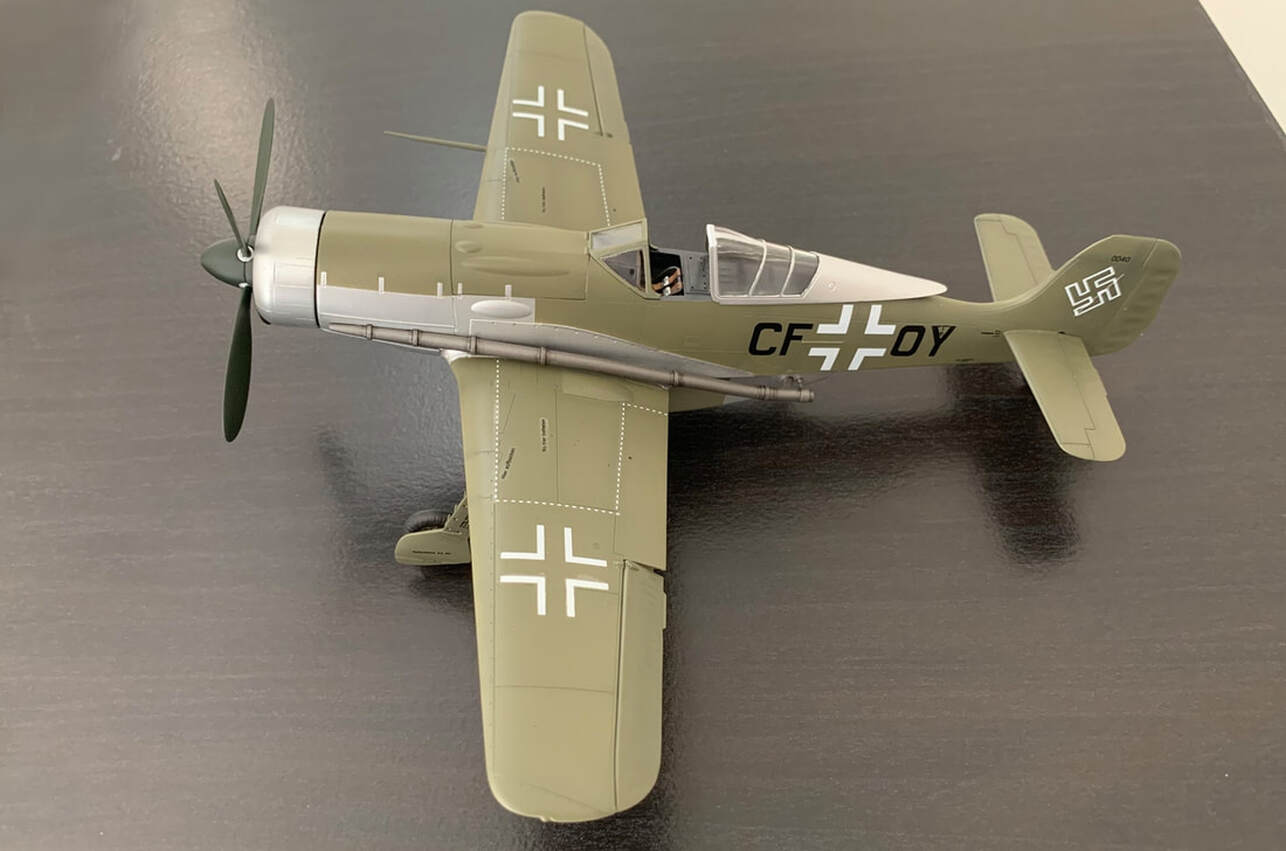
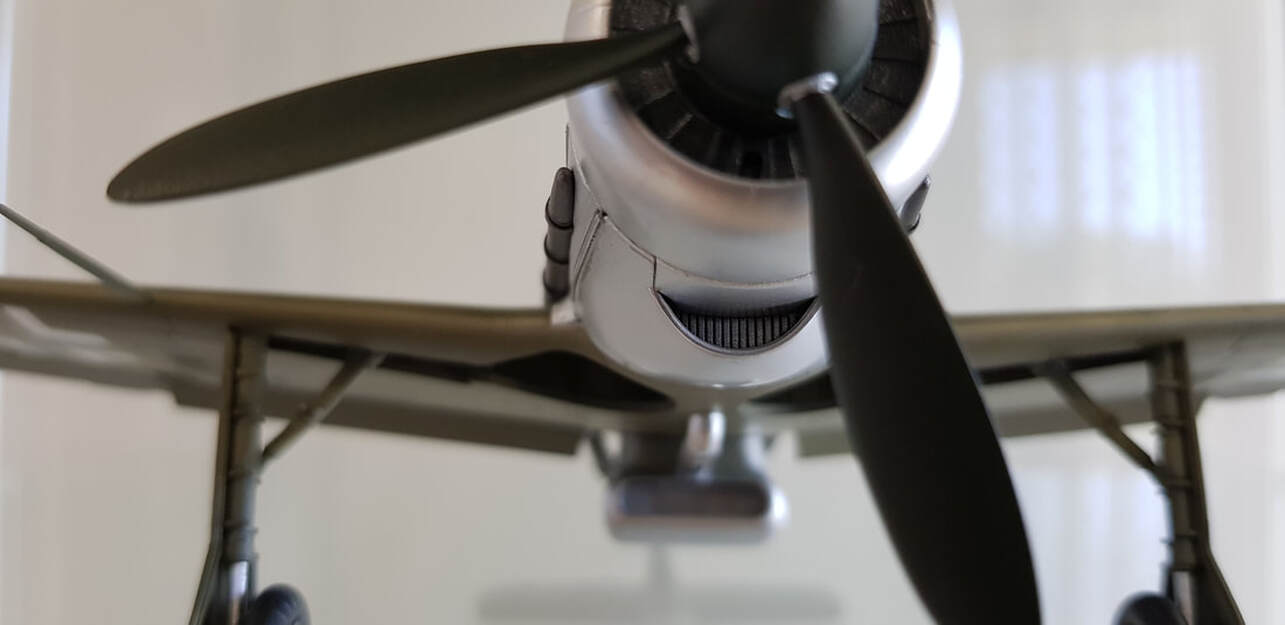
Prop, spinner and belly scoop. The hub on the prop will be silvered. The green is supposedly RLM70, i just went for a straight XF27 which is Tamiyas black/green.
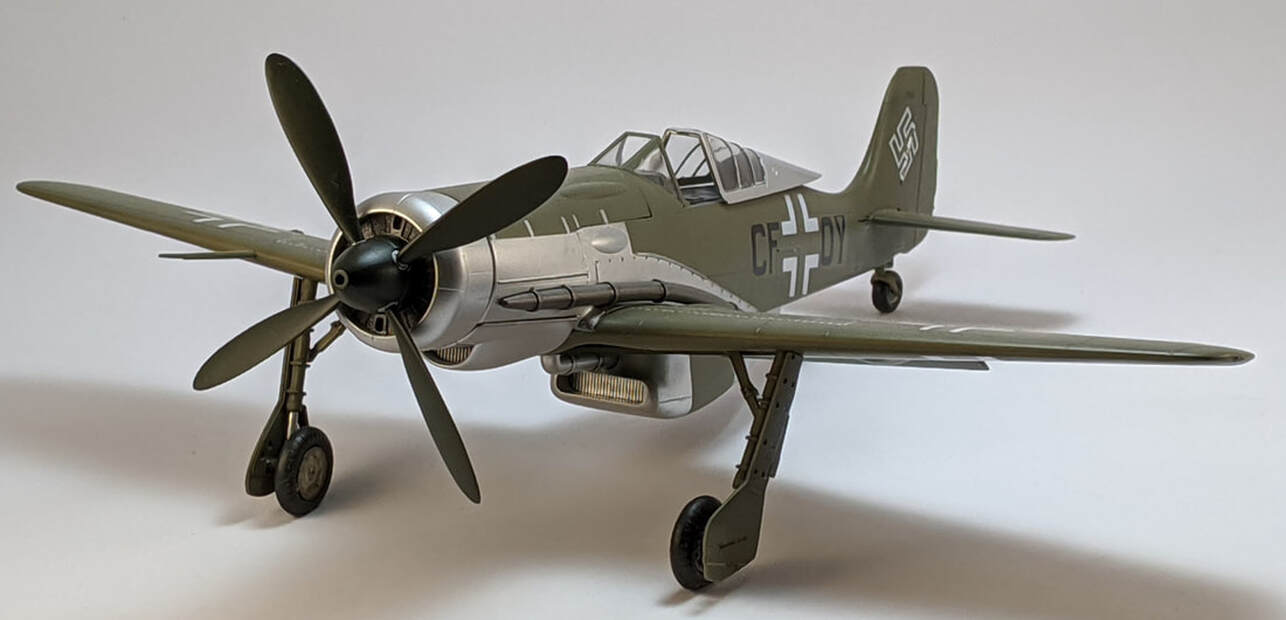
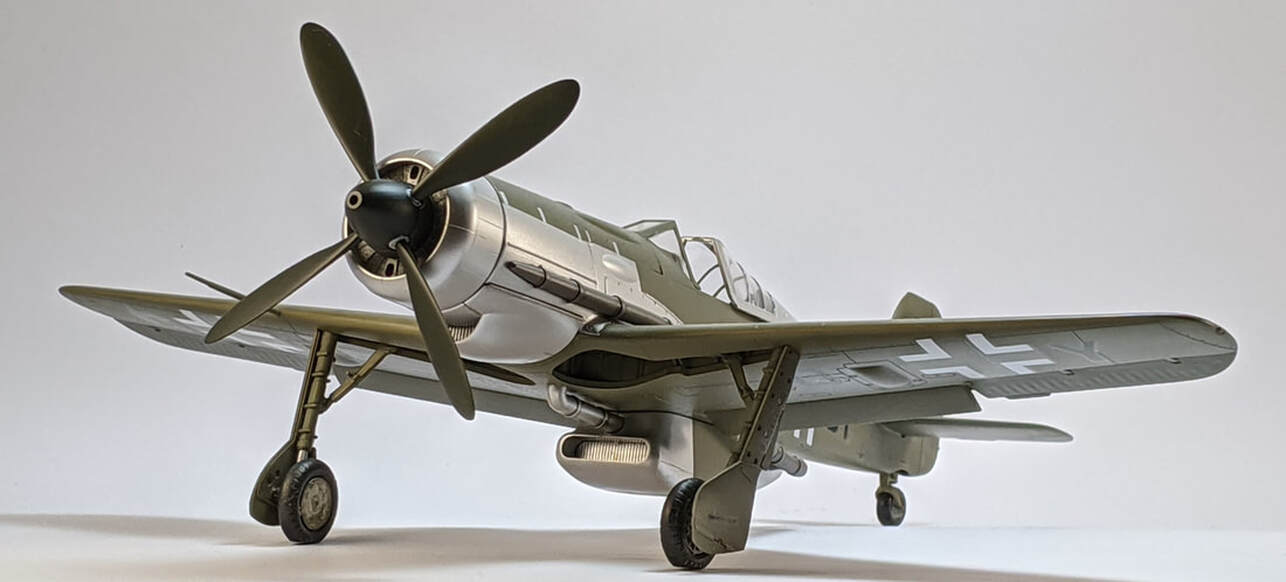
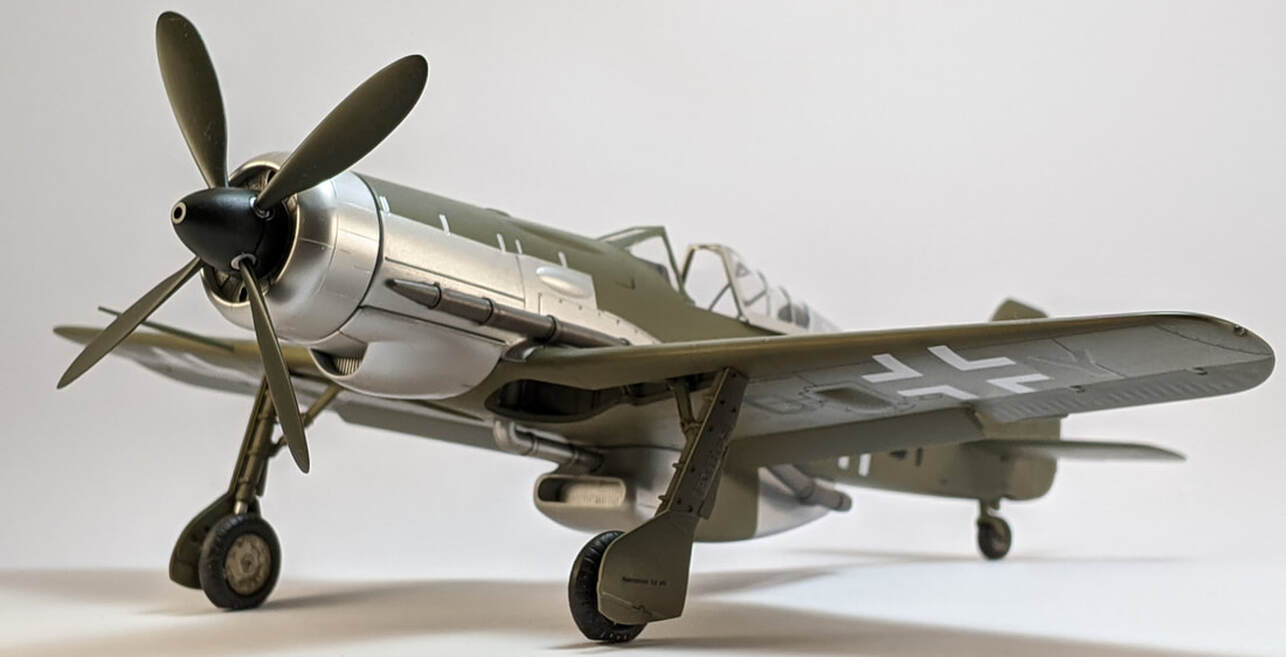
As it sits with the cowl and scoops as yet unglued. I'm up in the air about doing any post shading type work on the silver as i am too worried i may ruin it, but it is lacking in any depth. I did attempt a thin bead of Tamiya smoke on the silver but it turned out rubbish, it's that janky looking mess at the rear of the lower front cowl scoop where it meets the front of the wheel wells and I'll have to respray that section. This pic more than the others shows off the overall colour nearly spot on. You can just see the turbo nested in through the wheel wells.
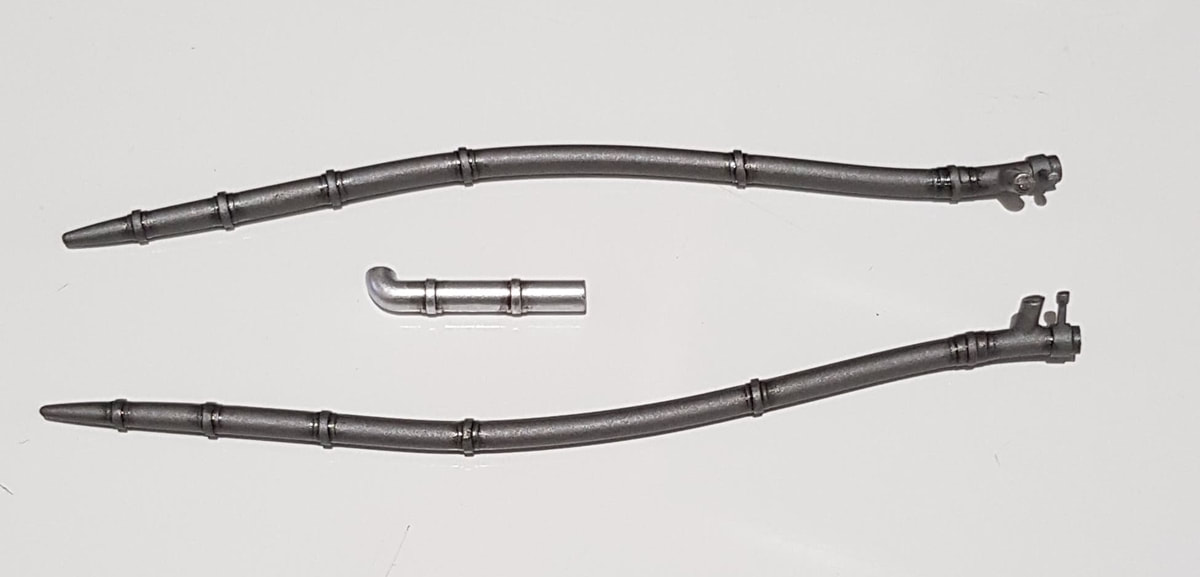
Exhaust tubing and the last piece of turbo piping. I gave the exhaust joins a coat of Tamiya smoke and then finished off with Tamiyas accent panel liner.
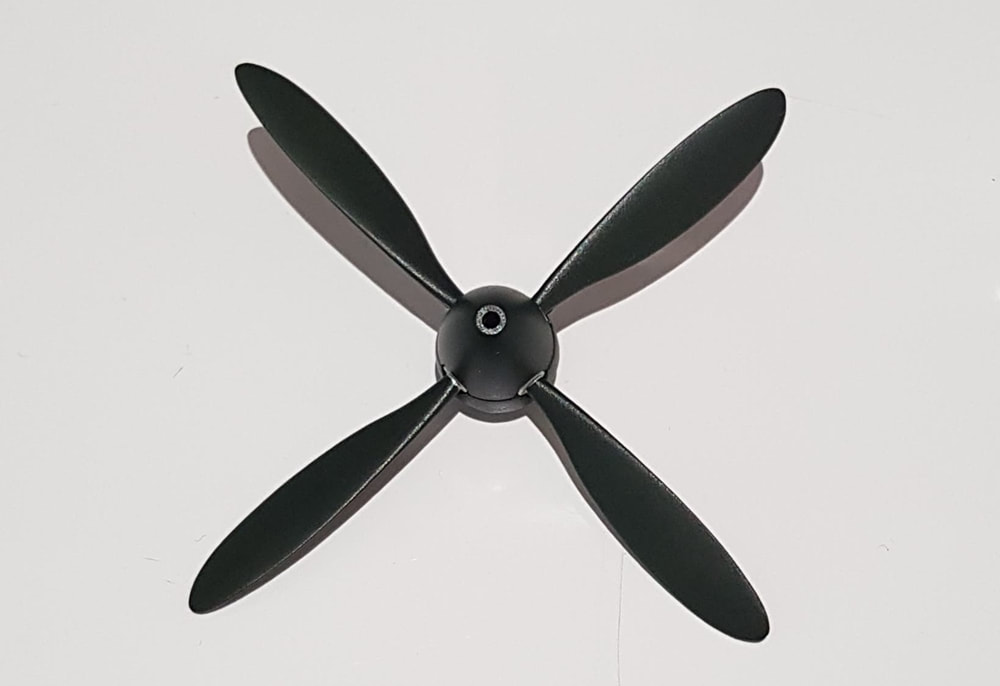
Prop finished, thankfully no spiral to paint!

|
|
The wheels needed correcting as the stubs locate them straight and not angled. I've seen a bunch of FW190 builds with the wheels left unfixed. Bit of fiddly chopping and sanding had them corrected.
|
|
Nearing the end of another build! The remaining pieces to go on plus painting the canopy and decals.
Canopy is masked with 6mm Tamiya tape, i didn't end up using the Maskol. I also painted the rear section incorrectly and had to repaint in the aluminium. Any excess is simply scraped off with a toothpick.
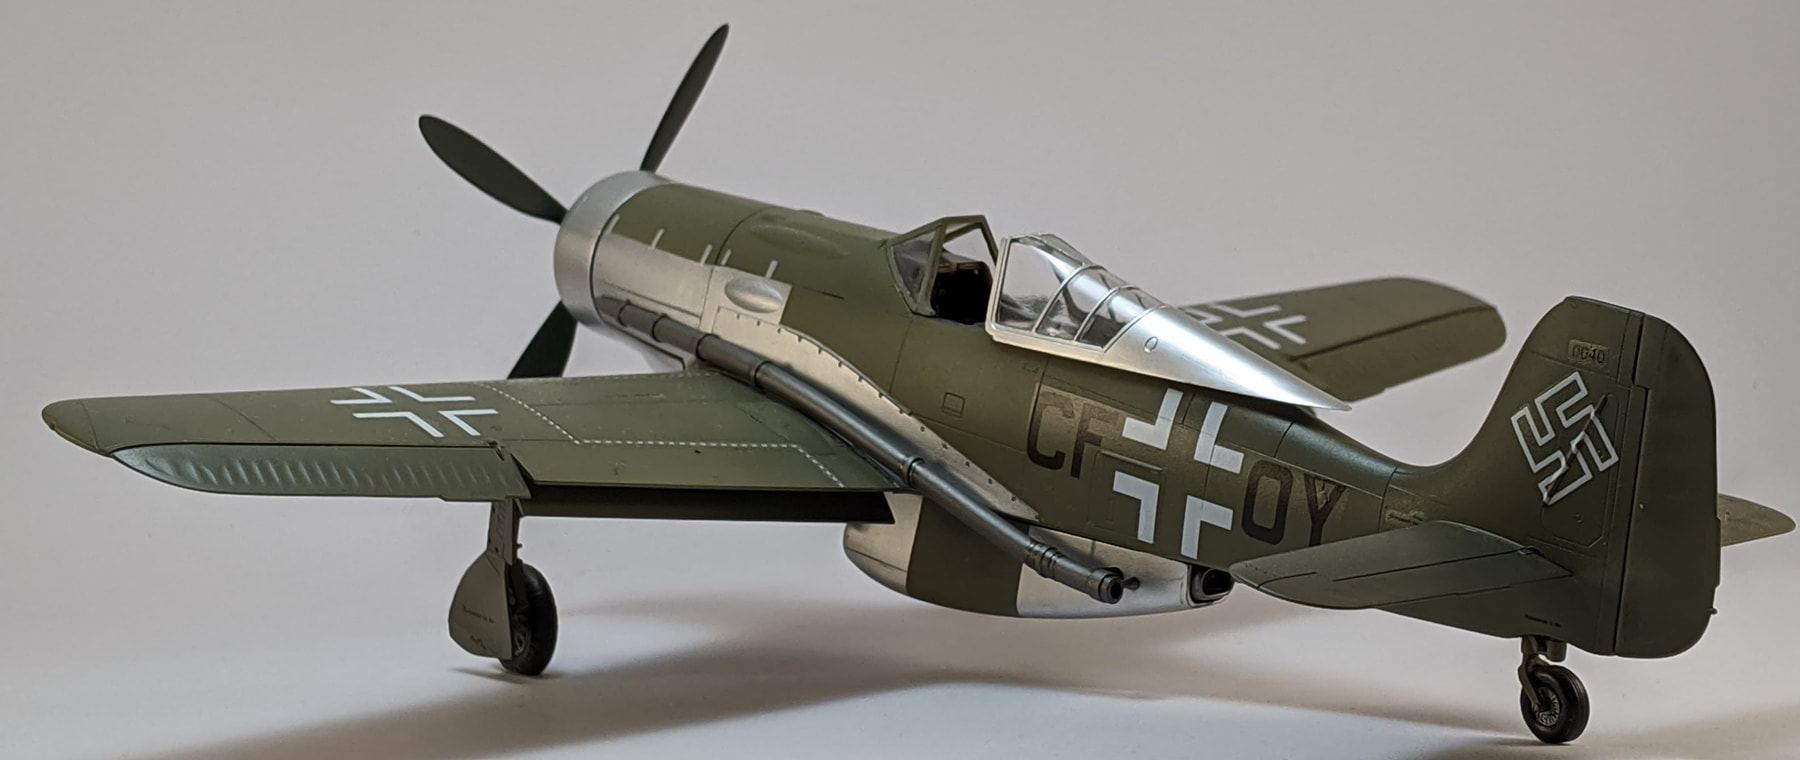
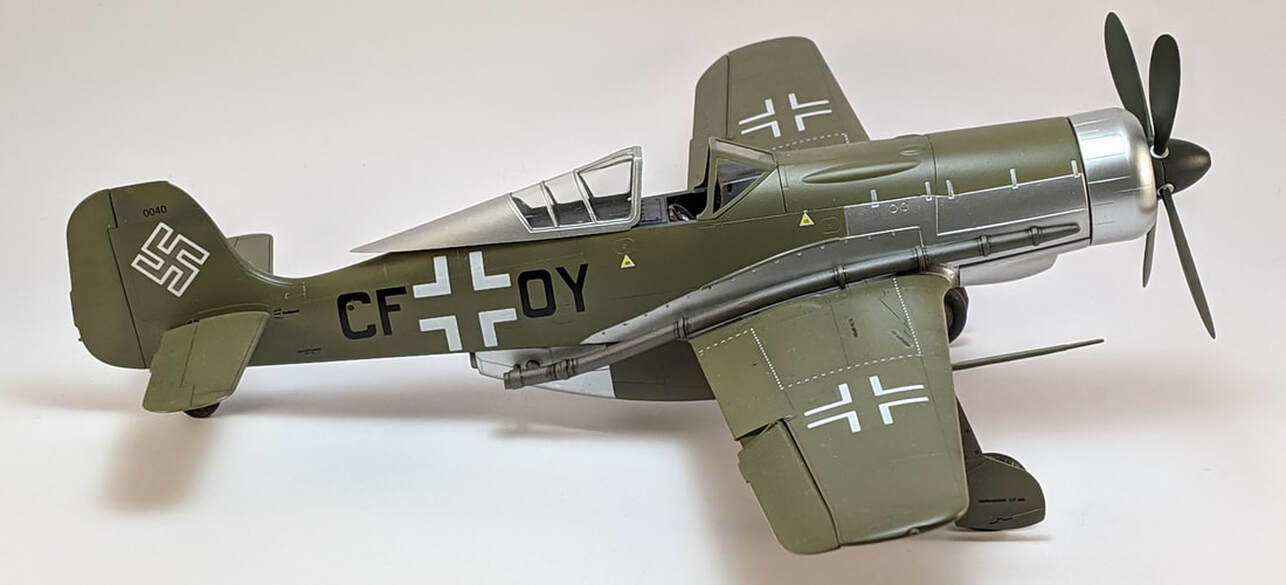
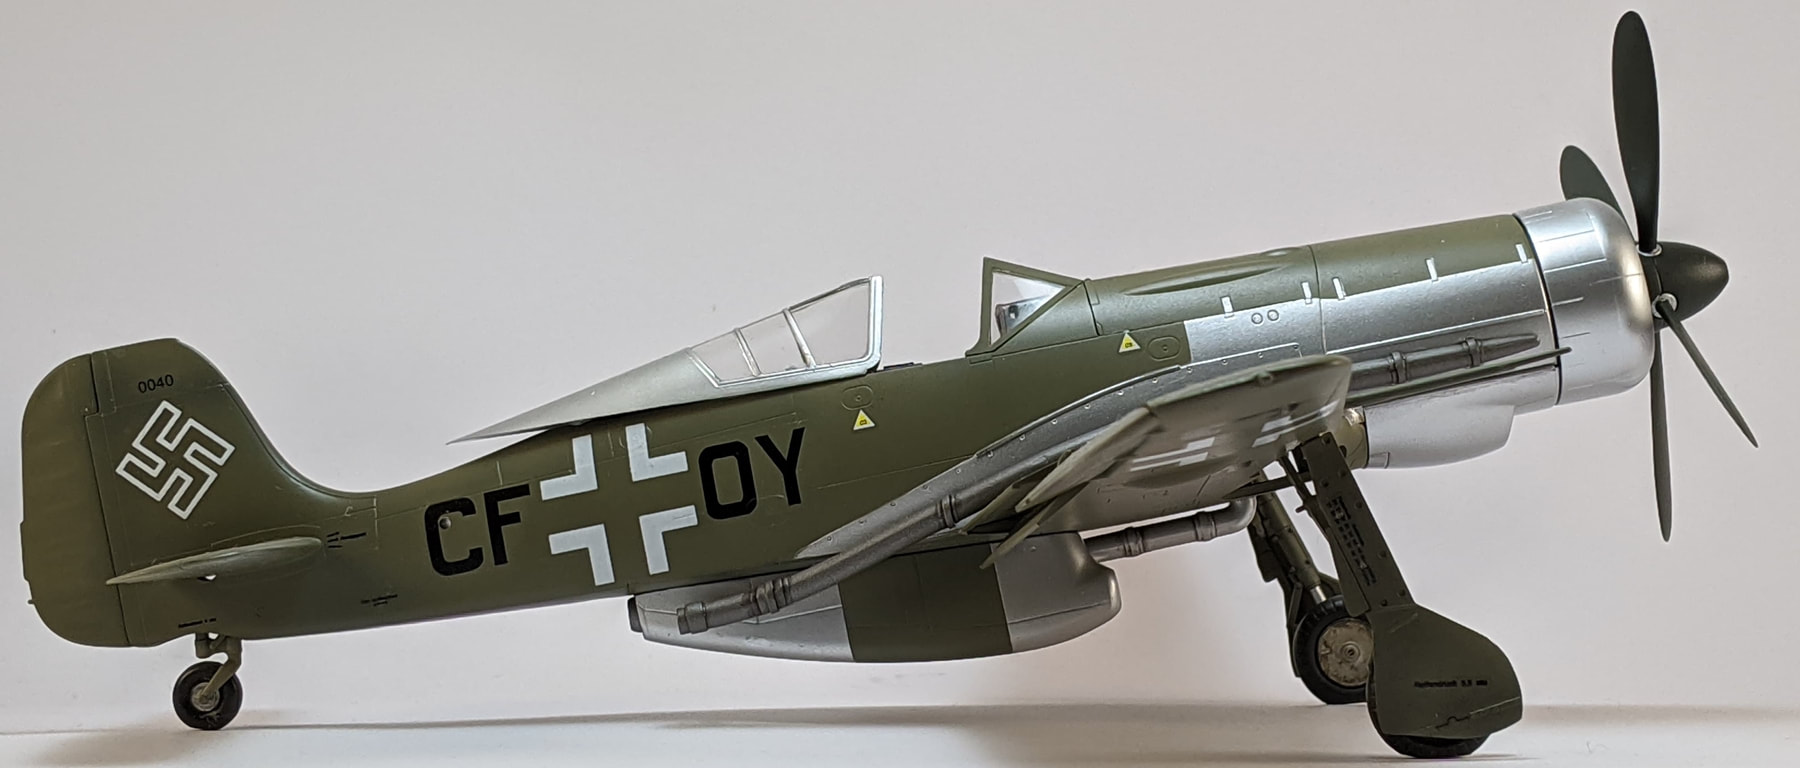
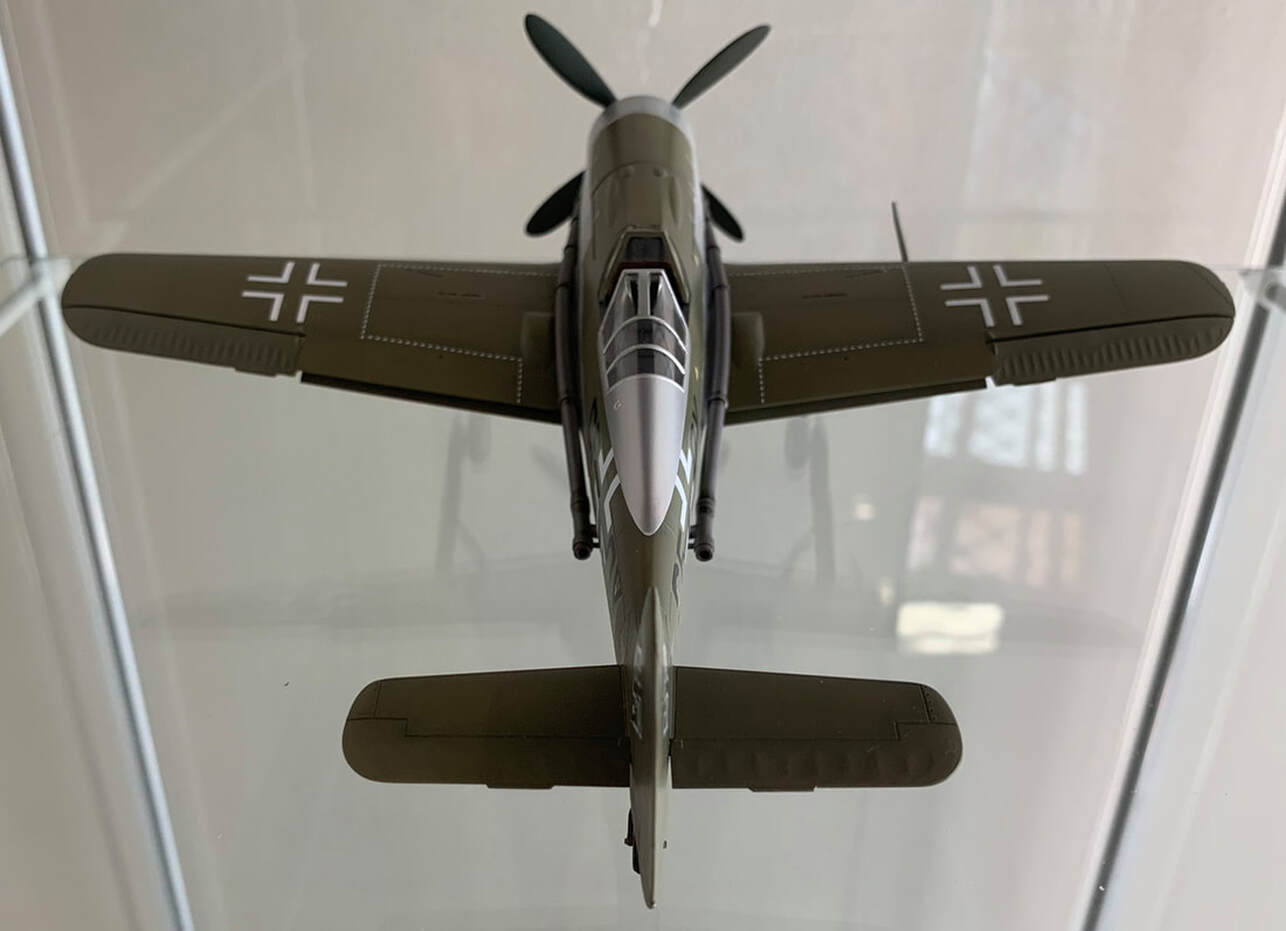
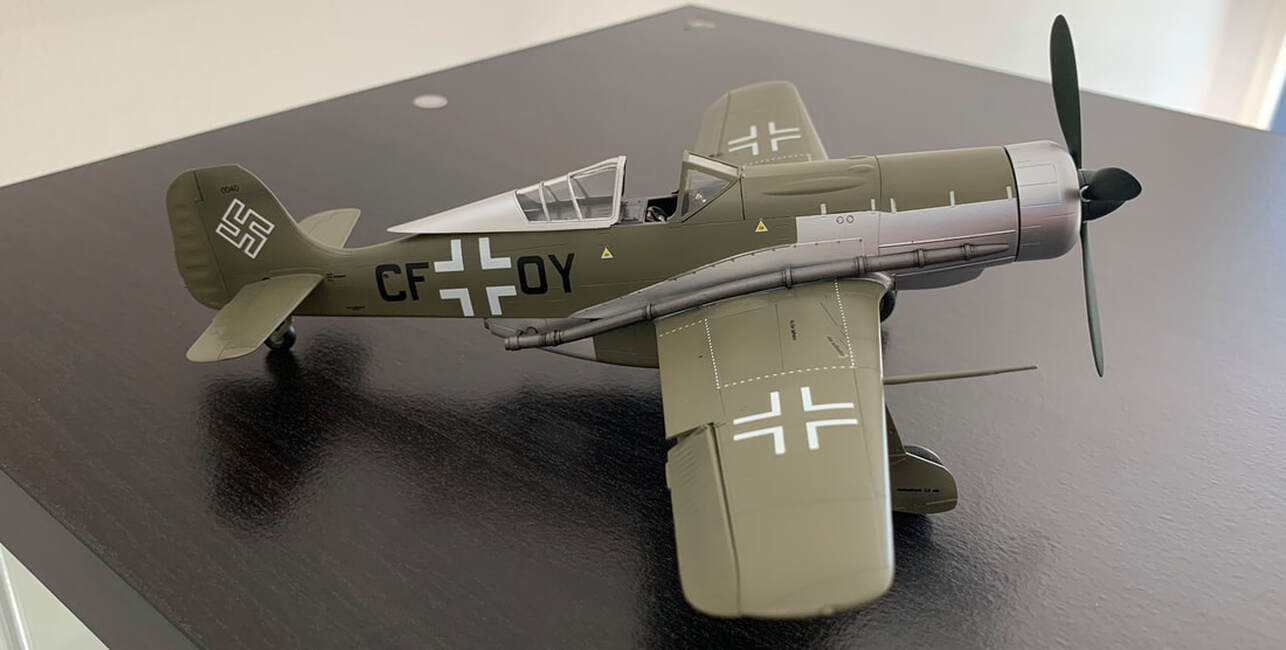
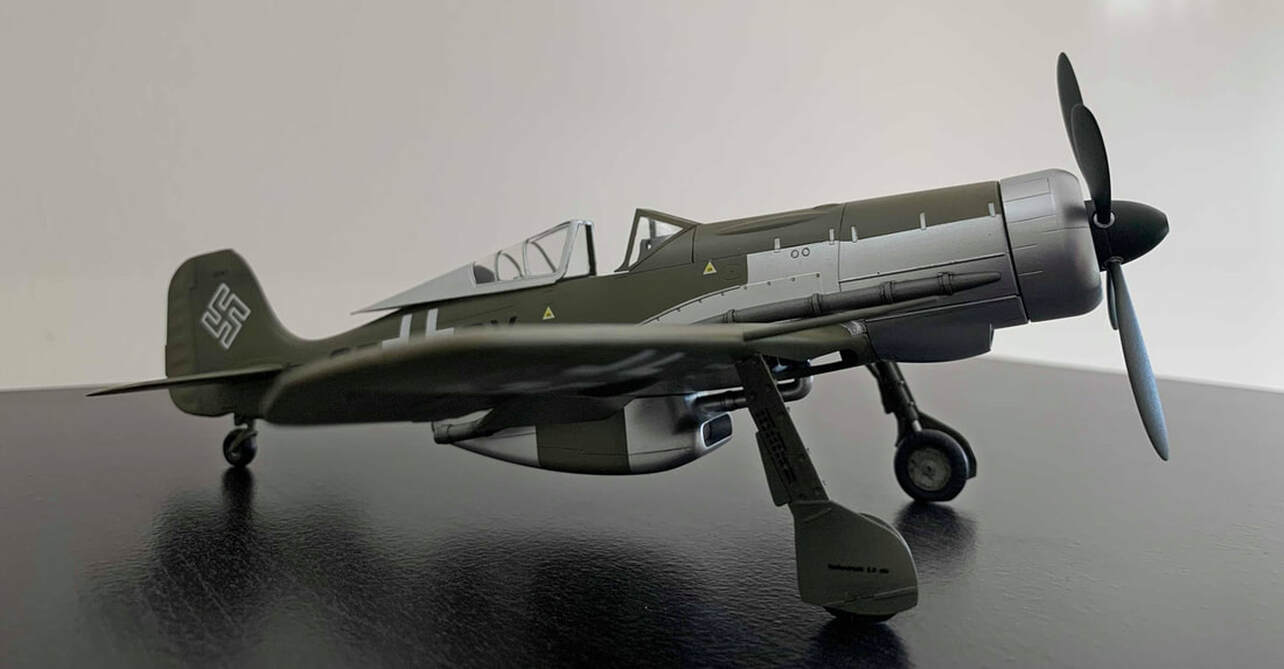
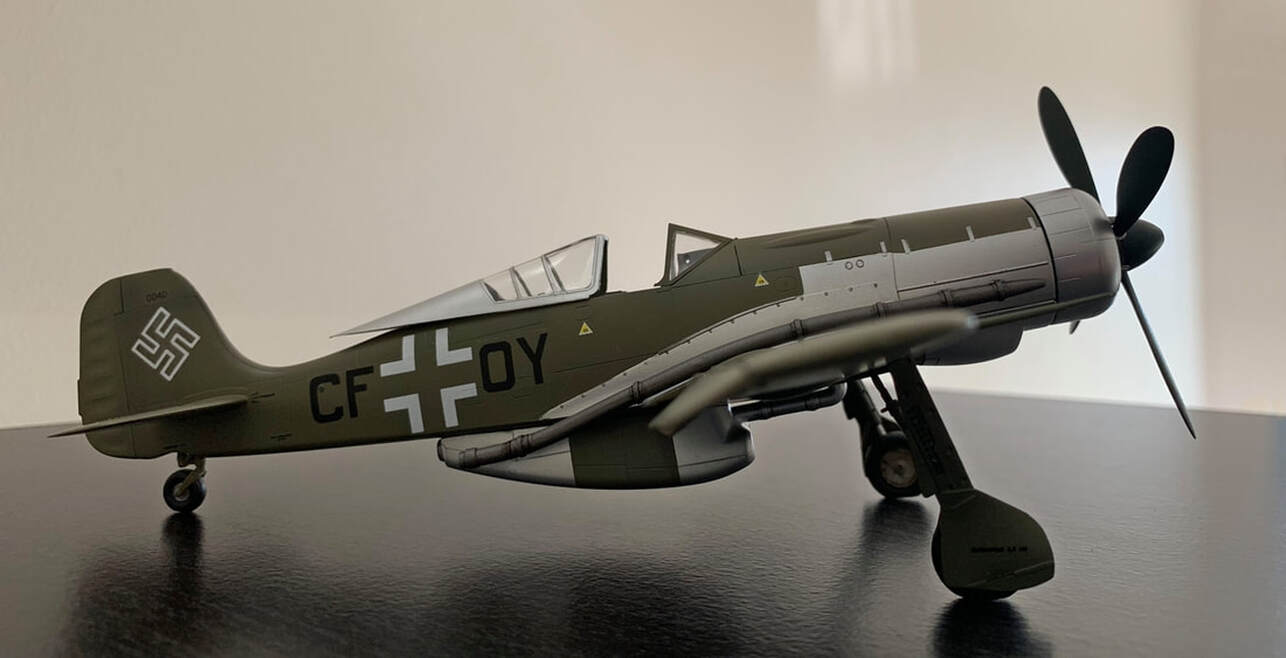
Finished! Wheels on, canopy cleaned up and given a light hand polish with a thick cloth. Decals were placed over the gloss, Markfit used to help them settle and then the whole model was sprayed with a semi gloss clear to give it a slight sheen and i could finally remove the masking over the fuselage silver. The only weathering was in the wheel wells and cockpit, being an experimental craft i wanted to keep her clean plus i thought she looked pretty racy and it would be a pity to dirty her up. Nice and easy kit, not overly detailed but she fits together well and looks good as a finished product.

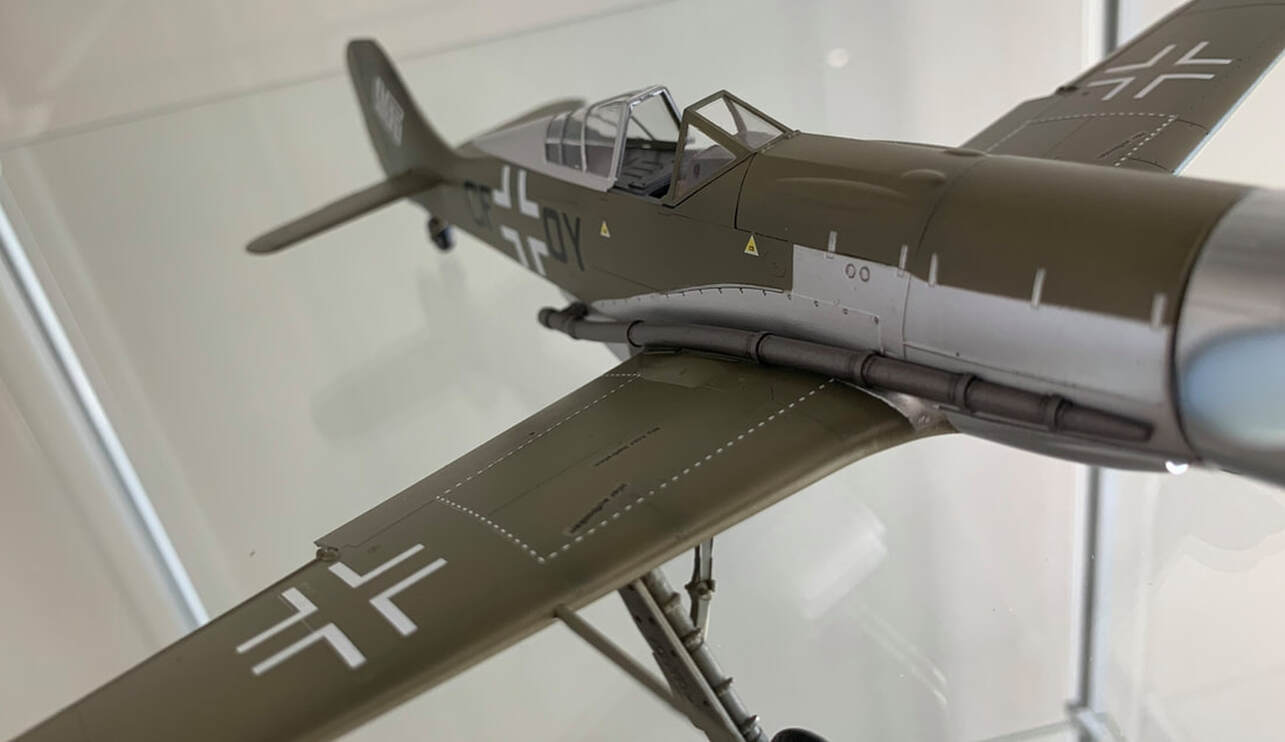

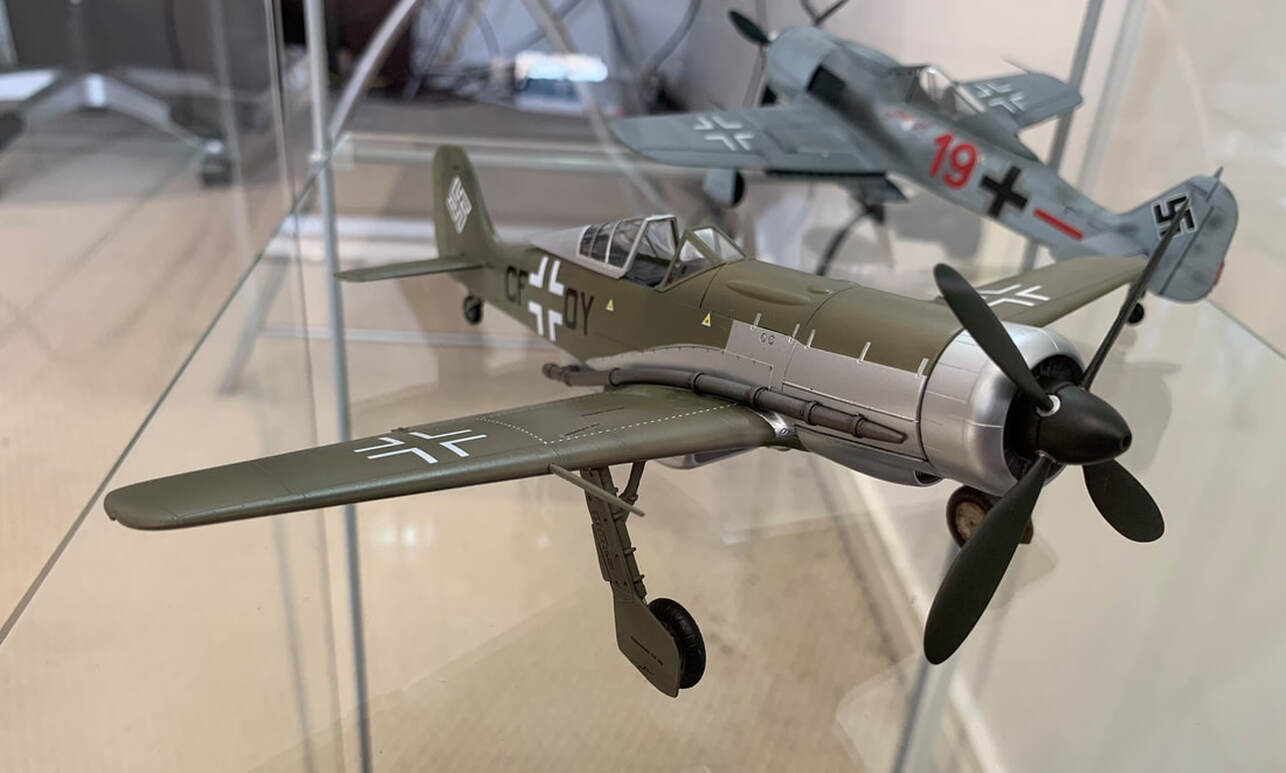
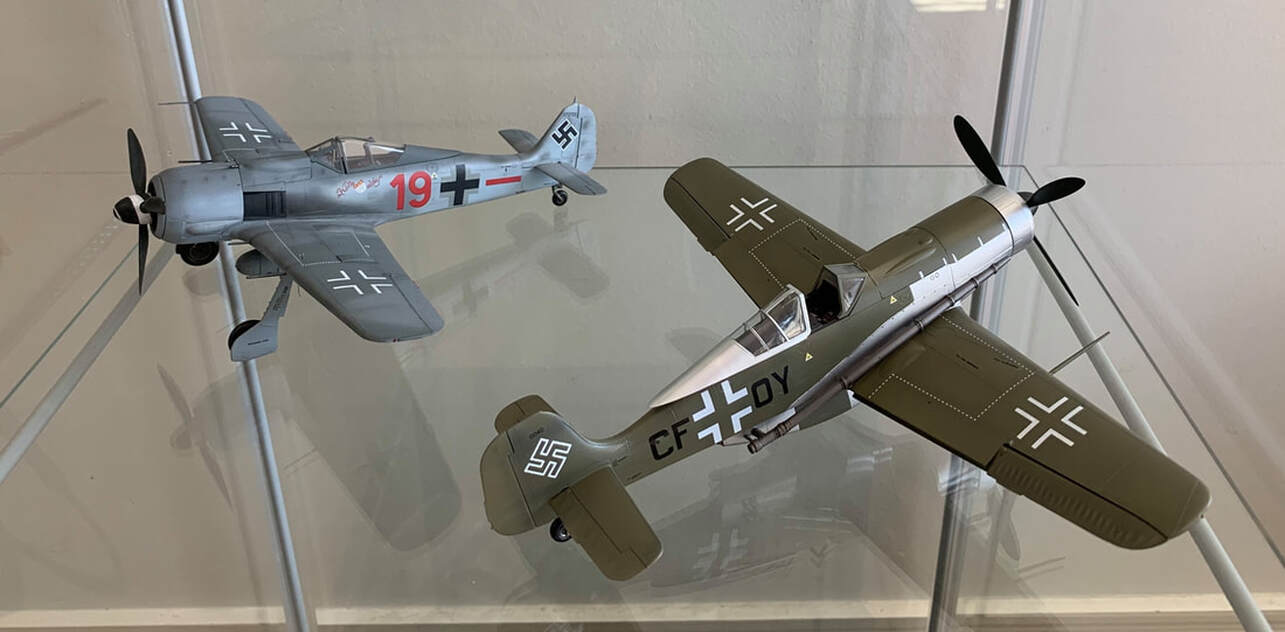
UPDATED PHOTOS - NOV 2019