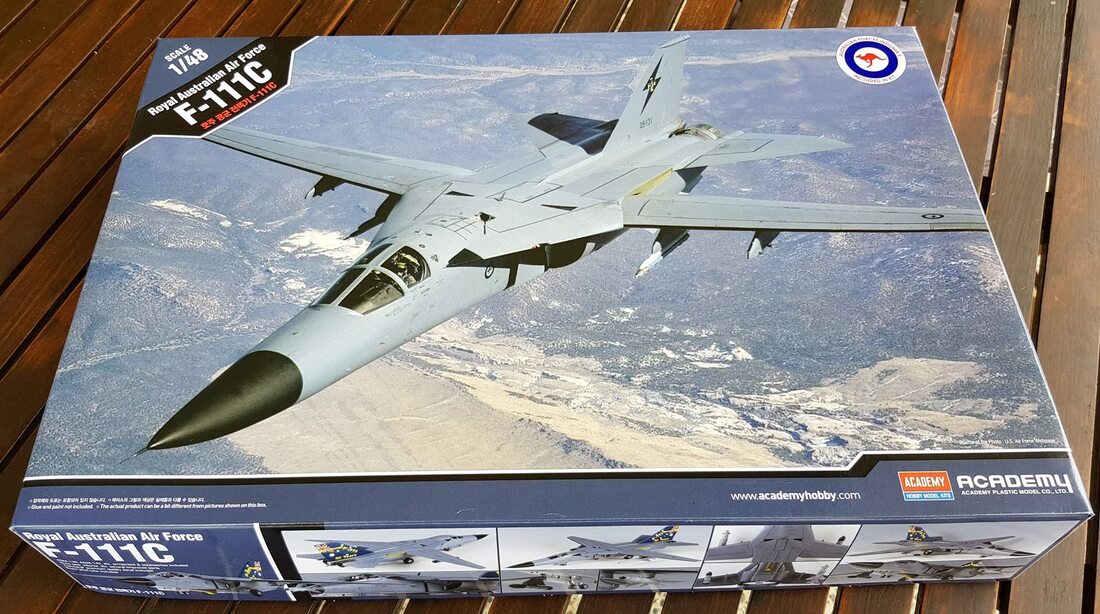
This one was a step up. The Academy 1/48 F-111C kit had a few issues that needed to be sorted, which i found out after looking at builds online. I thought it would be a cool challenge though and also, being an Aussie, a RAAF model to add to my collection. Plus, it's an F-111, they are just bad ass! These bad boys were stationed a mere 50k's from where i lived and i had seen them several times over the years at airshows and their famous dump and burns over Brisbane. Wicked machine that got an inglorious ending, at least in Australia.
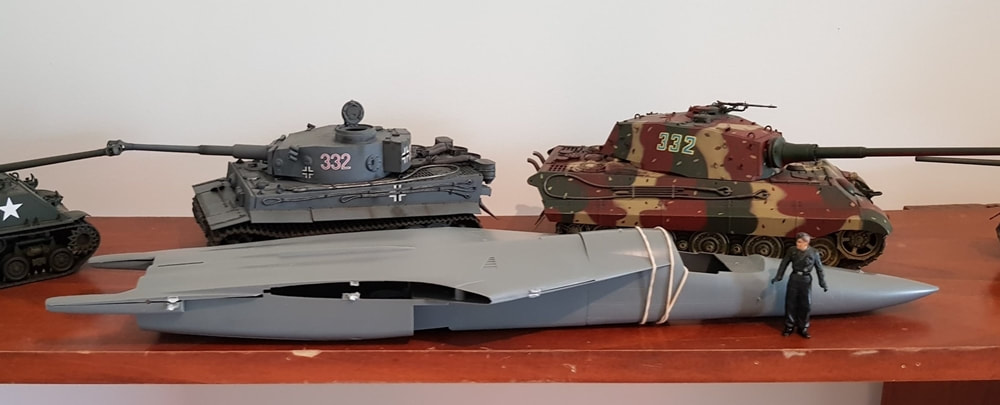
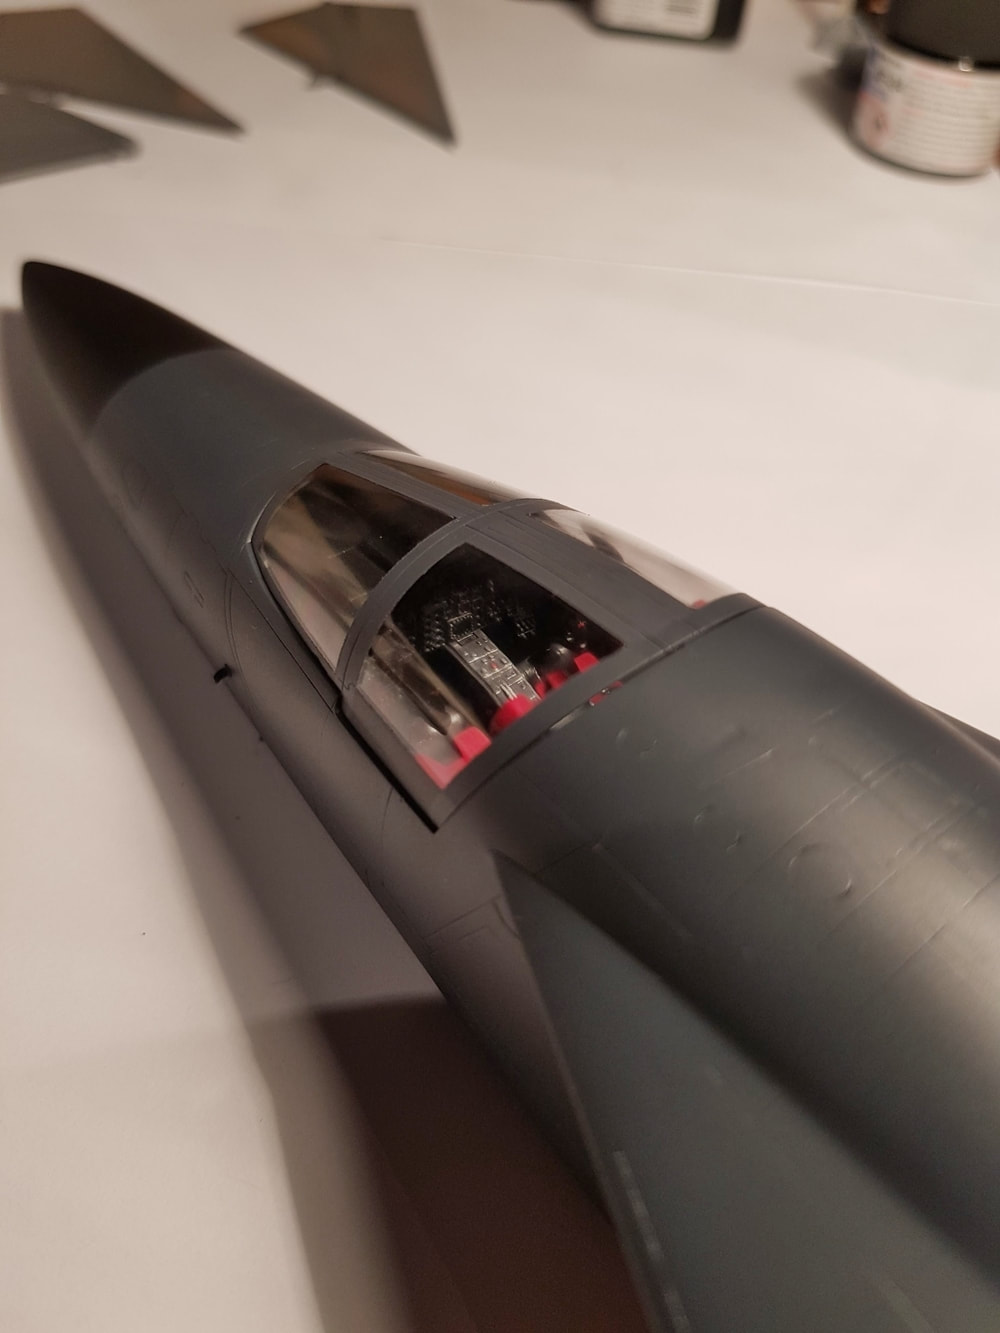
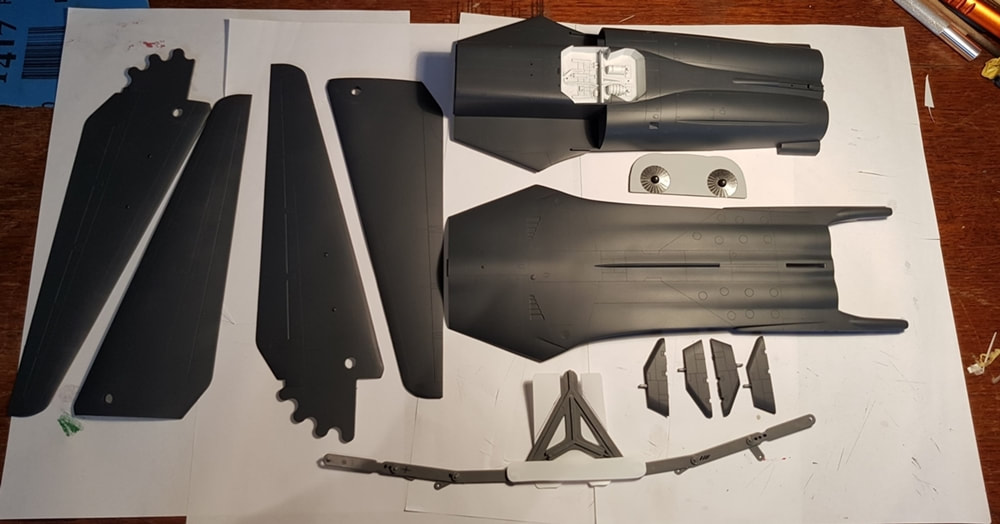
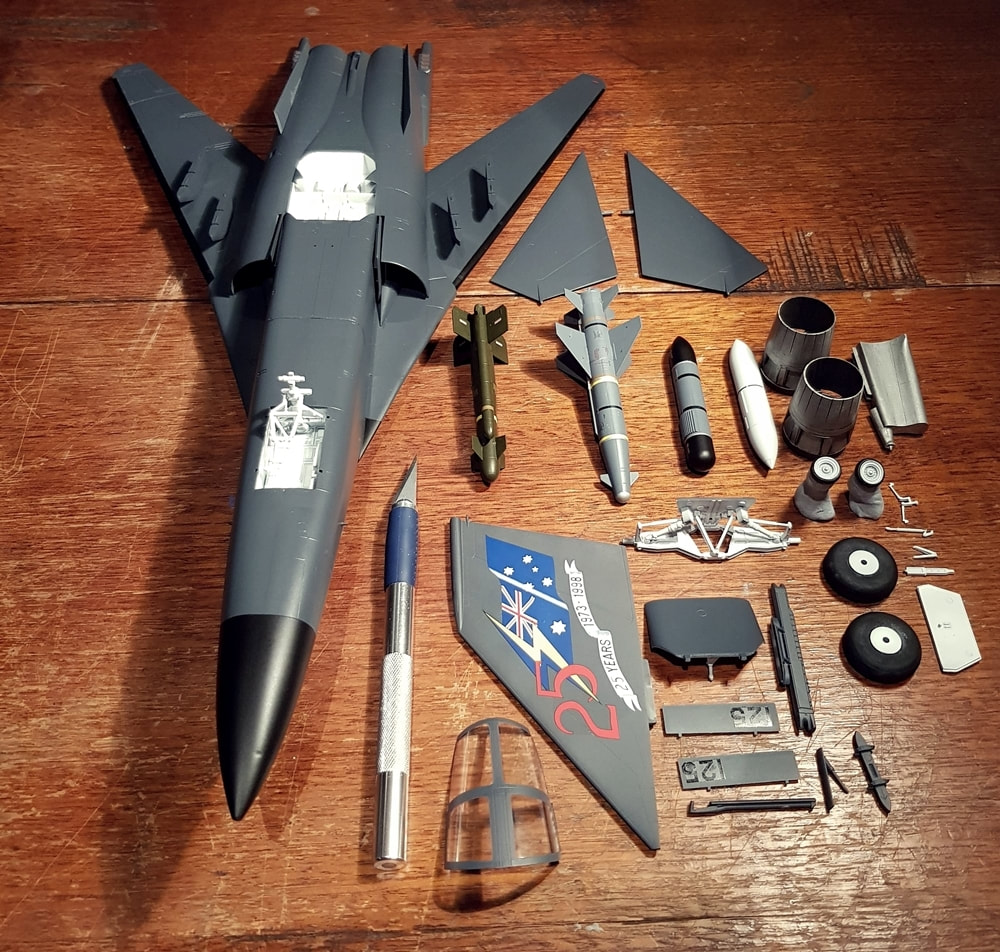
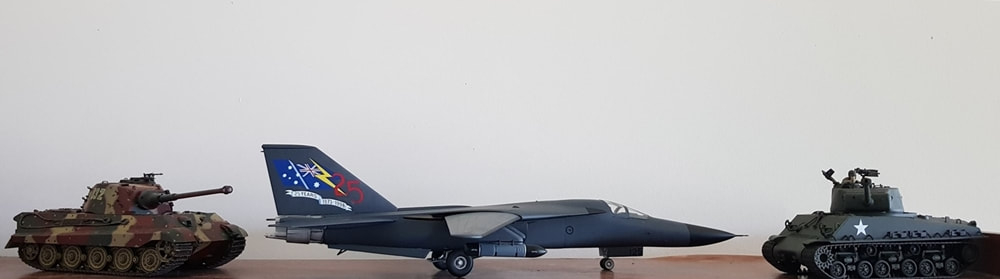
This thing was huge, well, compared to my 1/35th armour it was. I was considering a move to 1/32 at this stage but i'm glad i went with 1/48 for this project. Already in this picture even though the parts are just clipped together with no glue you can see one of the big issues. That fuselage join (the hump) at the top behind the rubber bands, it's miles off and will require quite a bit of work. Another thing, maybe it's just Academy sprues? The sprue joins to parts were soft and squishy and in some terrible locations requiring sanding and extra work unlike the Tamiya stuff. No biggy, just extra work.
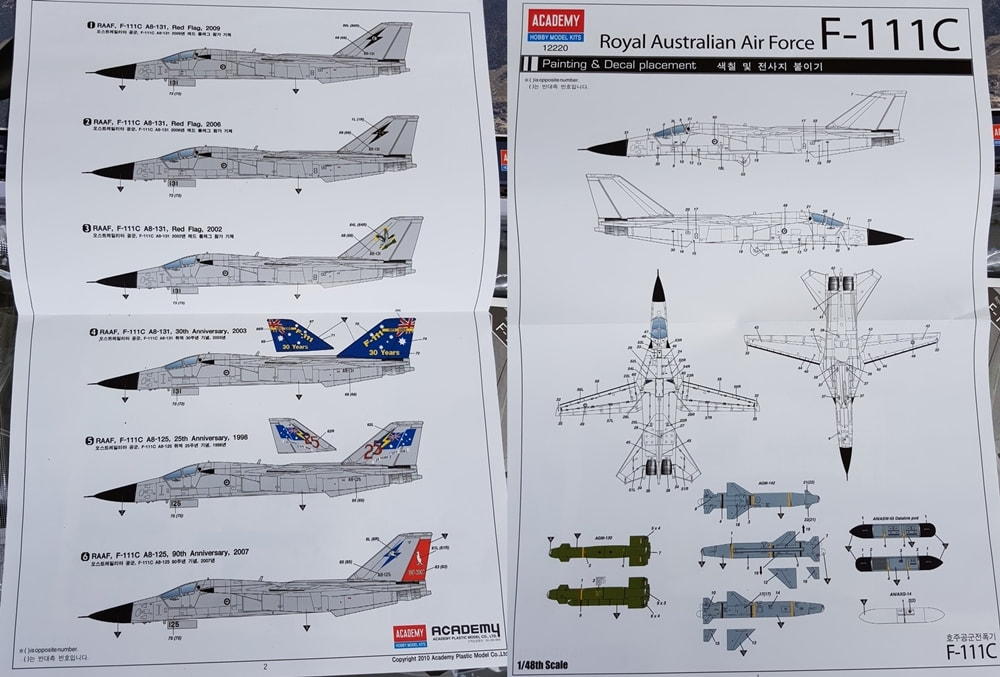
Perusing the kit, the decals scared me straight up. So.Freakin.Many. Well, at least that side of it was a long way off.
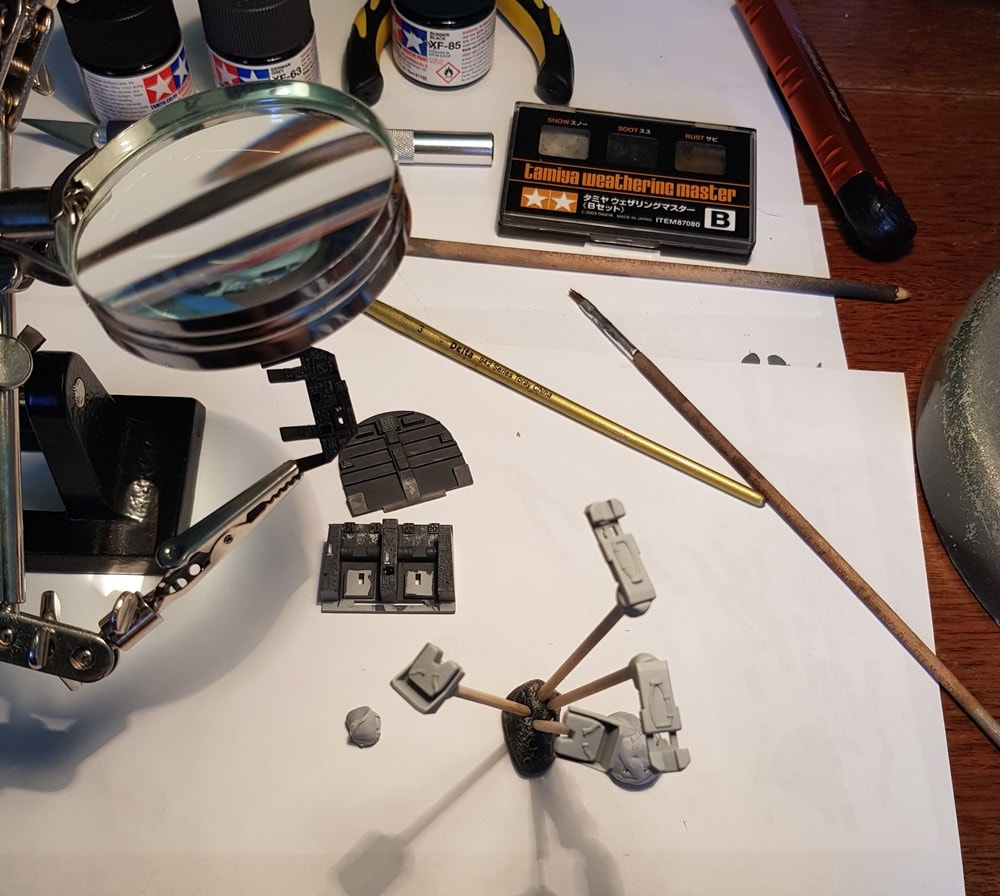
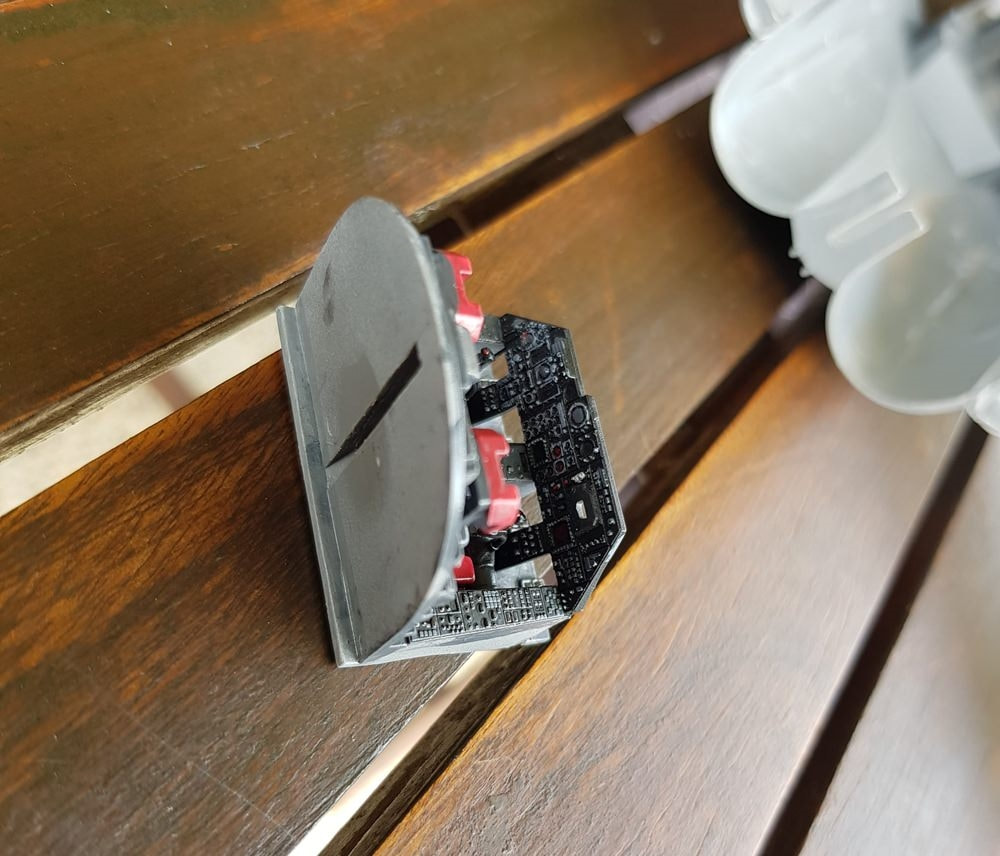
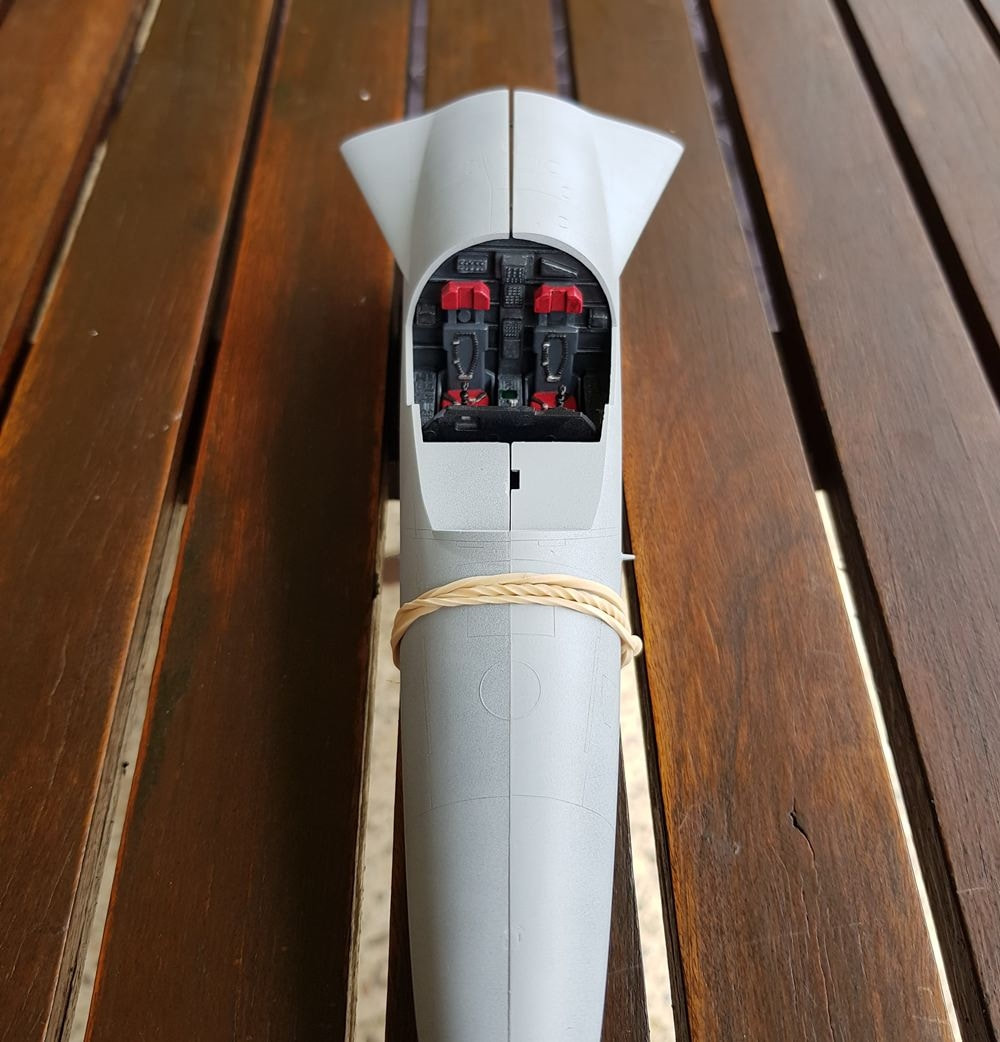
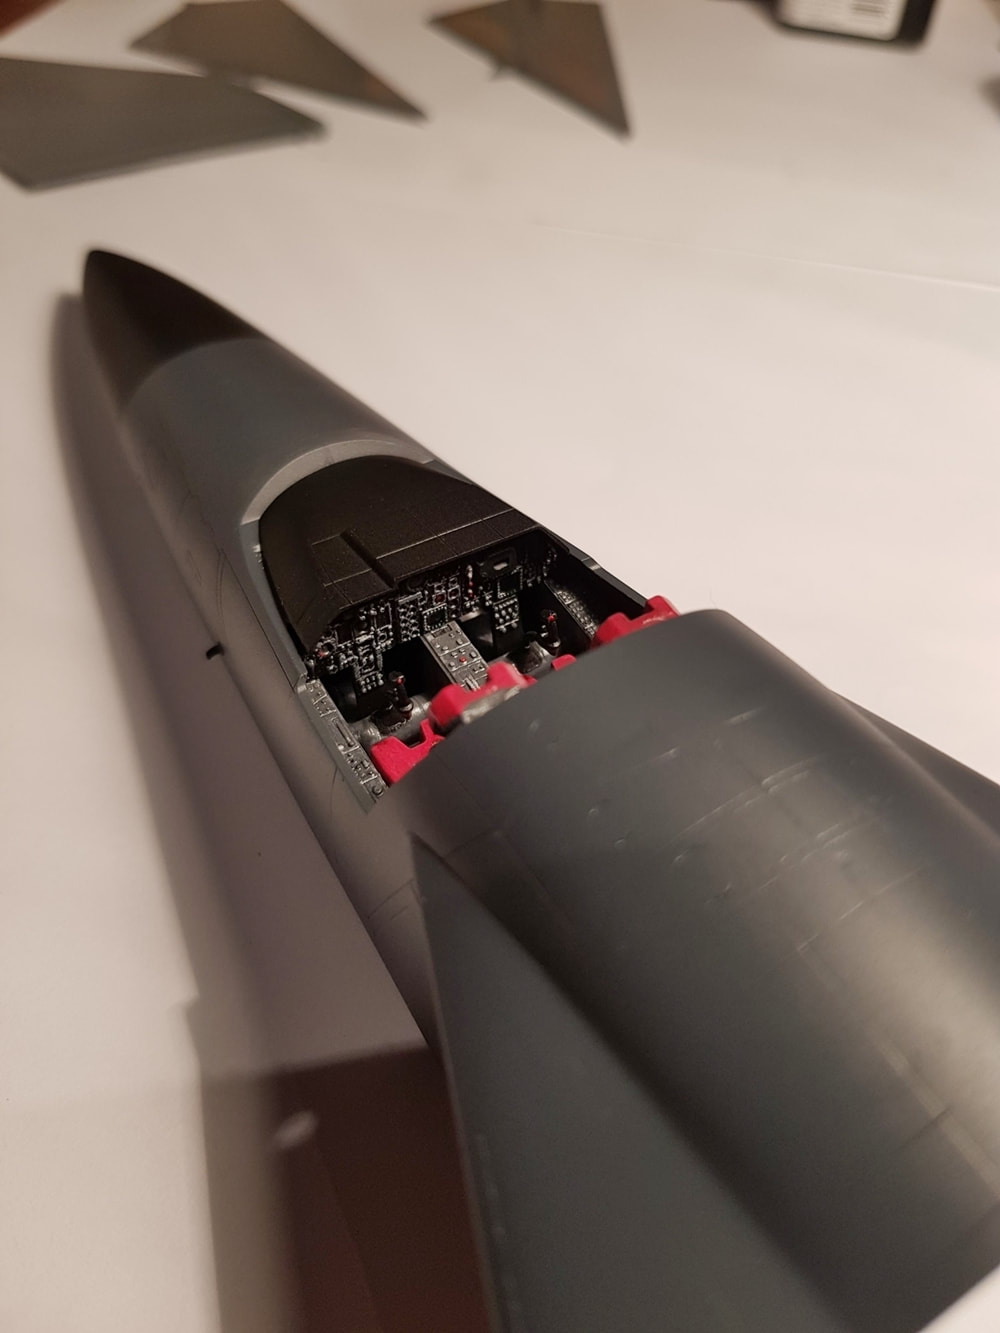
Cockpit. A fairly basic affair with minimal parts really. I was expecting more considering the room you have to work with and the size of the kit. The interior was a mix i made up with some greys and a dash of flat black. The instrument panel is matt black and then dry brushed silver to highlight the raised instruments. MFD's were painted with a clear mfd green and some extra detail added by looking at various pictures of 111s and matching the various button colours to fill out the cockpit. Seatbelts are part of the seat and a bit weird looking, they were painted flat black with silver buckles and reddish cushions. The interior got some panel accent to help darken some corners and deep lines and some mild weathering with some more dry brushing. The cockpit i trial fitted several times to make sure it was going to be a nice fit. The front fuselage section showed it had some join/fit issues as well here.
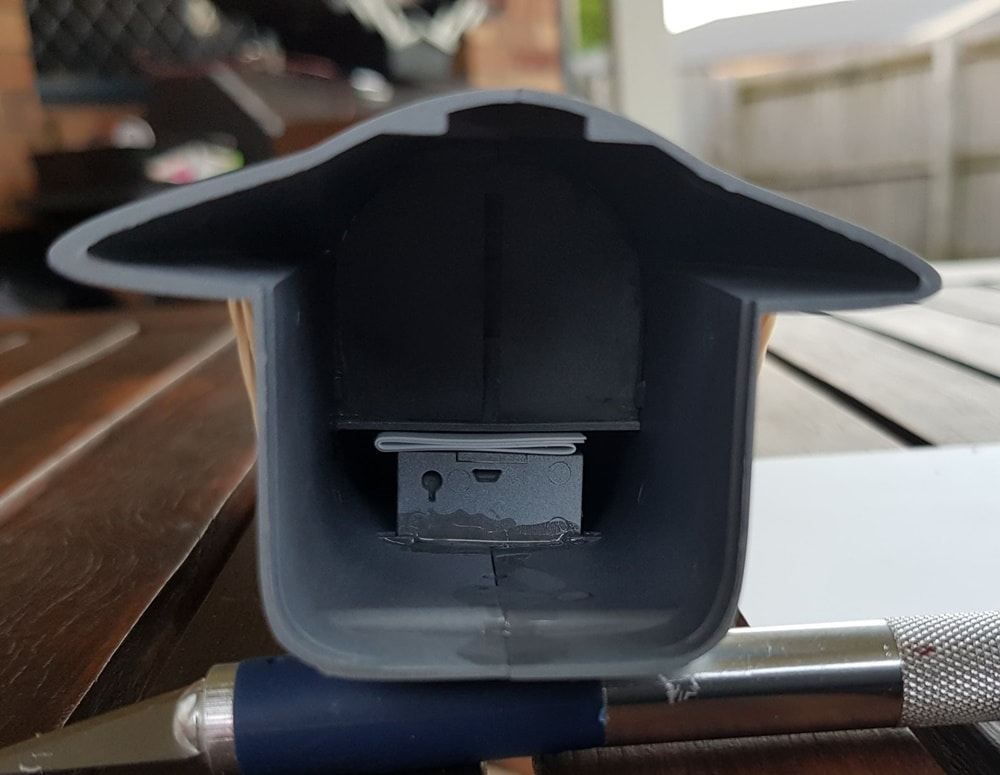
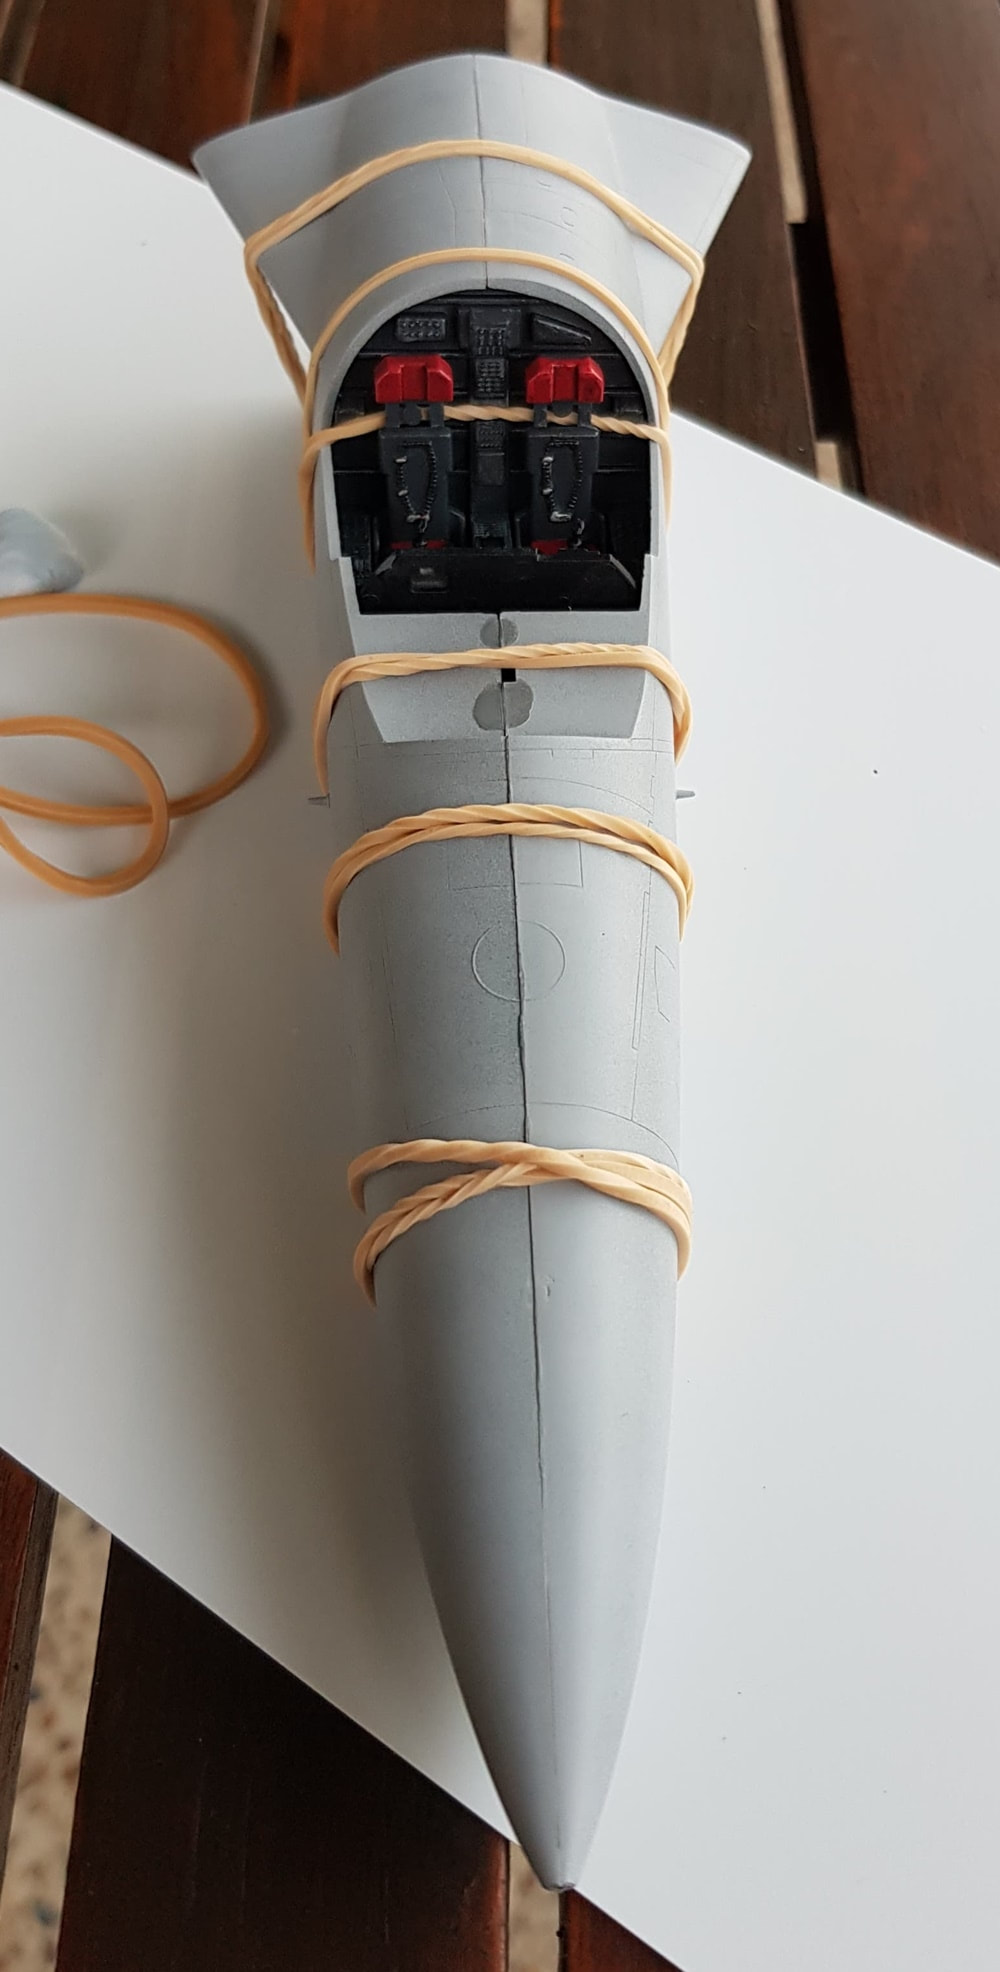
This model will have a fair bit of weight towards the rear with the folded wings, wide body and those massive tail planes and rudder, you need to add weight in the nose to avoid a tail dragger. I just used a big blob of bluetac and wrapped it around the biggest bolt that would fit. That was jammed right up into the nose and surrounded with glue. Once this front section was joined i jammed some card in between the wheel box and the cockpit to make sure neither would move. Bits that you can't get to once a model is glued together make me paranoid so i tend to overdo them. Memories of rattly planes as bits came lose inside as a kid. The fuselage was a very average fit, the whole length of the nose doesn't match smoothly and neither does the rear section, upper and lower. Putty and sanding, first time i have ever attempted this with a model and i was slightly worried about how it would come out. It needed two applications of putty and primer with sanding and drying time in between. I had read about plenty of issues online with the Tamiya putty regards drying times and warping/shrinking long after the application. I went with one thin application, maybe a mill or a mill and a half thickness let it sit overnight under my lamp and then sanded it down the next day. Same procedure for the next putty fill. So about four days in total. The shrinkage should really only happen on thick applications and no or little curing time, i feel i won't have any issues but I guess i'll know in six months or so.
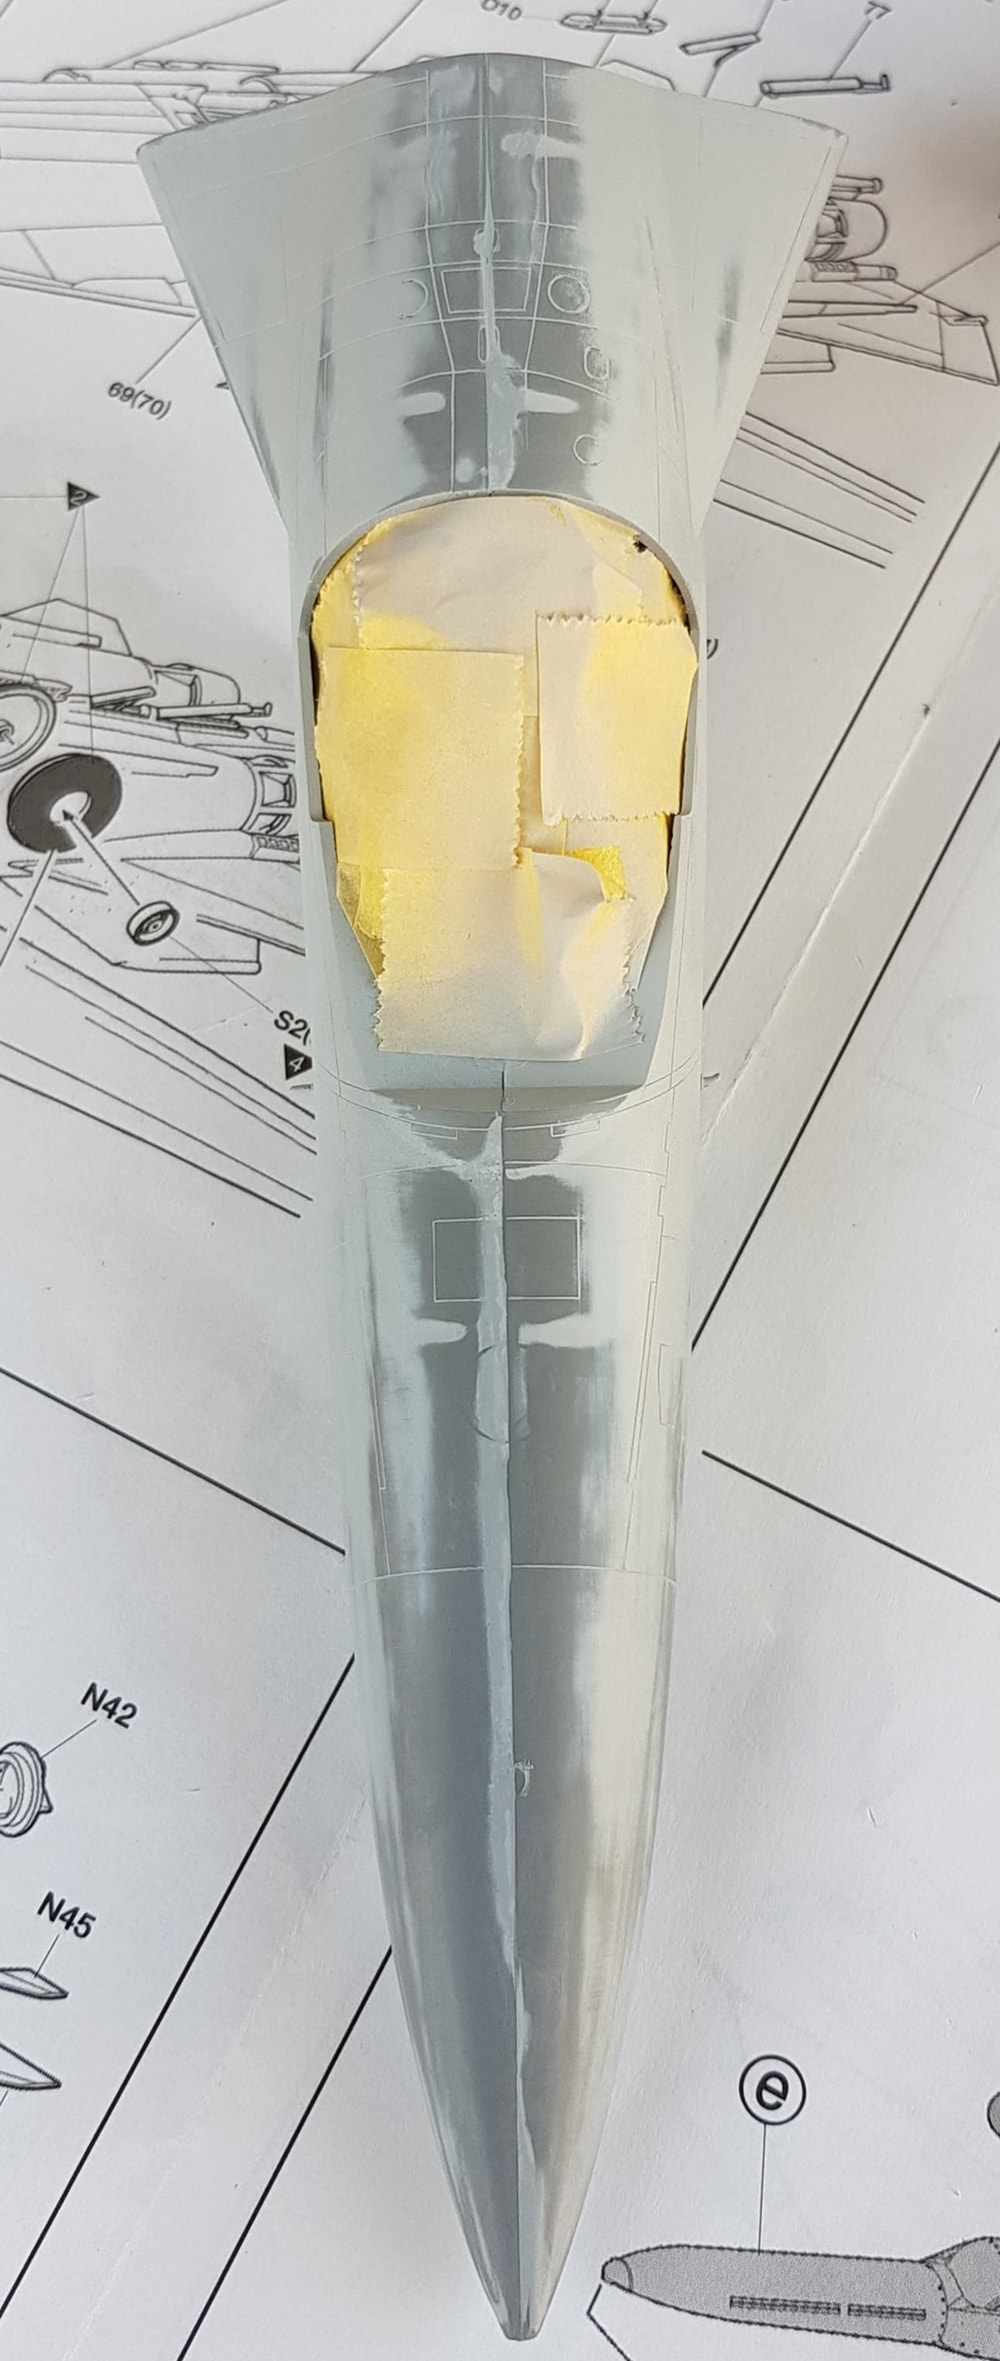
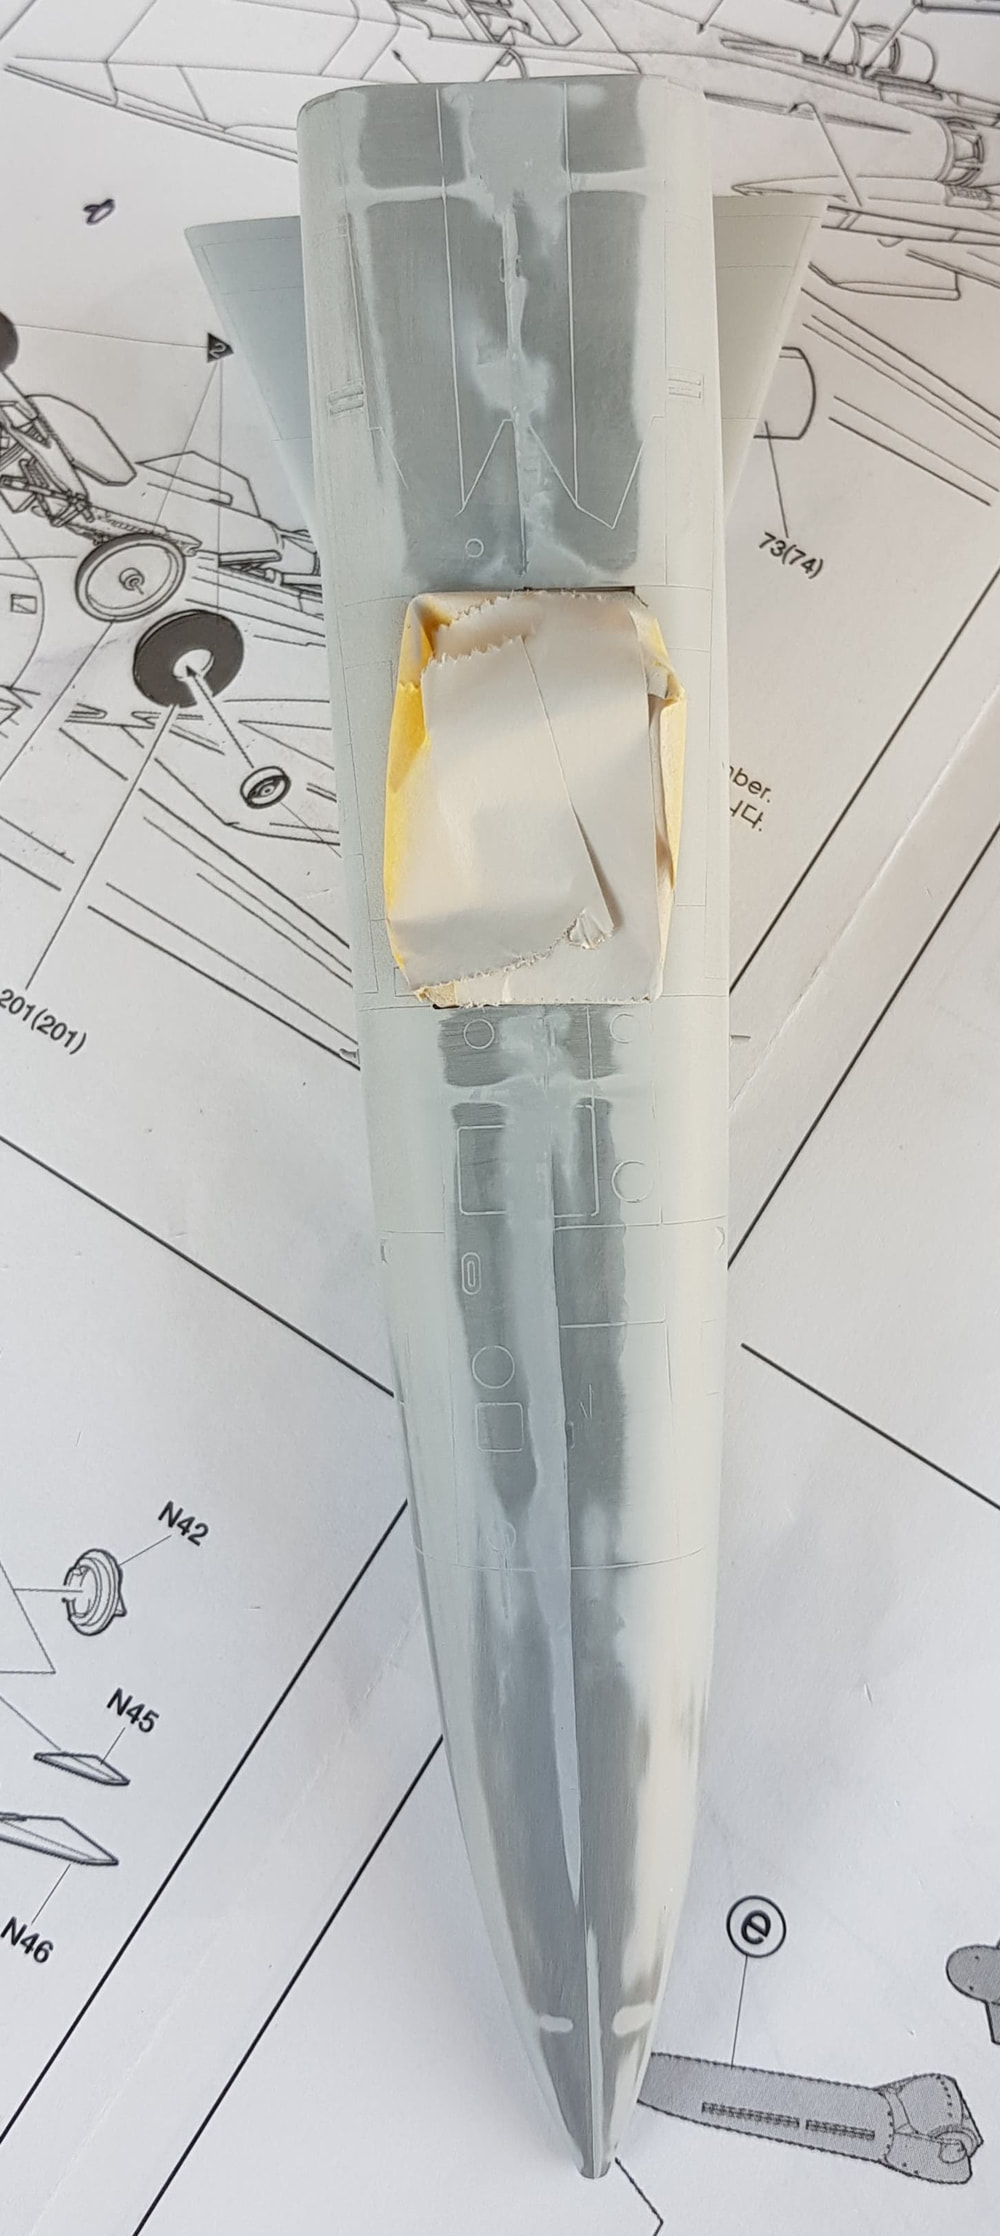
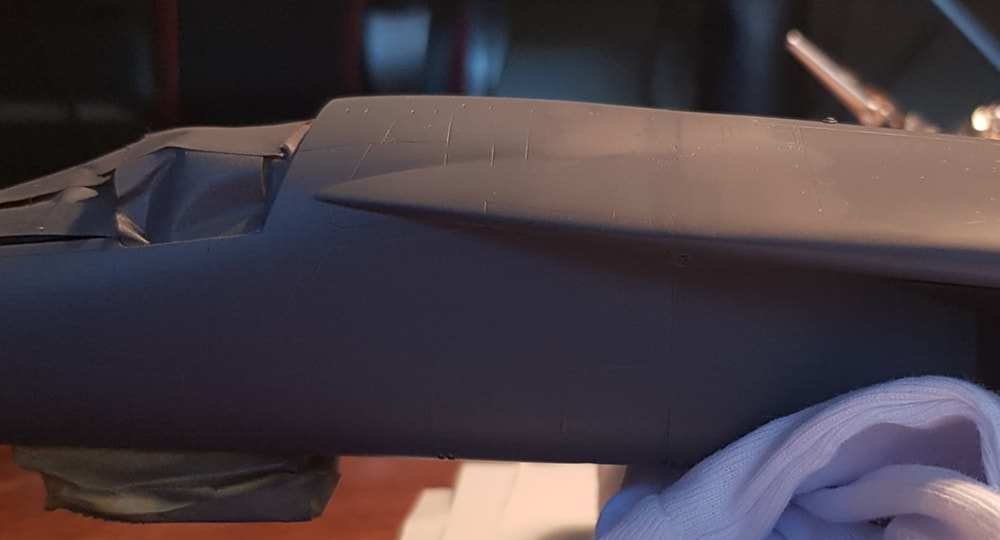
The issue i had now was i had sanded a shit load of fuselage detail out. Lines and such. I did have a go at re-scribing some but i just can't seem to get a straight line going to save my life. Then there were circles and ovals..this was something i was going to have to suck up and learn about and invest in some tools to do properly. This build got no re-scribing as much as it pained me. Once the front section was smooth and looking good i gave it a hit with the Tamiya gunship grey to see how she looked all up so far. Mainly impatience led me to painting it at this point. The nose was masked and painted matte black and i masked and did my first coat on the cockpit glass. I was still using spray cans at this stage of my modelling builds.
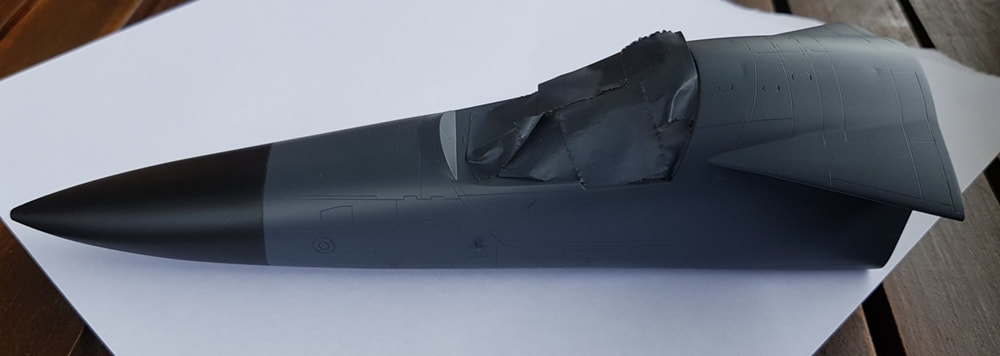
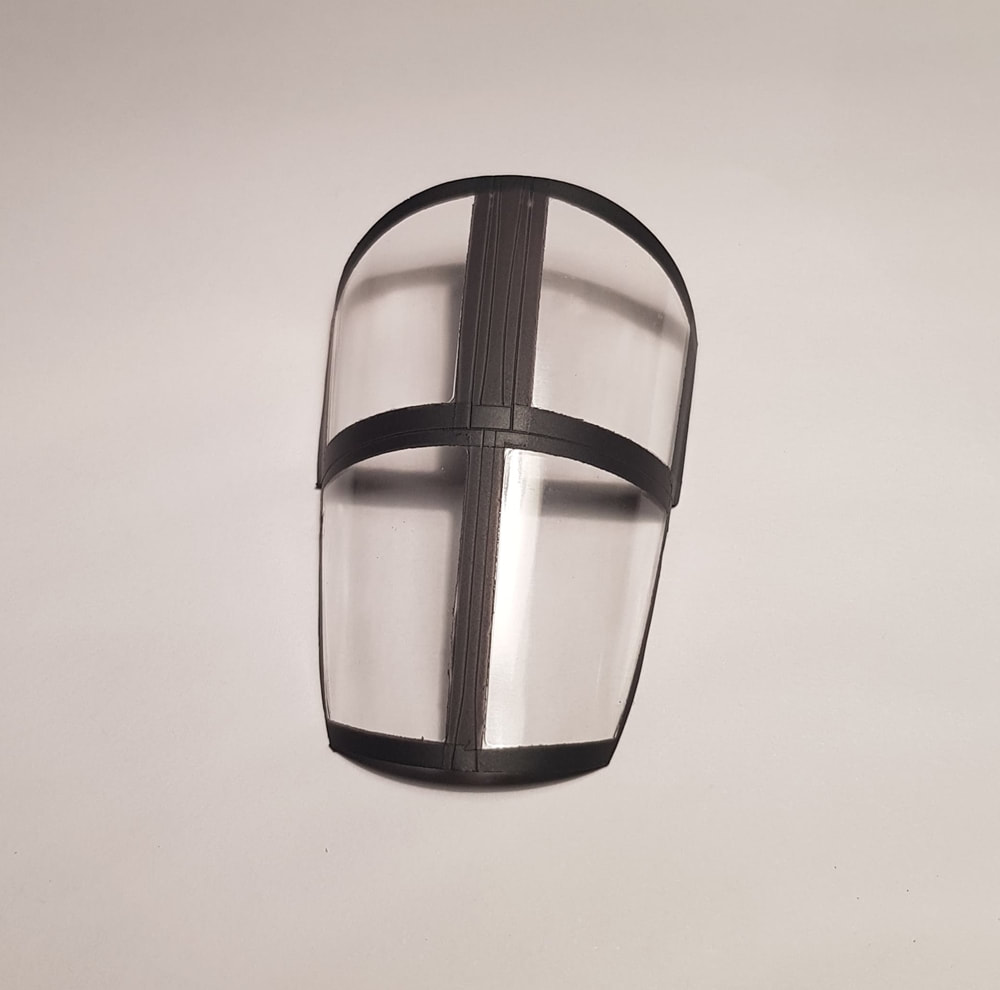
The cockpit glass was not a neat fit. It fit's either crisp one side or the other, not both and has a gap at the front and rear. This is still a work in progress and i have not glued it yet a month after the build was finished. I've been thinking about applying some low and slow heat and then putting a slight weight on top of it to see if i can get it to maybe flex into position. I need to think about it some more yet.
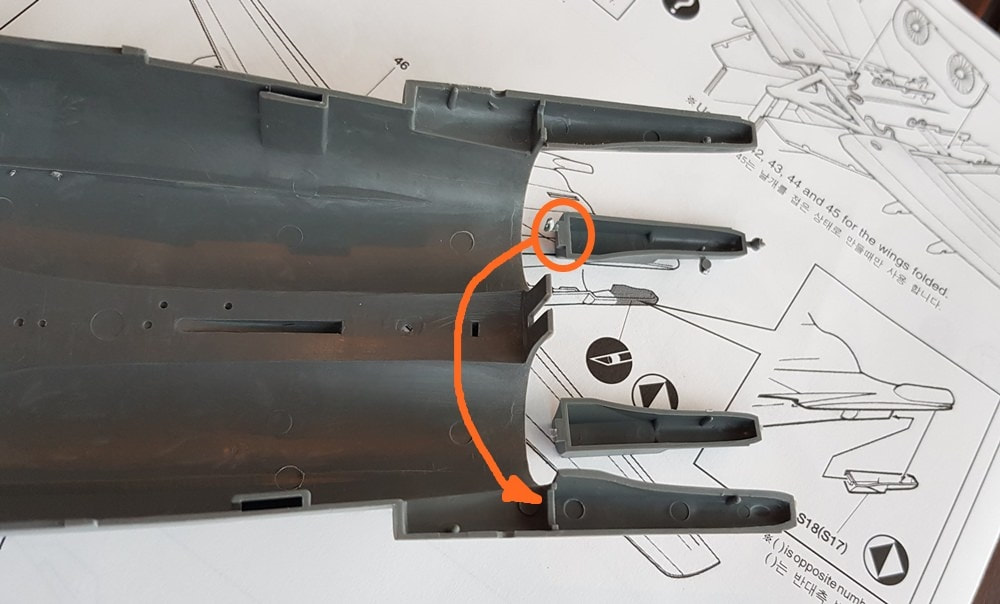
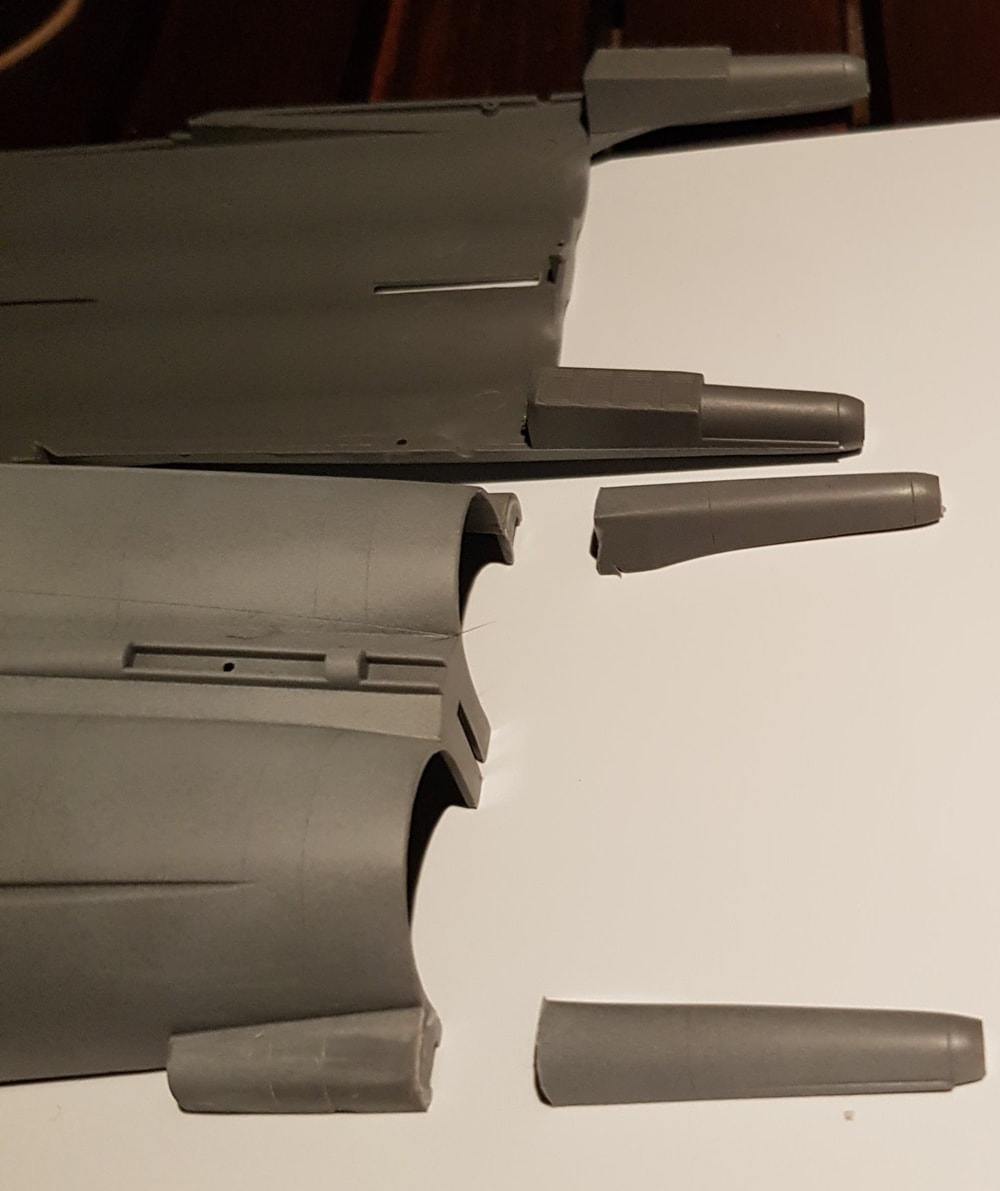
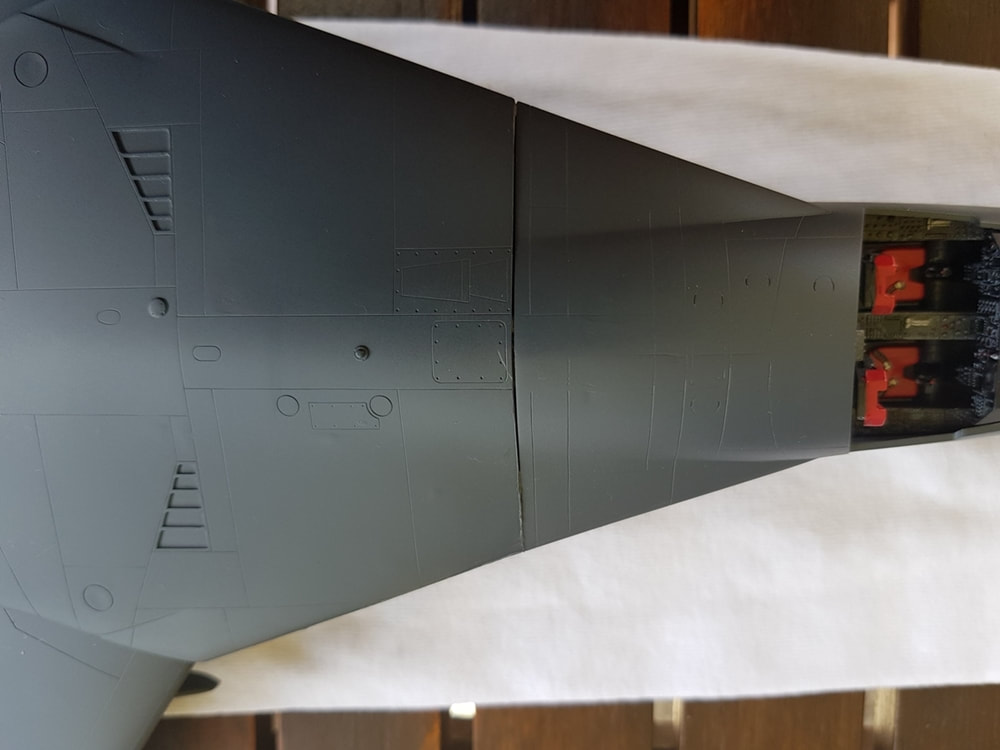
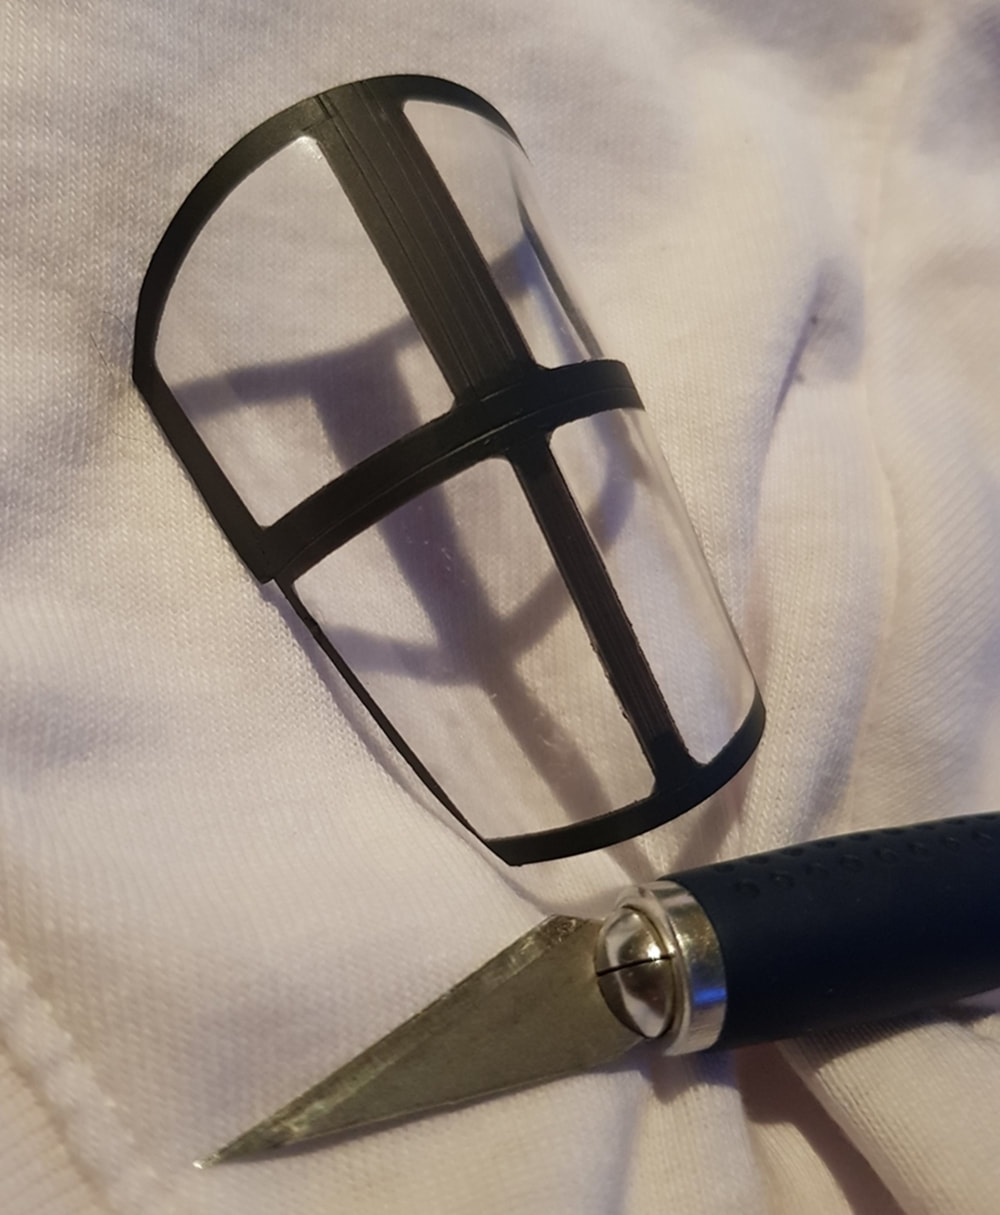
The end tips of the lower rear body have to come off and be changed for chaff dispensers. The kit gets the tags wrong for the replacement ones as. The circled tag fits the opposite side and vice versa. Easy enough to chop the tag down to suit but it had me scratching my head for a minute wondering if i was looking at it wrong. I went slow and easy with the hobby knife to make sure of a clean cut and then glued the chaff dispensers to the top section of the rear fuselage. These would need some minor putty work to hide the small gap left over from the cut.
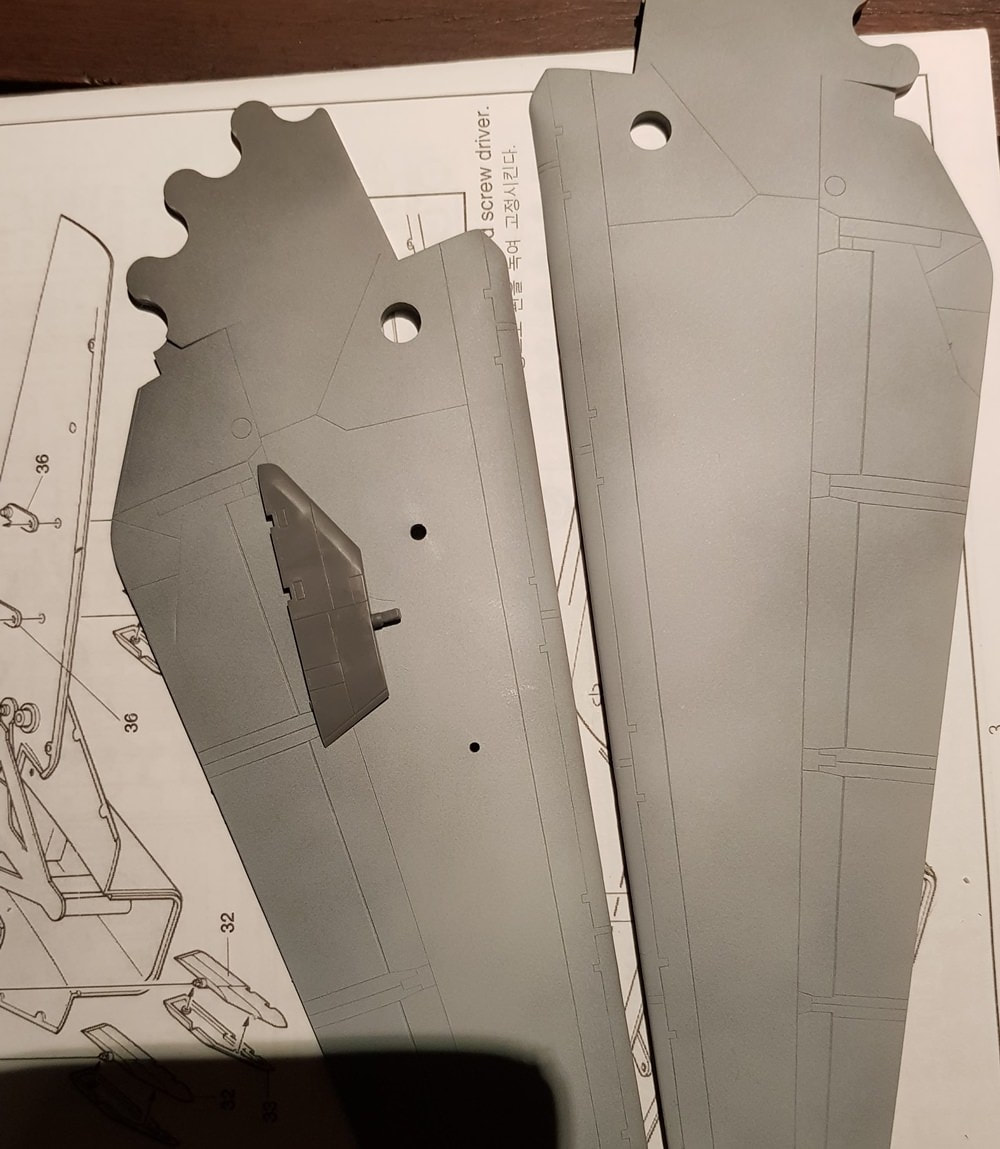
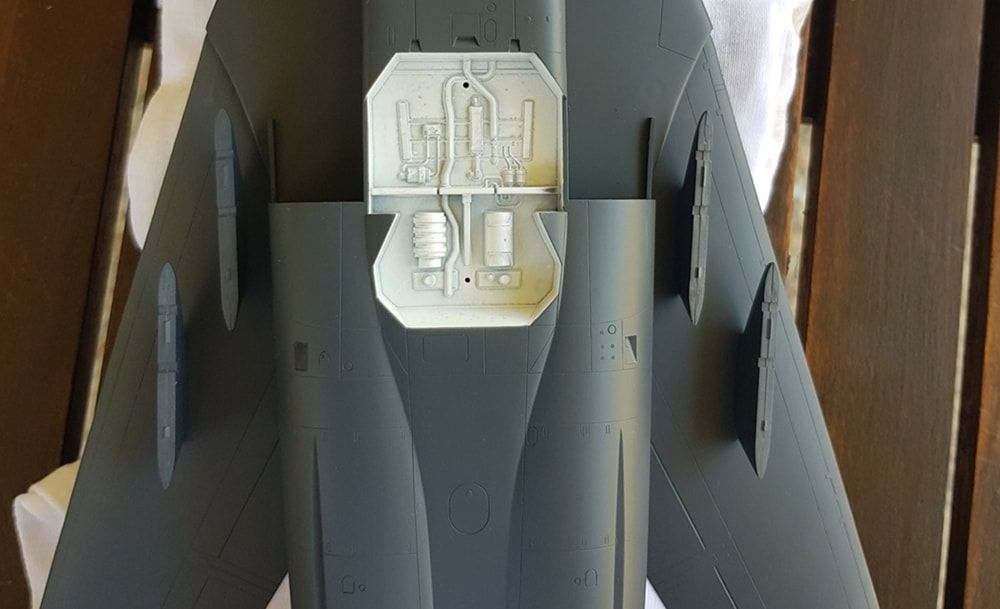
The hole i thought i had to make, small one, versus the hole that had to be made. Making holes in important parts of models always freaks me out. The loadout pylons poke through the lower wing and then are glued to the swing wing mech levers inside the wing so they stay forward facing whilst the wing moves. Sounds good in theory.
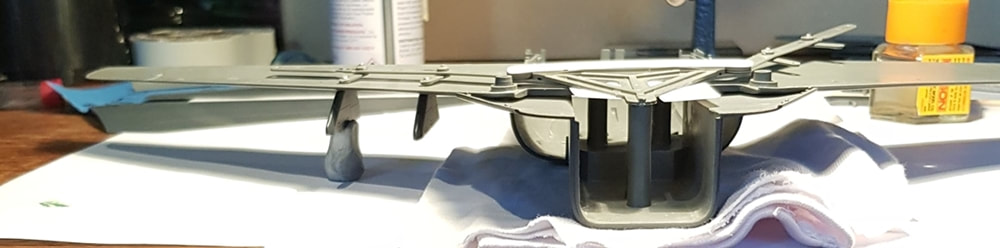
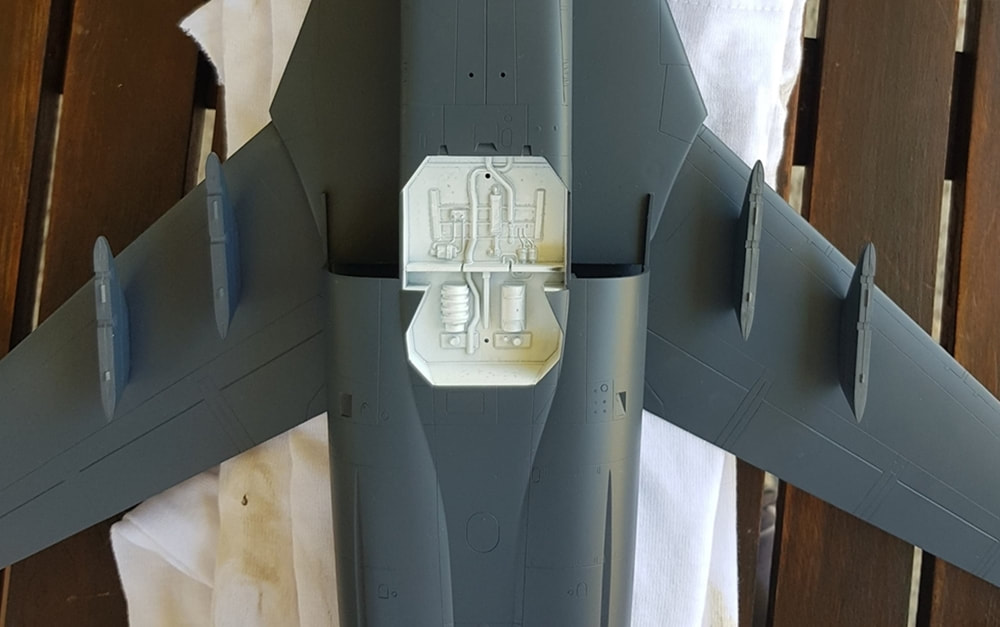
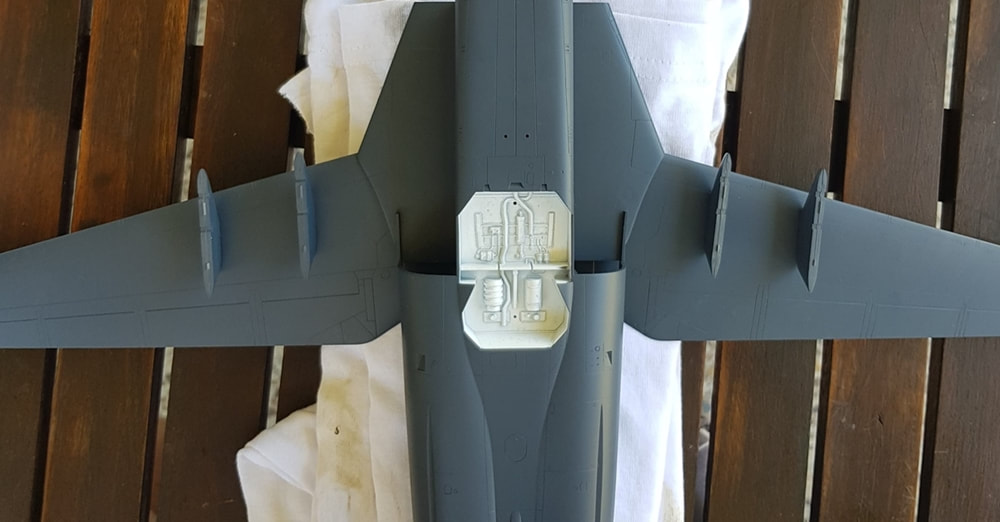
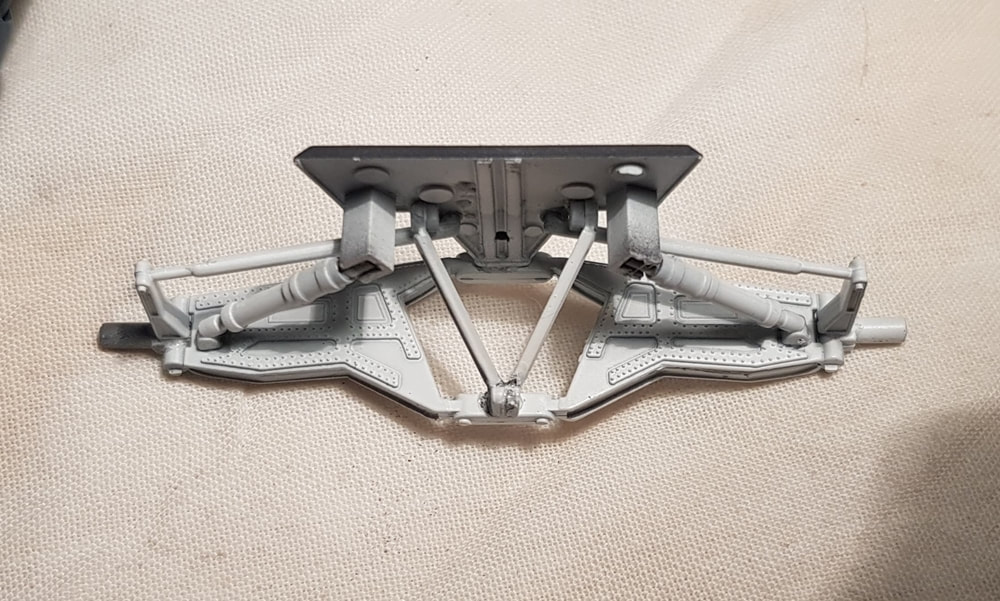
I should have got a pic of the swing wing mech before rework to compare but it's all pretty basic anyway. The big plastic teeth (above) that mesh on the wings were grabbing on the main middle triangular mount when opening and closing. I mounted card top and bottom so they could slide past smoothly. No chance to fix it once the body is glued. The horizontal piece on top is my strengthening attempt to stop the wing arms ever coming loose. There is some more circular card and plastic washers underneath for extra reinforcement. Not my greatest work but it does the job and makes me confident it will last a lot longer than how it was straight from the kit.
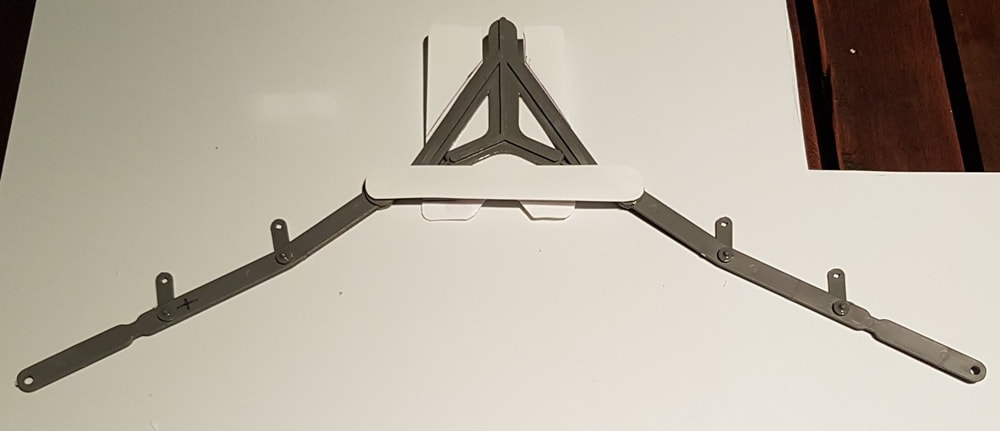
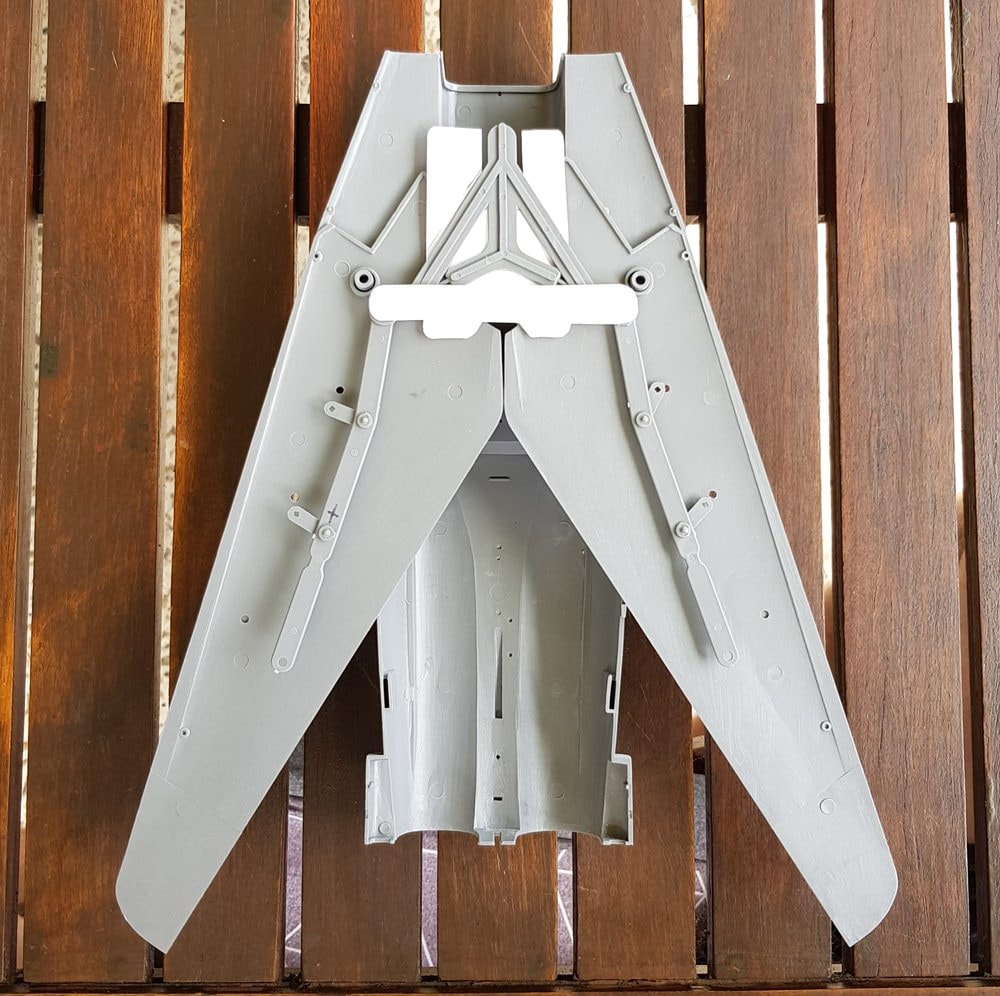
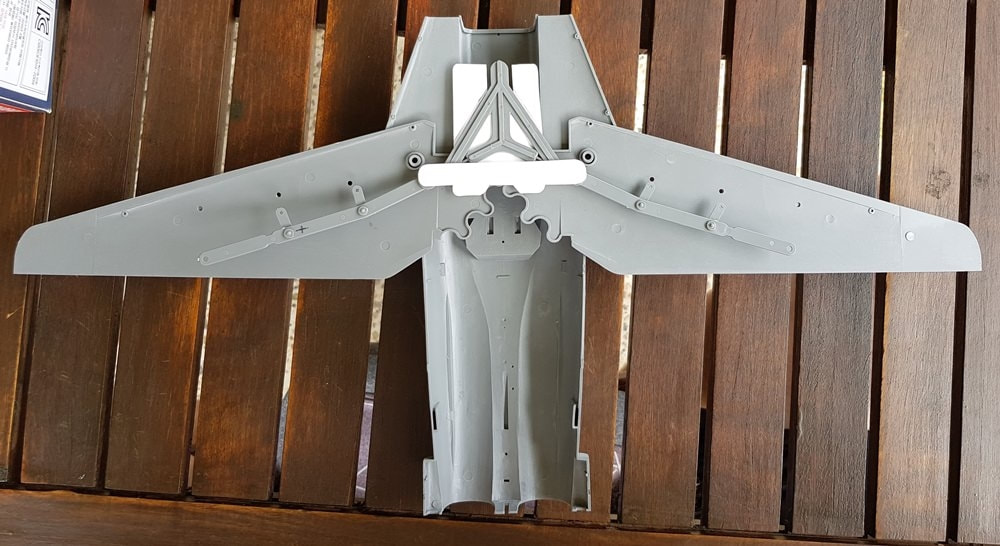
Checking to make sure it all opens and closes smoothly. You can see here how the card stops the teeth interfering with triangular mount.
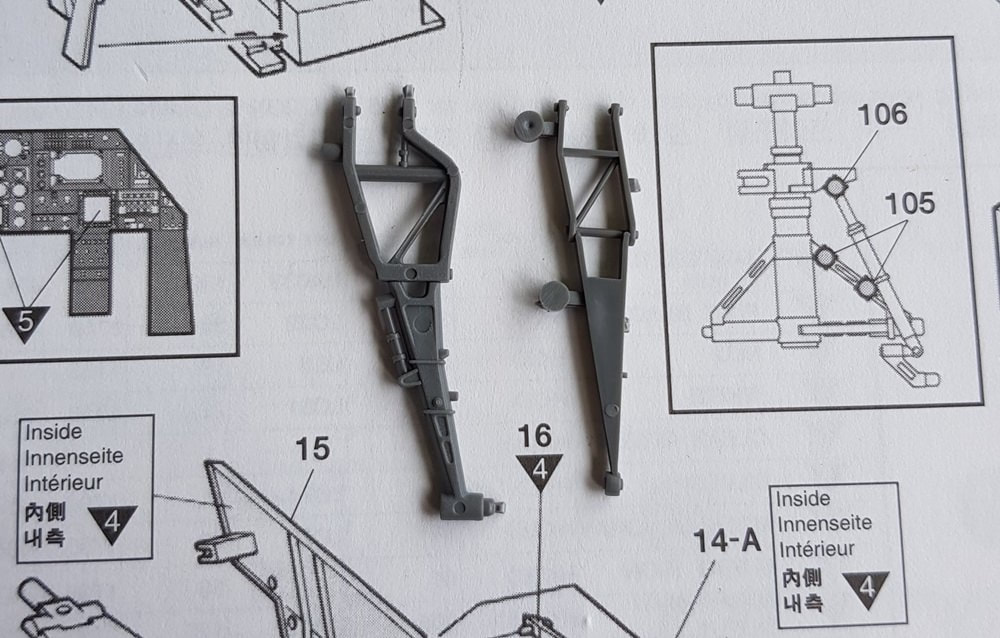
One nice thing this kit offers is updated parts sprues. You get the old parts as well, the difference is chalk and cheese.
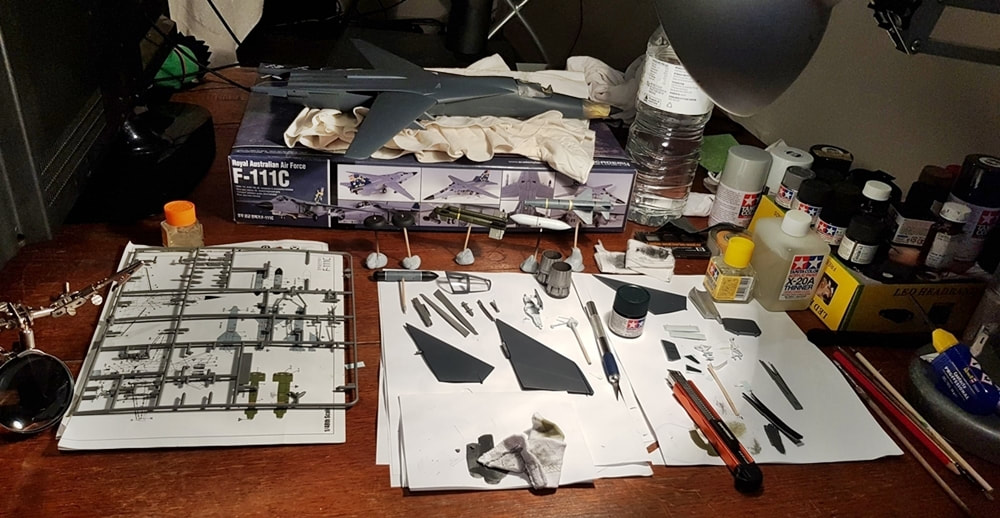
Once i had the swing wing operation all working nicely it was time to get together all of the parts needed so i could put it together in one hit. This is everything primed and sprayed and ready to fit up. The pylon mounting points don't locate very well into the swing wing joints so they all required work. I had to carve the ends of the pylon mounts into a better shape and then recut the wing lever mount holes to suit.
The pylons were mounted one side at a time, extra glue dabbed on top of the wing lever so hopefully they don't come loose once the wing is sealed. With the work i had done by reshaping the pylon mounts and the mount holes it was a pretty tight fit so it should be good. You have to be nice and gentle with this whole setup though. I let this set overnight before i went any further.
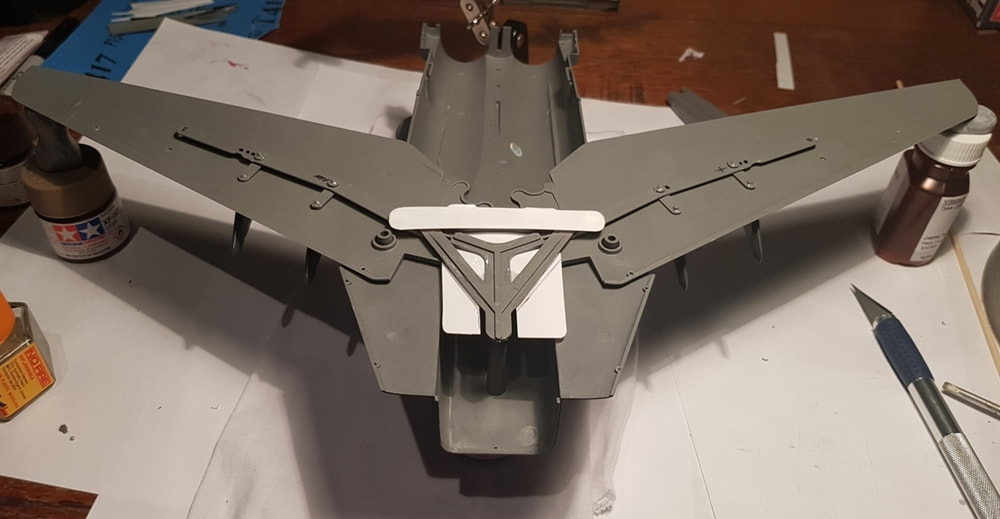
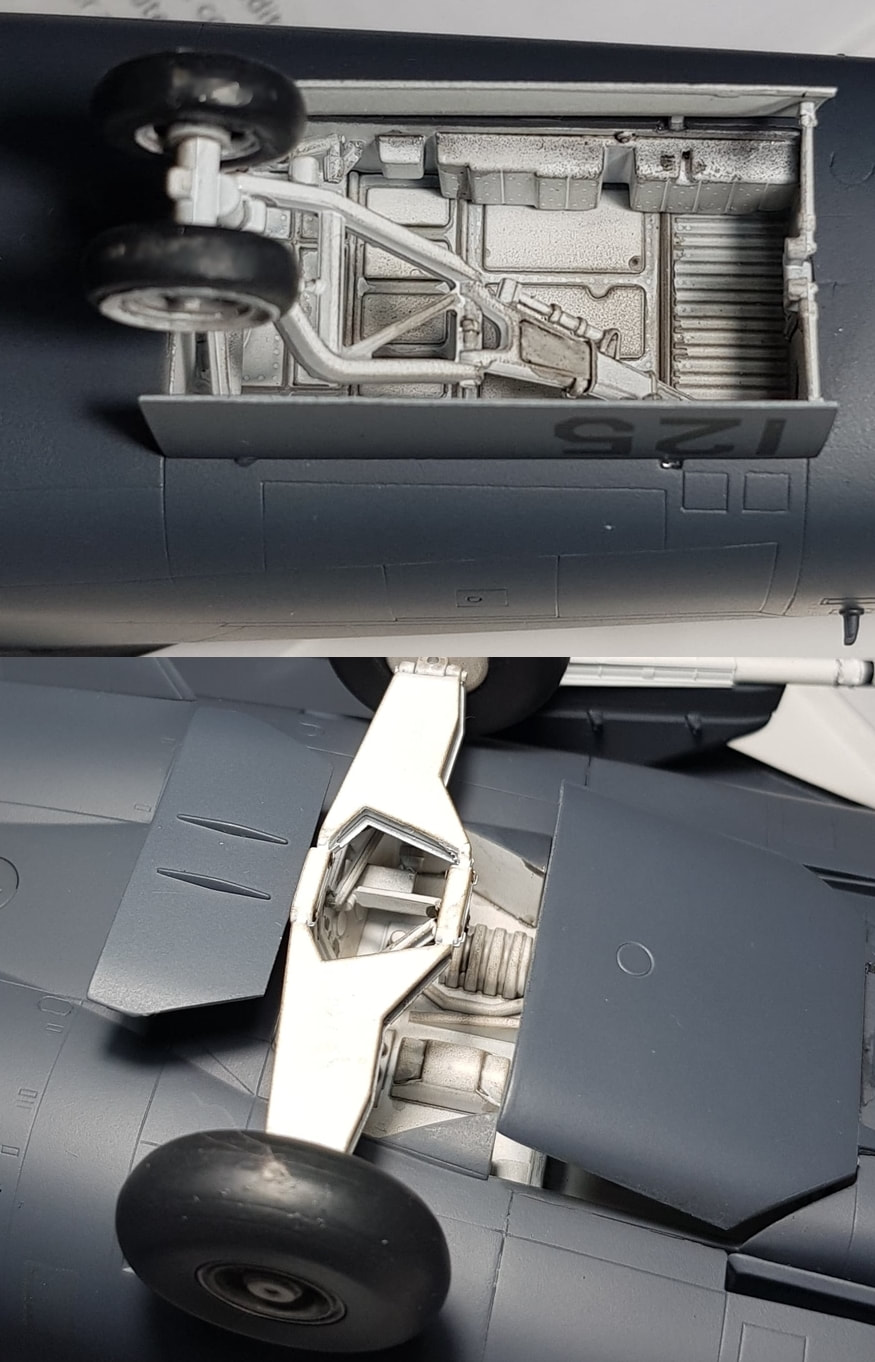
The next morning i mated the wings and once dry did a full swing of the wings to see how the pylons would fare. It wasn't too bad but could have been better. They didn't go fully straight when extended but i was happy with the result knowing it was a lot stronger and would last. The white in the undercarriage bay i laid on too thick, which accounts for the rough looking finish. I've since discovered you need many thin coats and more drying time in between with whites and yellows. My mistake, lesson learned.
Both wings needed putty and sanding as they overlap at the edges. Another average fit unfortunately. This only required one layer to hide the overlap with a sand and then a minor putty to clean it all up and get the edge correct and smooth. Still a few good hours plus drying time and repaint.
The dreaded hump. Even though there had been a few obstacles, this one was the one i was worried about. With the bottom and fuselage sides (basically a box section) as neat as it will fit, this is what you end up with and have to fix. This is also with a large piece of sprue i cut and placed inside to force the rear section of the fuselage up to match the front join as good as possible. Without the sprue it is a lot worse than these pictures.
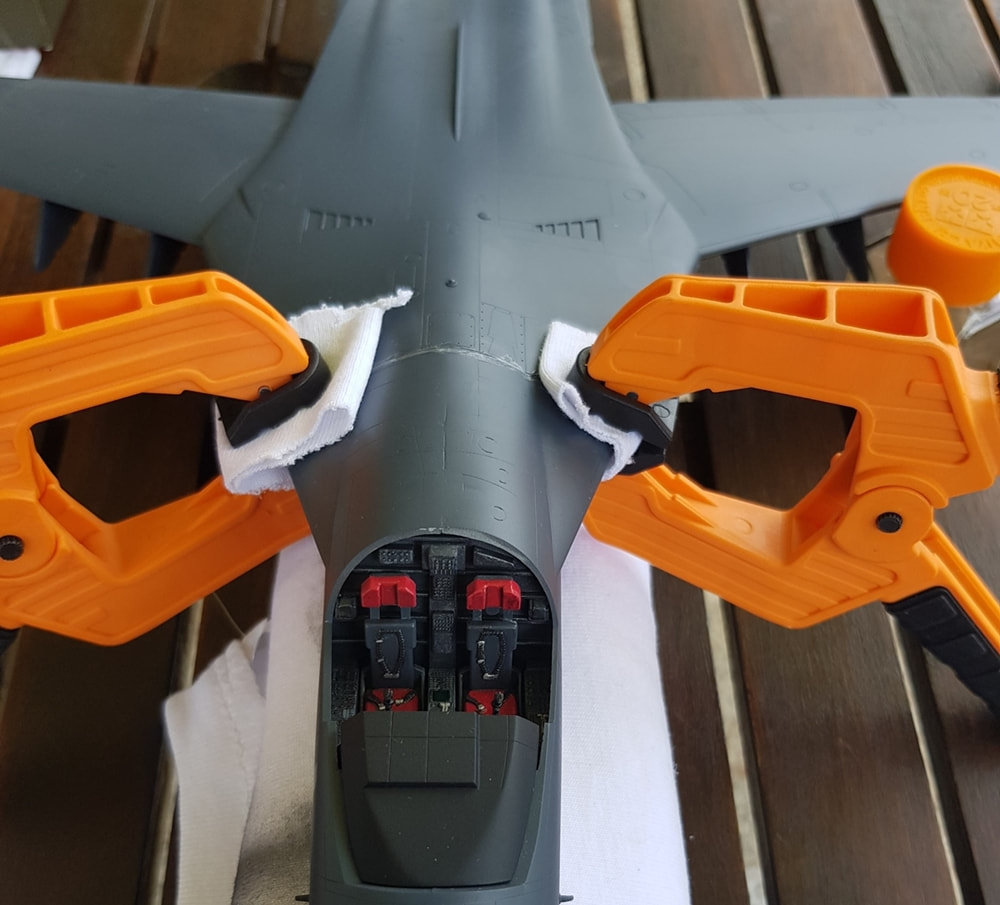
Once i had the sprue brace sitting inside, glued and dried, i went to work getting the best fit i could to minimise the amount of putty the hump would require. I had a bright idea and rushed off and bought some three dollar clamps to hold it while it set. This ended up being a mini disaster as you shall see!
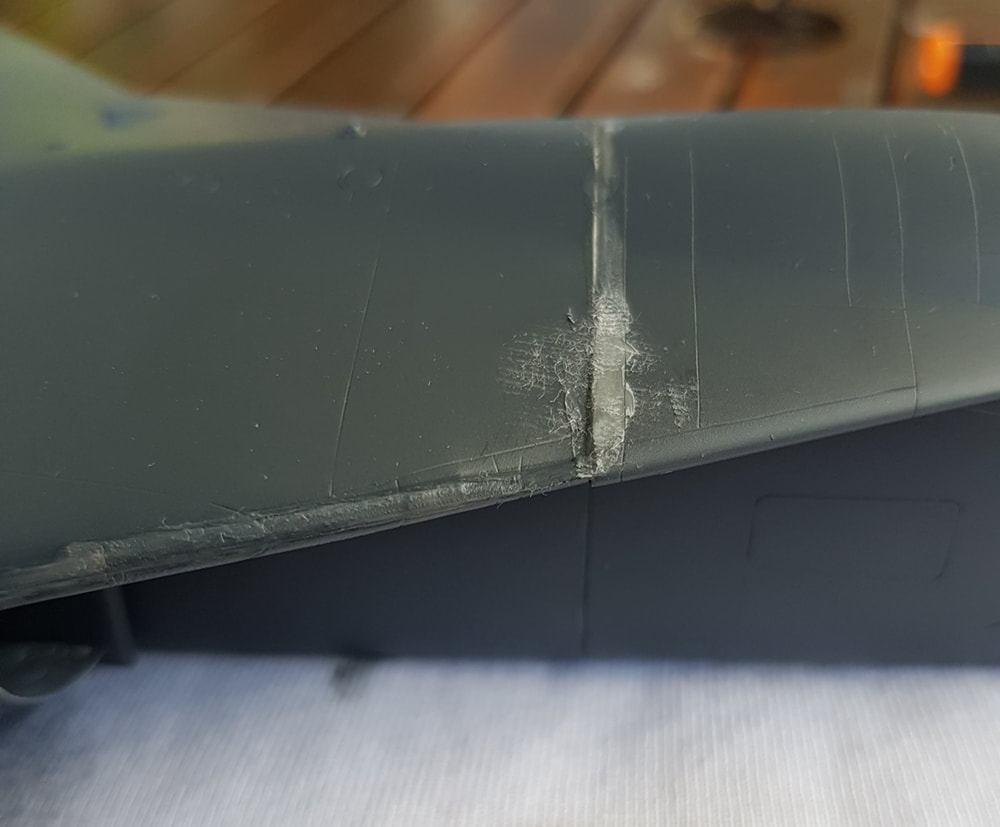
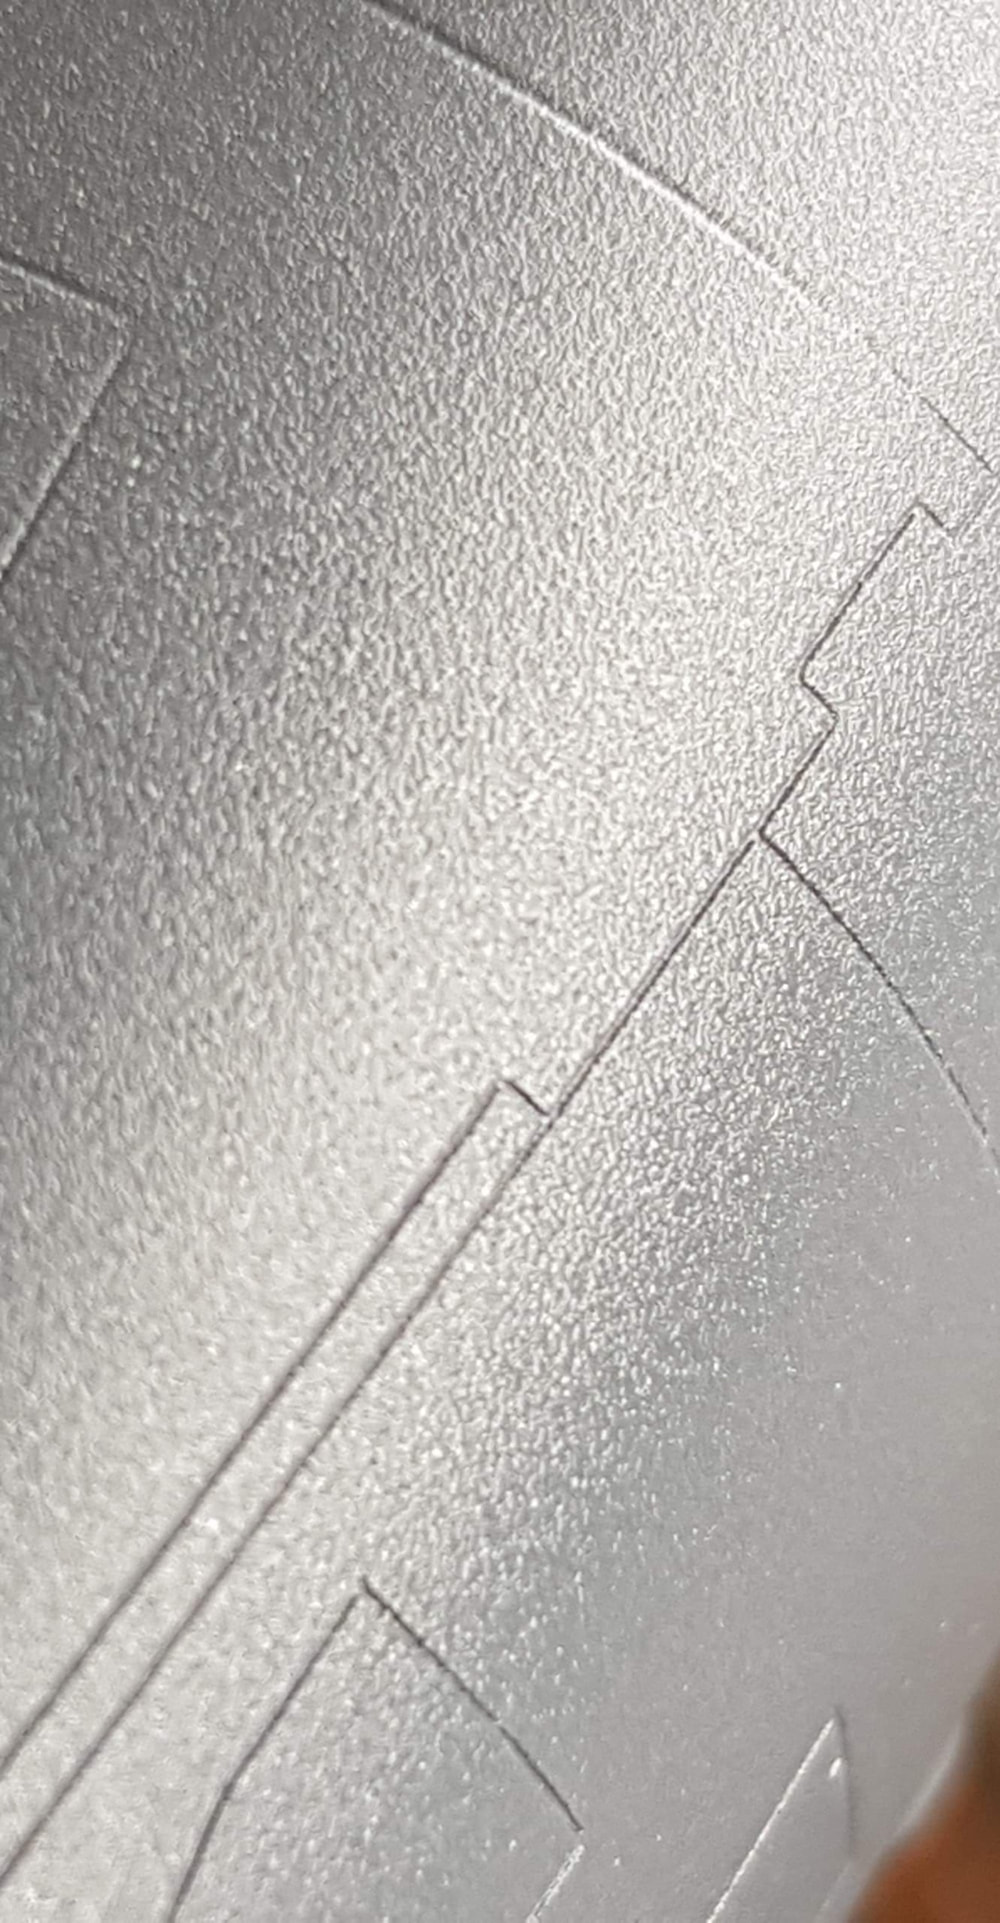
The clamps had way to much oomph and now i had some more work. First putty pass and sanding, goodbye to some more lines and fuselage detail. Throughout this build i used 600,800, 1000 and 1500 grit wet and dry.
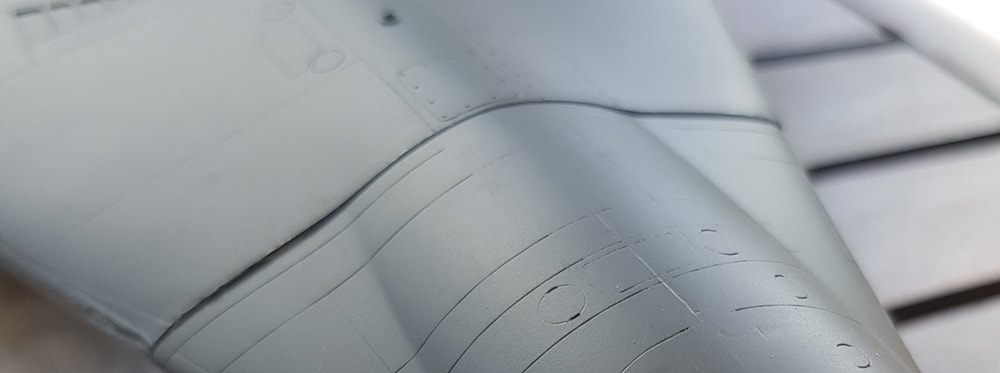
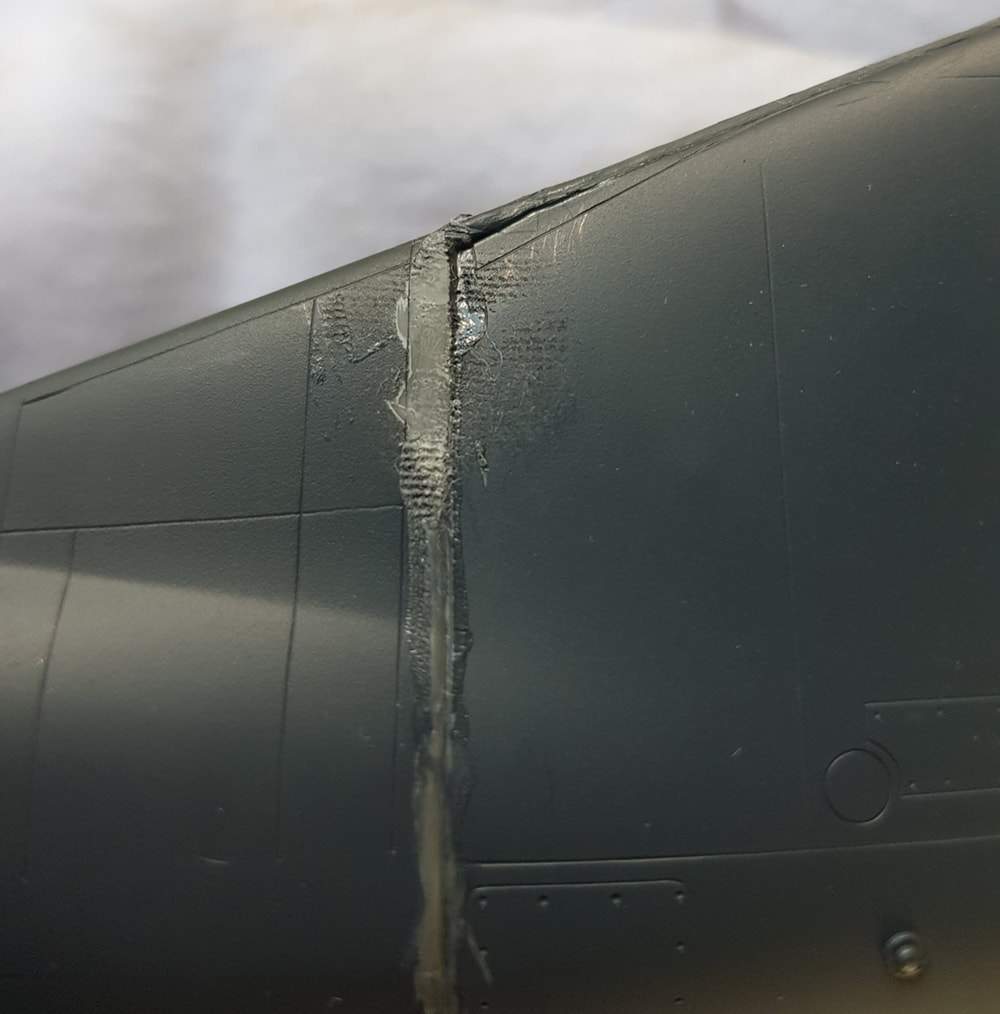
Second pass and a thin coat of paint so i can see how it is all going. Still a bunch of pin holes and some join marks, slowly starting to happen though.
Third and final putty and another coat to highlight my work. Any detail in this area has mostly been sanded off. Bummer, but least that hump was sorted.
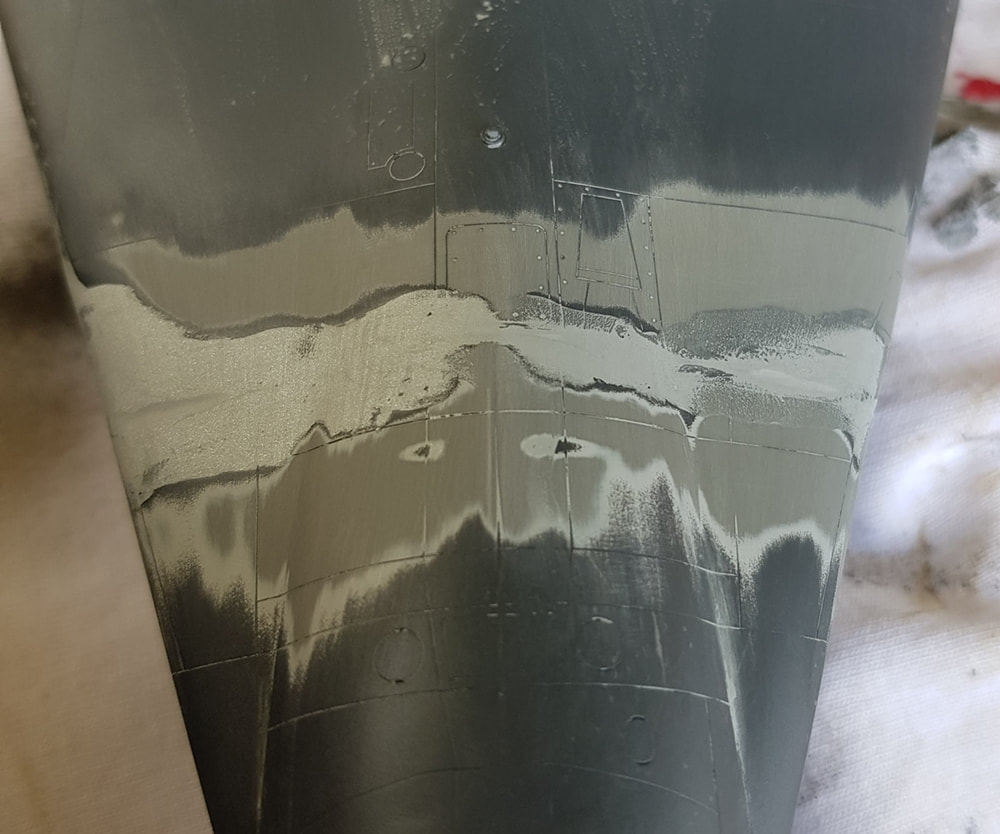
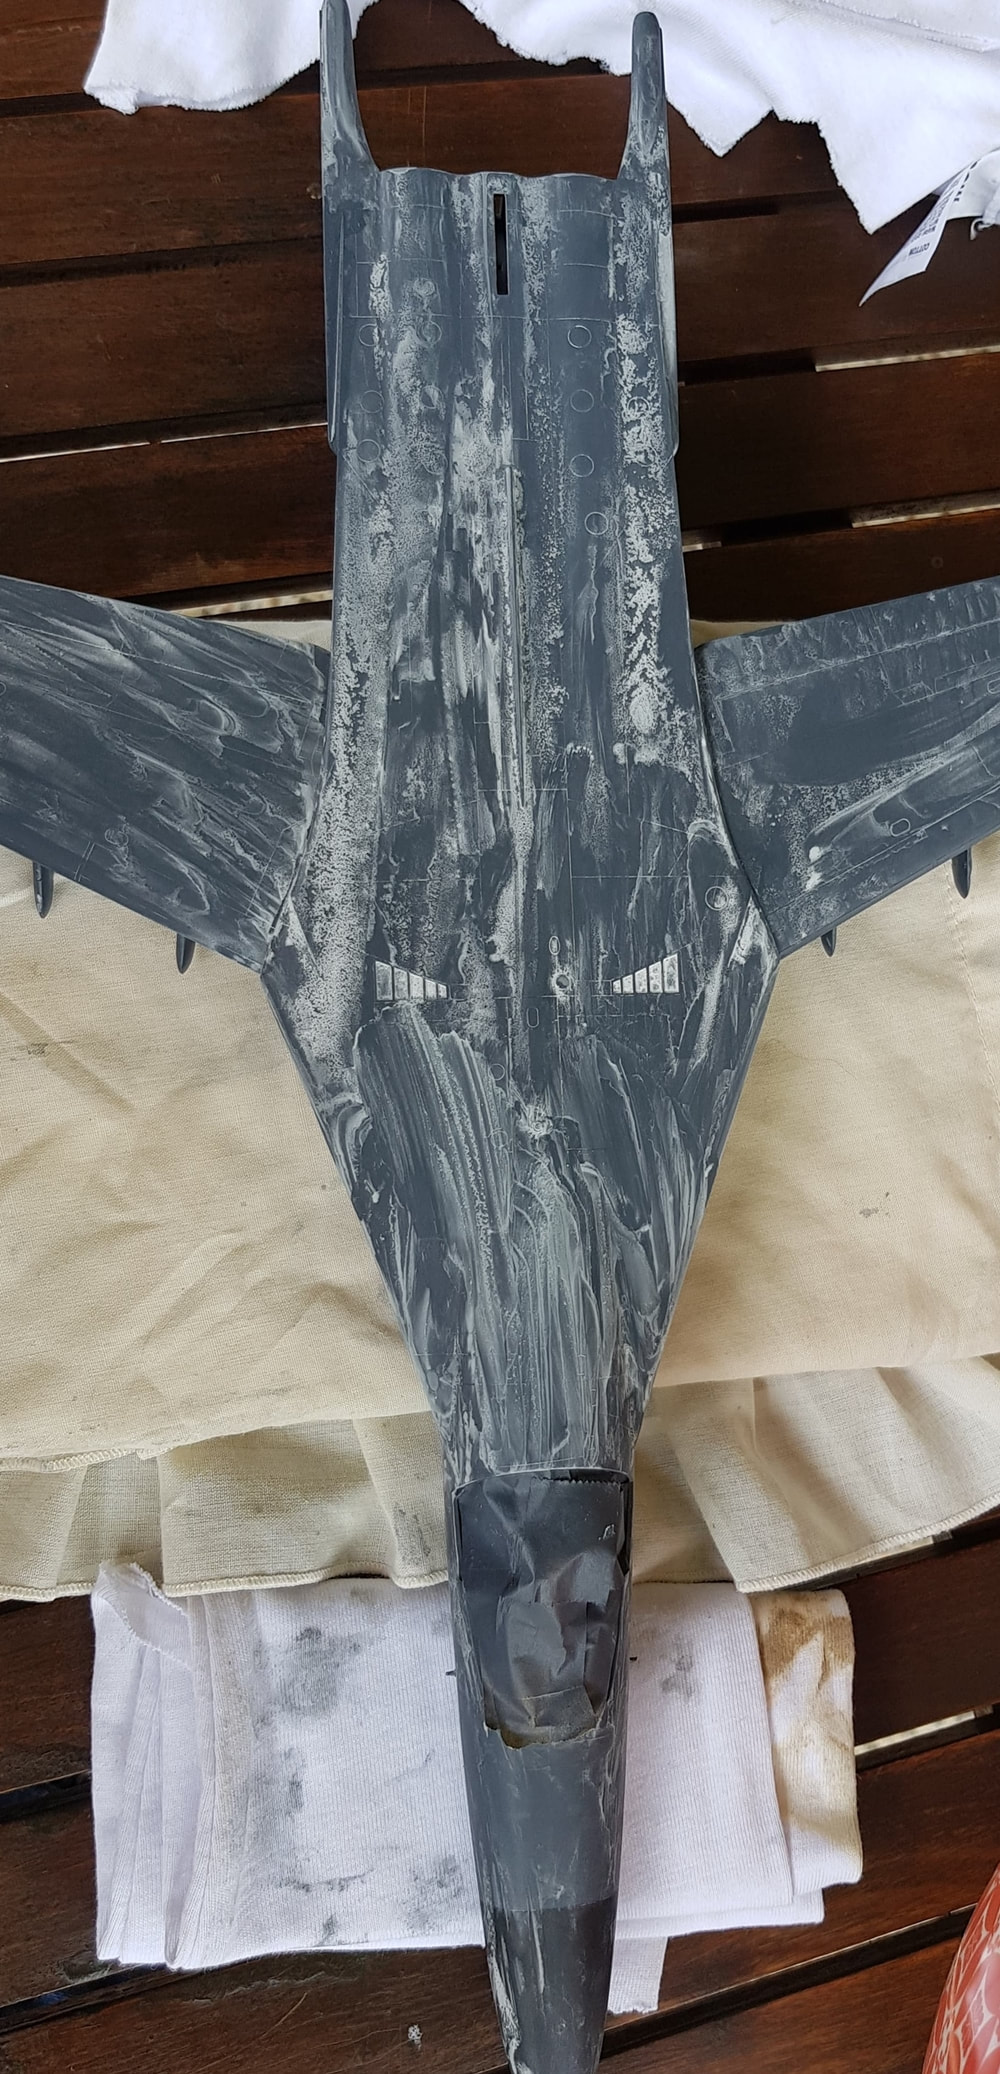
The whole fuselage got a light rub down and clean up from here and a last coat of gunship grey. After all my handling and sanding it needed it. In hindsight this should off been the first coat of gunship grey to go on. I had sort of jumped the gun on that as i was worried about getting the wings covered properly once they were hidden in the fuselage, but still being able to be seen. So anyway, i put down a semi gloss clear so i could spend a few nights laying decals. Enter the next disaster :) Whether the semi gloss paint had reacted with the top coat or it was too humid, i don't know but the end result was terrible.
There was no hiding that mess. I packed it away for the night to take a break and get ready to attack it the next day with renewed vigour. I really don't think this F-111 liked me at all. There was only way out of this mess, more sanding, which is what the next morning was, wet and dry the complete mess, rinse it all off and let it dry in preparation for another and hopefully final top coat.
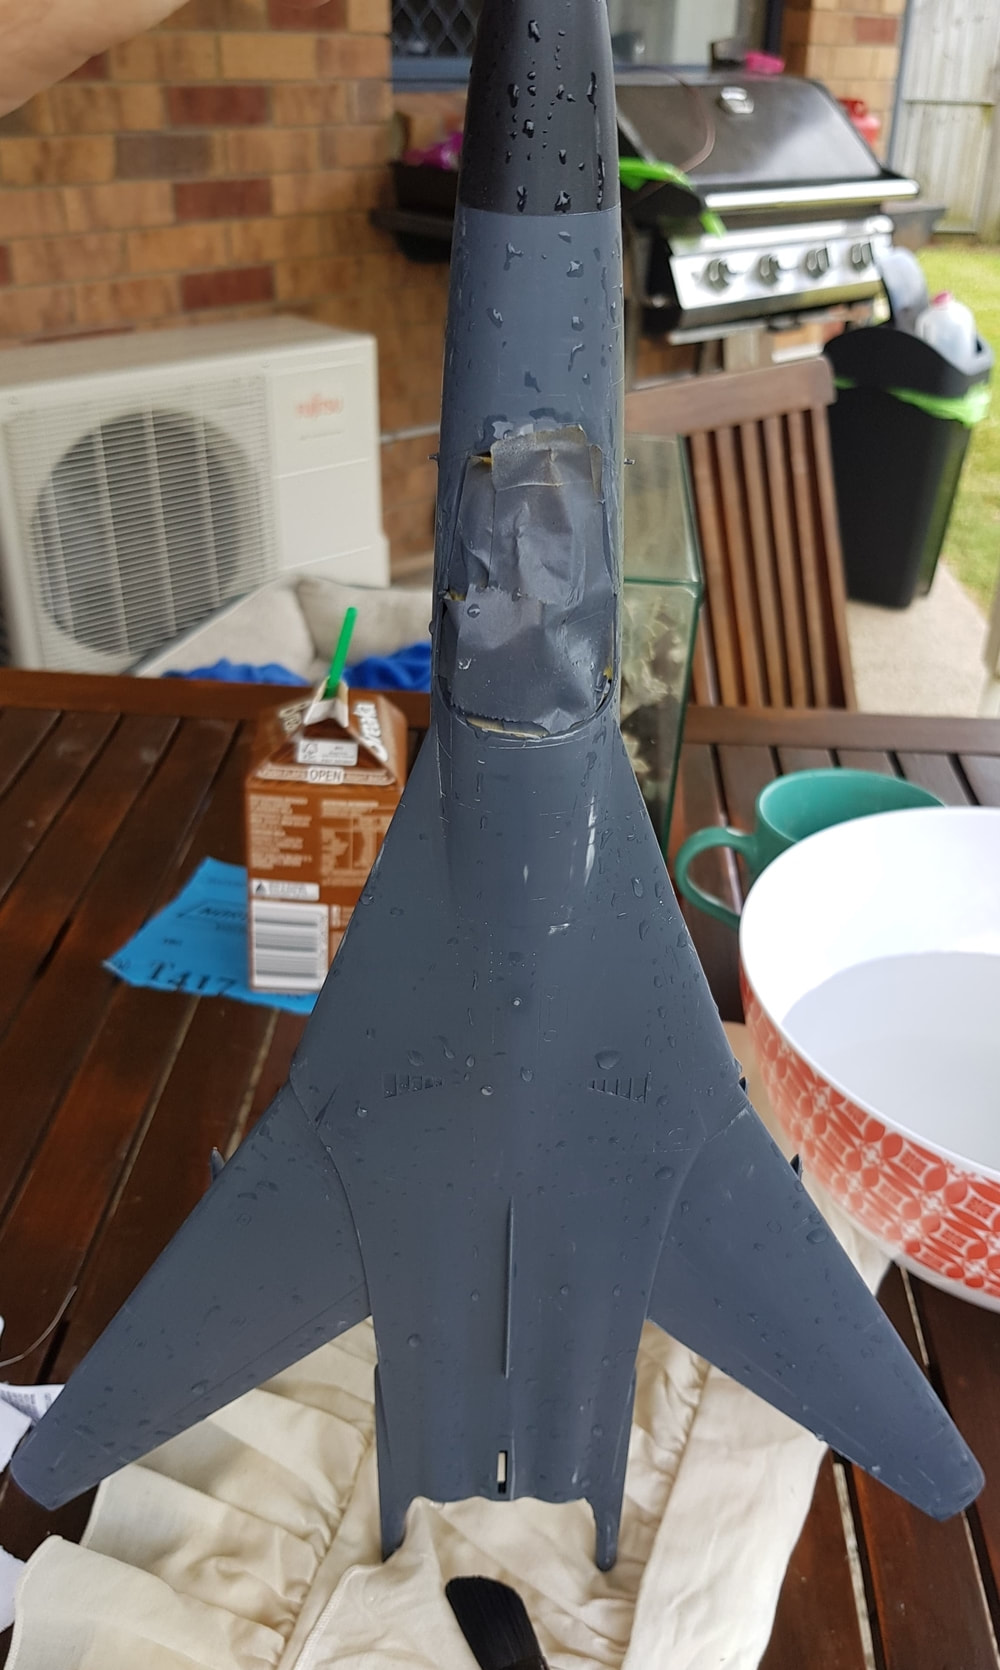
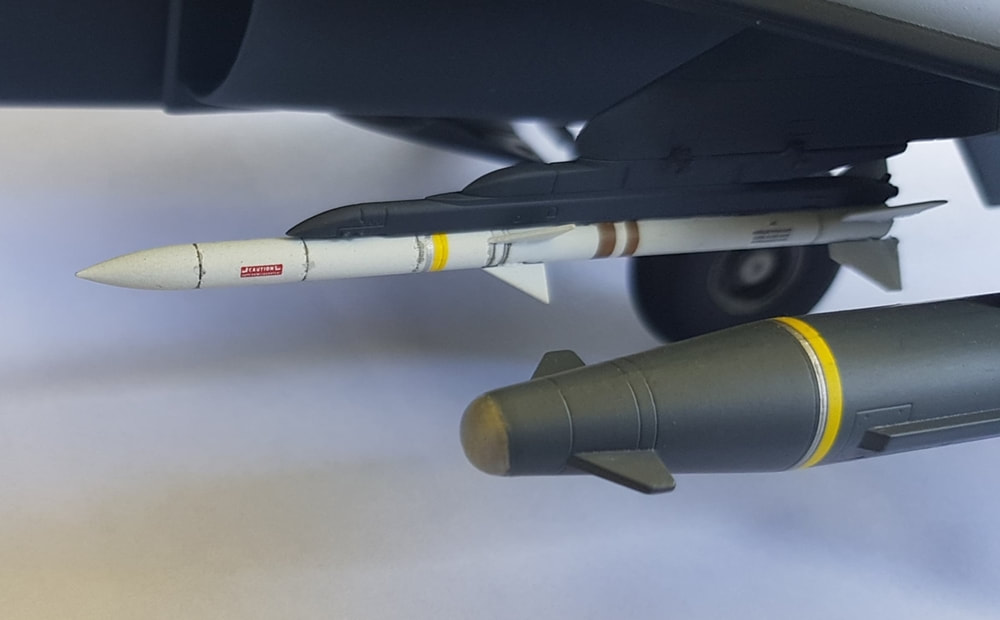
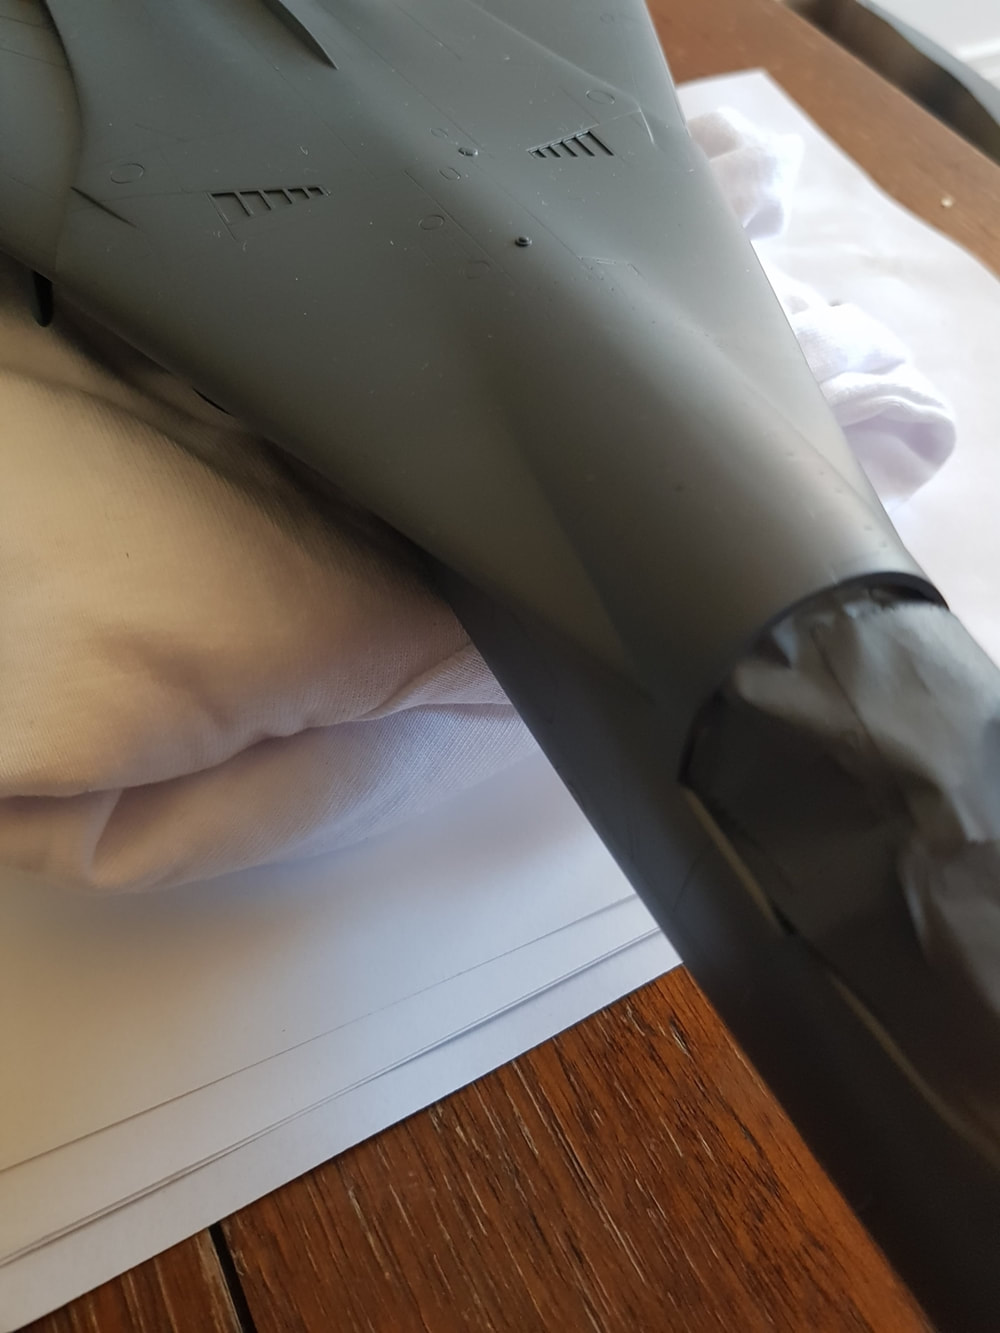
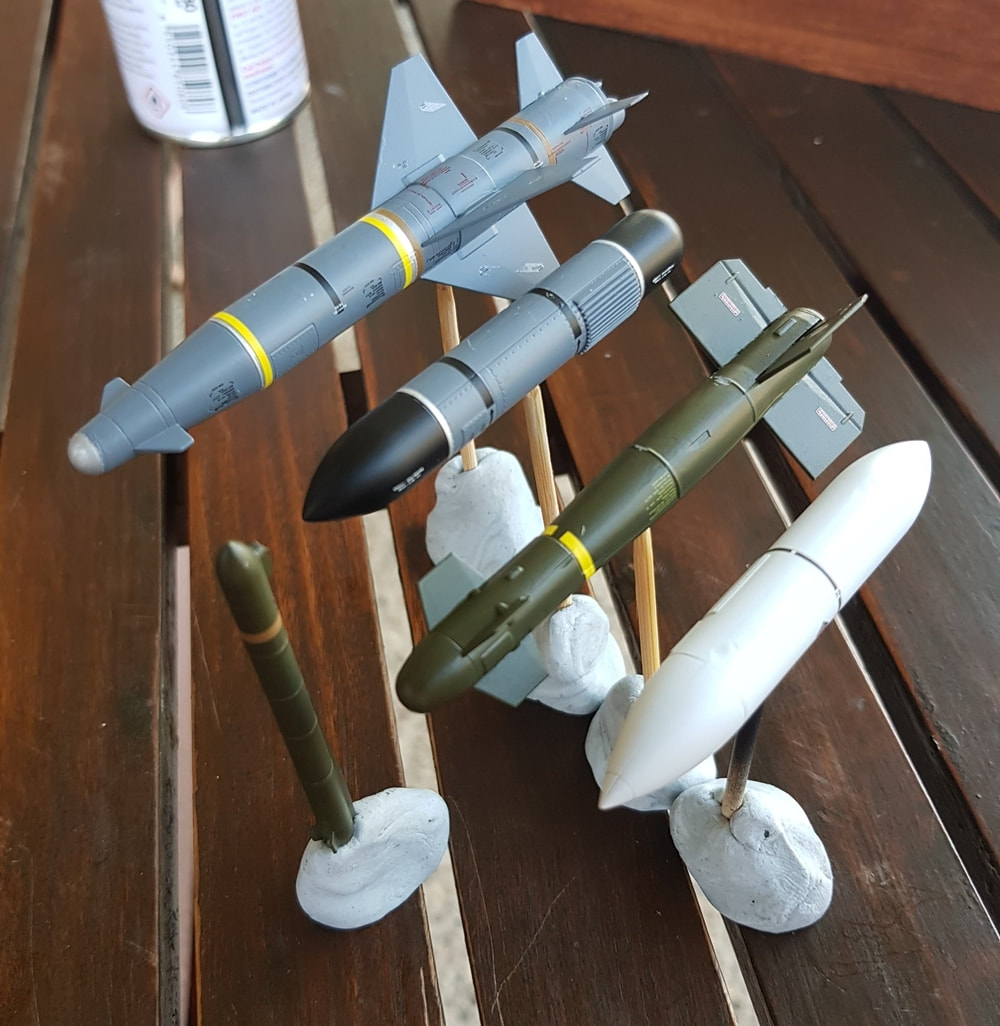
In hindsight this mess helped my paint job as i was able to sand a few blemishes and smooth out a couple of areas that had been annoying me as well as give the wing edges and hump another light once over. I also wasn't happy with my nose masking so that was sanded and remasked for a much better line. While i waited for the plane to dry i moved onto the load out. The weapons and pods were either nuetral grey, olive green or white. The only colours i had in a can were the white and matte black so i thinned out the grey and olive with a roughly 50/50 mix in a lid and brushed on light coats. By using this mix which made for thin coats, about 4 in total, i was able to get a fairly nice finish with no visible brush lines. Decal application was mildly painful, i'm just no good with fine long thin dangly decals like the ones that wrap around the missiles. Much stuffing around with a toothpick to get them in position and then Mark Fit to help them sit nicely. A coat of flat clear and they looked the goods.
Re-masked the cockpit so i could round the corners off with paint. Much improved on my first attempt.
Another update pic with parts that are ready to go. This kit was turning into a bit of a slog, but it was showing me i was doing a few things wrong. Painting too early being the main one. In this pic i have done the jet cans already. They were a mix of silver and gun metal then weathered with my pre made water and acrylic art paint wash from the previous Tiger II build.
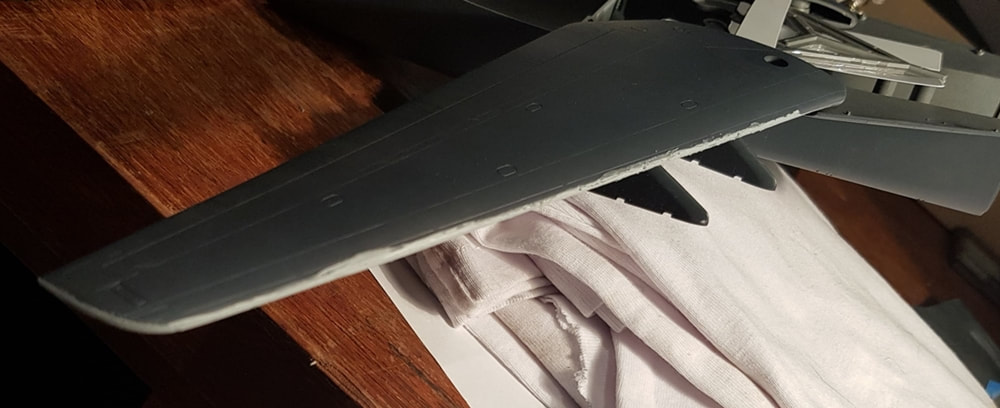
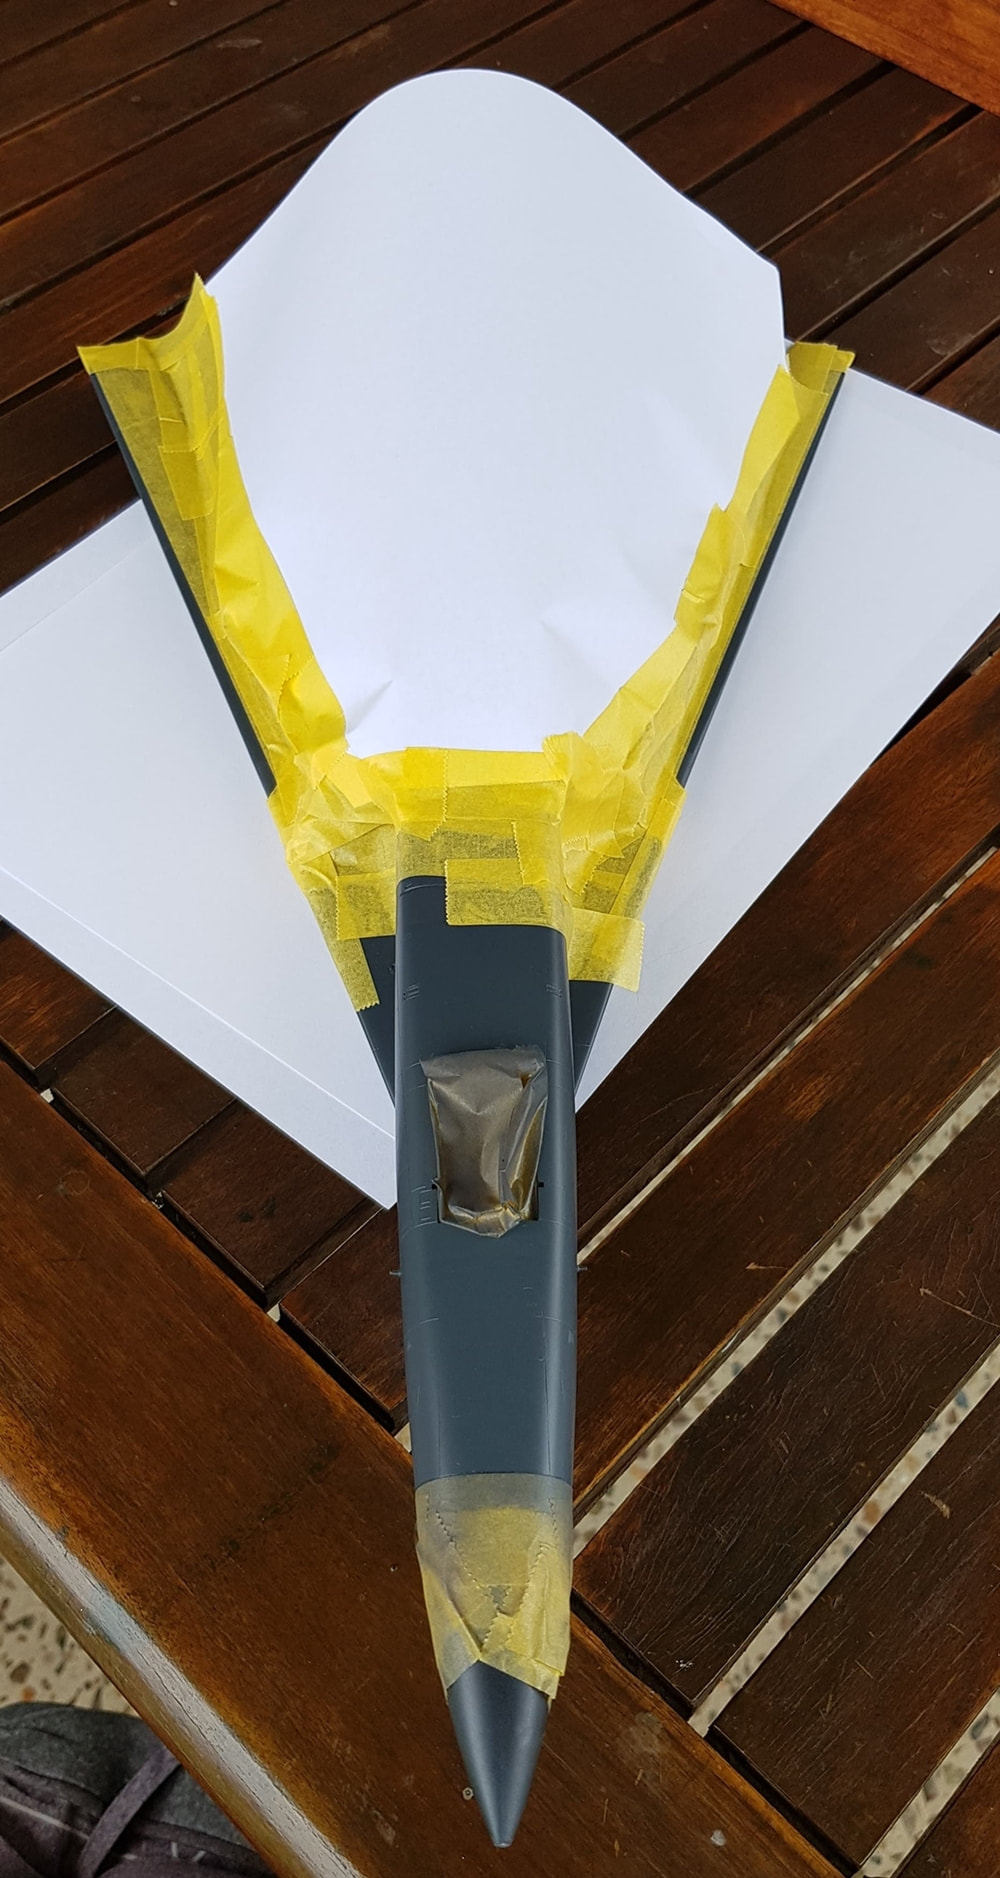
Plane masked so i can paint the matte black leading wing edges. The kit supplies decals but the one i attempted to fit just would not sit right so i scrapped them. The painted finish ended up looking much nicer anyway.
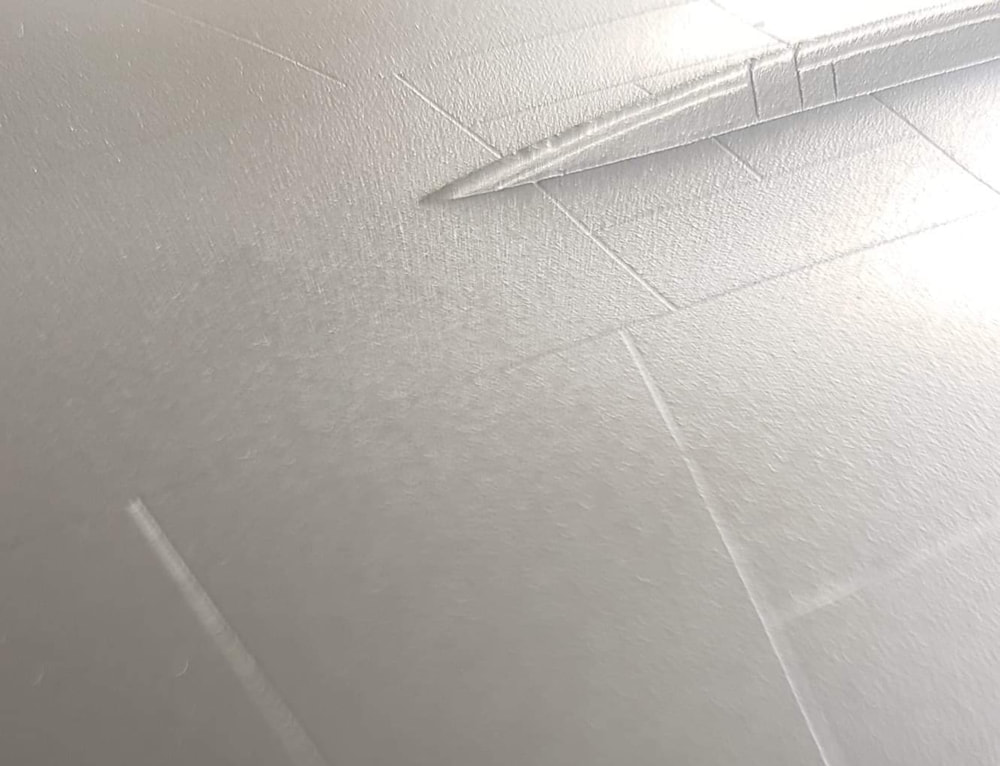
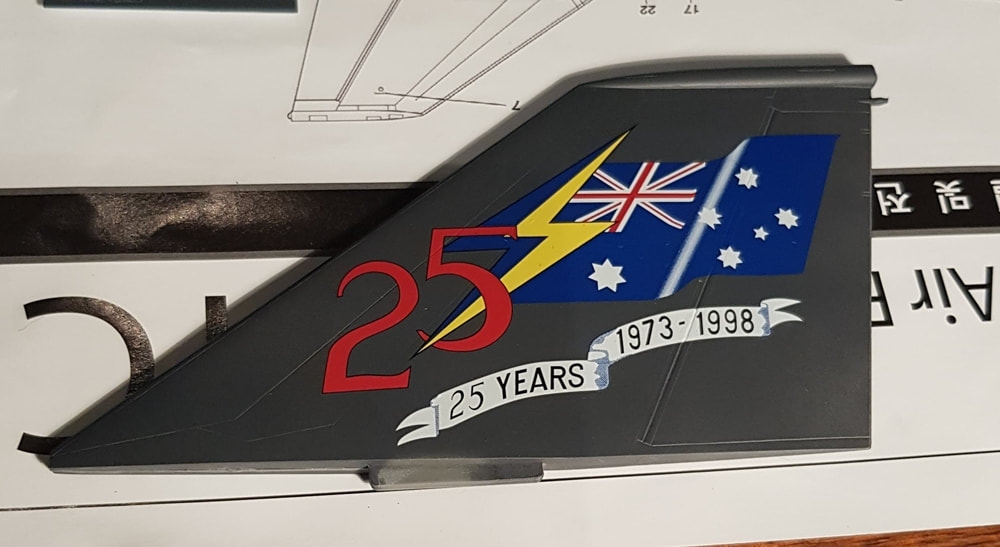
Tail decal, two applications of the Mark Fit and some work with a cotton bud and it sank nicely into the grooves . You can see the difference the flat coat of clear makes with the pic underneath of the nose wheel doors decal numbers with no flat clear yet applied. All of the undercarriage pieces including the wheel rims got a slight wash and i used panel liner accent in the undercarriage bays.
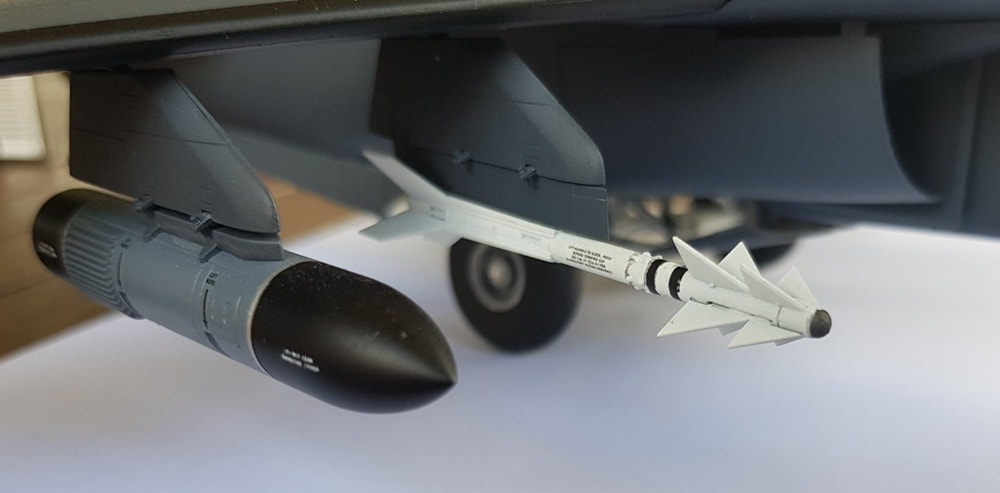
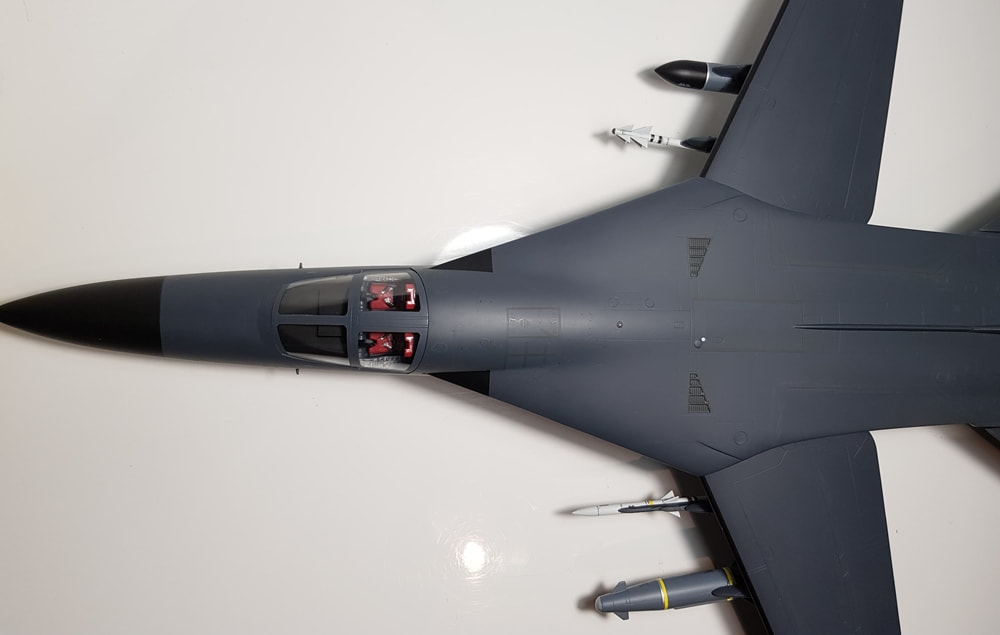
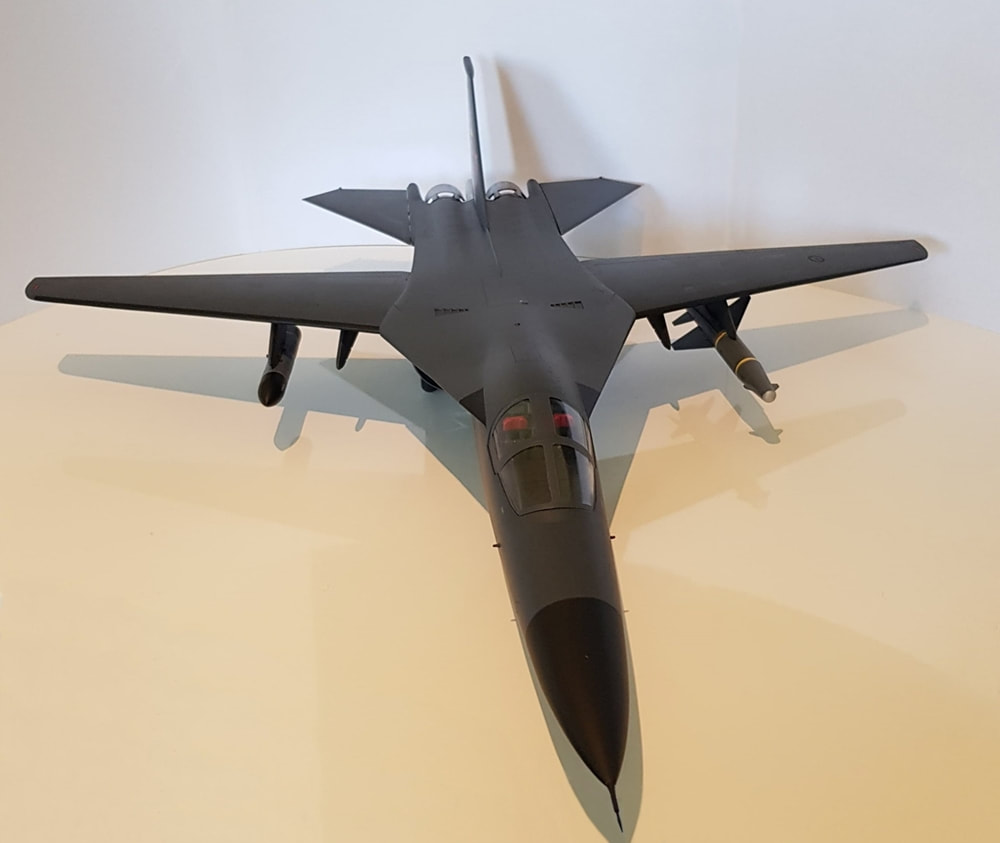
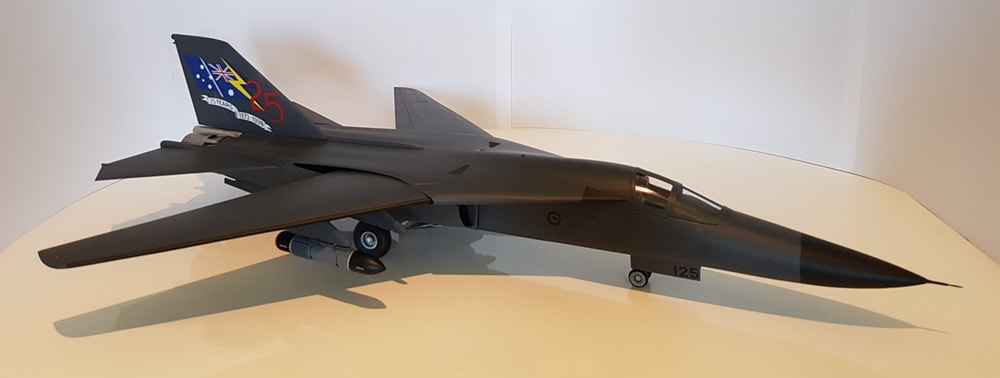
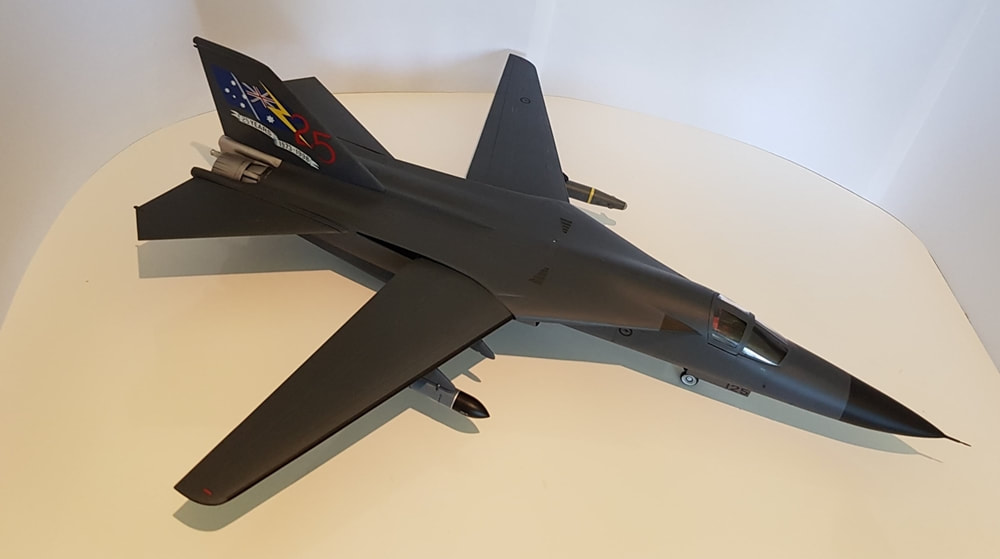
One thing i didn't mention at all here was the air/jet intake covers and cones. They were a bastard of a fit and i trial fitted them at least four or five times before gluing. I'm still not sure if i used the right ones as you are supplied with two sets, the instructions show one set of covers being used but they don't suit the correct engine cones so i had to use the second set. After some trimming, fitting and re-trimming and much poking of tongue in corner of lips i had both sides fitted neatly. Bastards of things. Next issue, the gunship grey i had used was too dark and the decals hardly showed through. This is the model that convinced me i needed an airbrush so i could mix my own colours. I used the wing walk decals and about half of the others but missed a bunch as you can hardly see them unless the model is under a light. Slightly annoyed but the colour choice was my fault. The cockpit i have still not glued as i need to work it so it fits correctly and i need to cover the holes in the fuselage where the wings swing. The model comes as either wings open or closed. Which seems fairly silly when you get a swing wing mech that works. I am halfway through making a set of covers to solve this issue so the wings can still swing, but have shelved completing it until i finish my current FW190 project. Overall it is a pretty impressive model when finished, it just needs a lot of work and patience to fix the kits errors and bad workmanship. This is as it sits at the moment. Notice the inner wayward missile, this arm has some movement in it and will pull straight but i didn't want to risk breaking it so left it as is for this first picture.

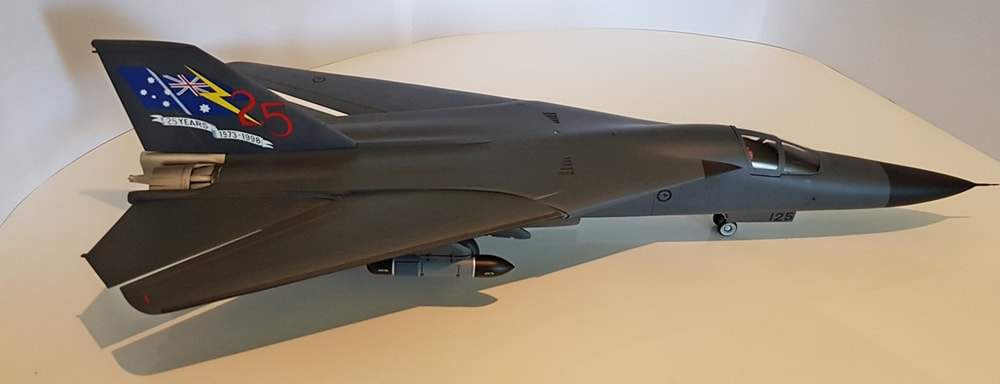


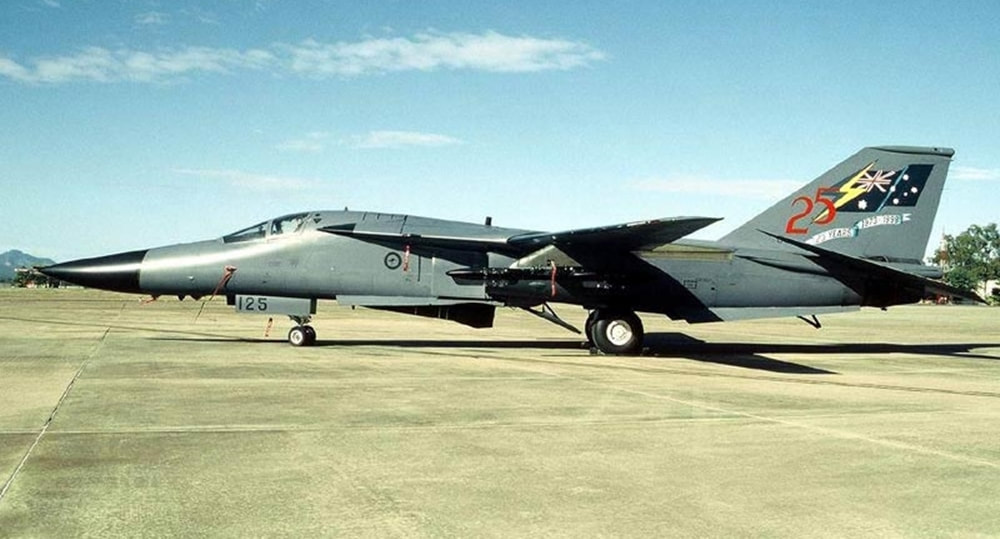
The real deal. Look at that colour difference.
These two inner missiles i added a week after i had put the model aside. The empty inner pylons were bothering me as it made the finished project look a bit empty.