This is about as basic as bases go, but i feel a base elevates your model a lot for the minimum amount of work involved.
-What you'll need-
A piece of wood
Handsaw (but a jig saw will make it easier)
A cheap roll of model grass matting
Dirt or dirt pigments
PVA (clear wood glue)
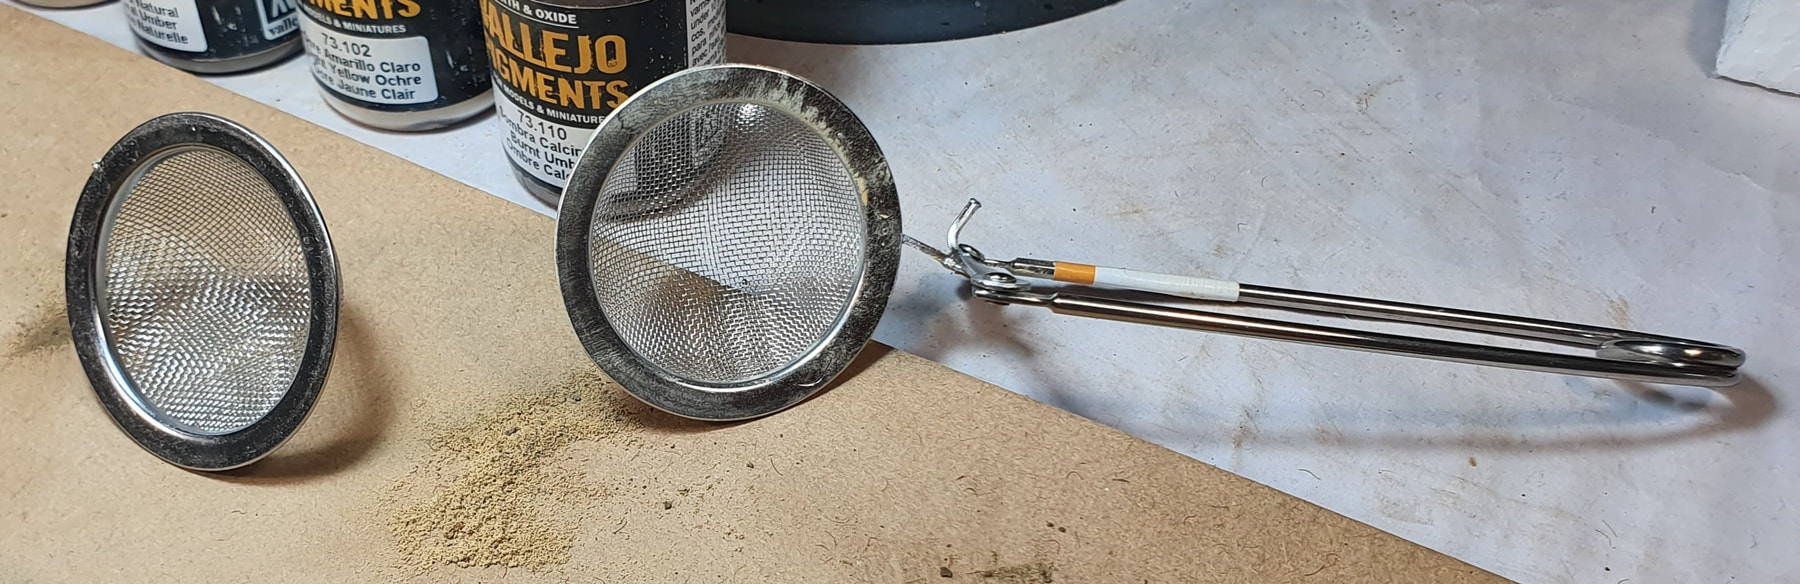
Cheap dollar store tea strainer or flour sifter
That's it!
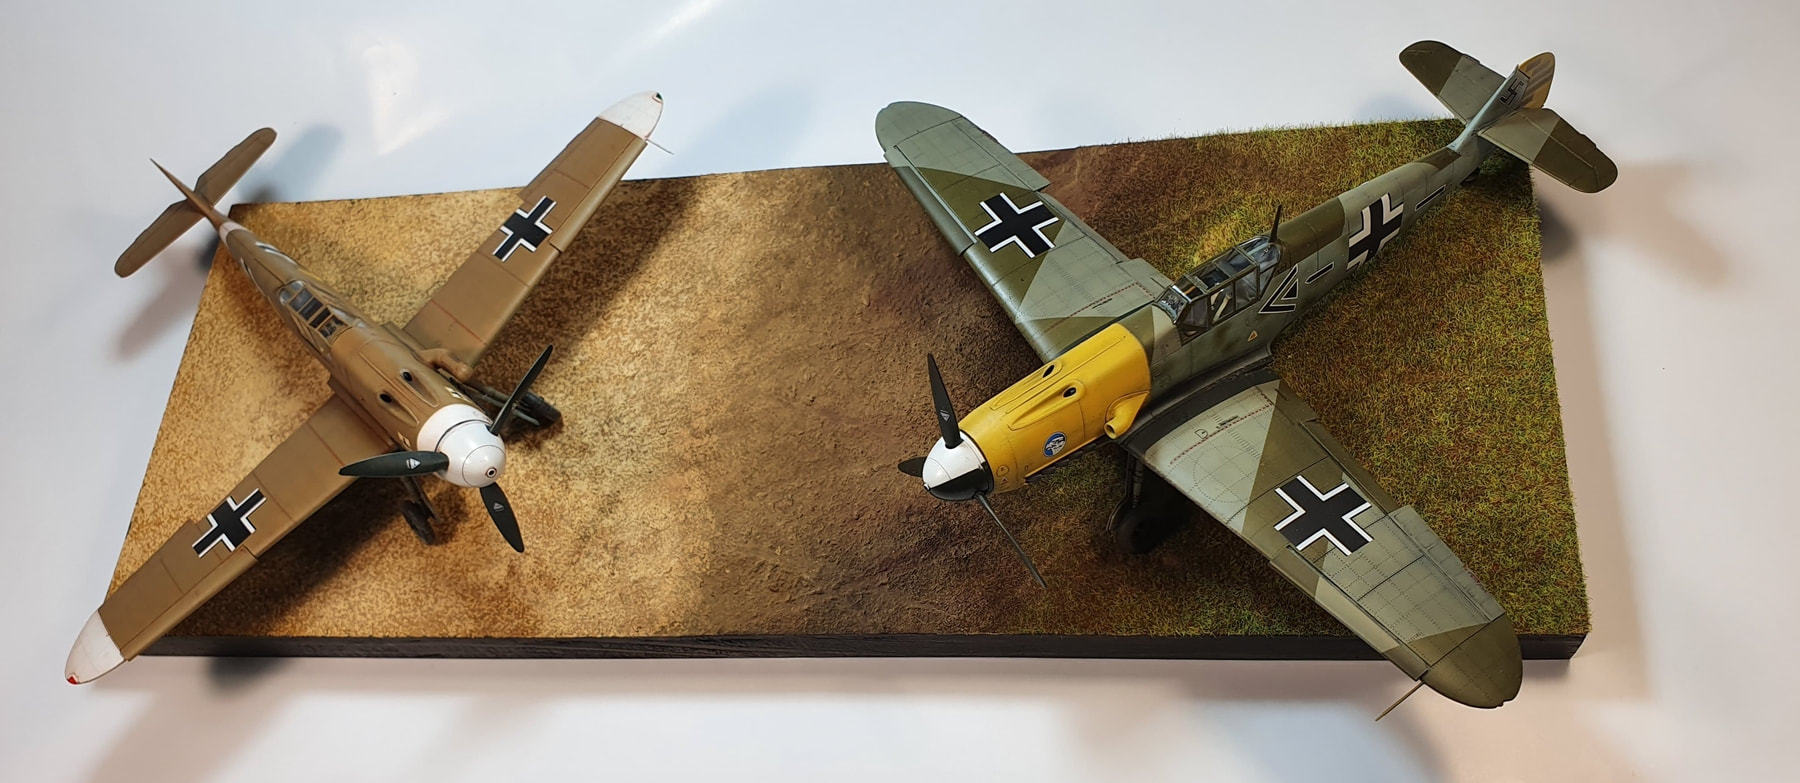
I am using some old bed frame and slowly hacking it up as i work through my model kits adding bases. The first one i did was for the Douglas Dauntless and since then the rest of my models have looked a bit empty. The next one was for the Spitfire and then this double version for the Eduard 109's . This was the first one where i decided to use a jigsaw instead of a hand saw, but for these basic shapes a hand saw will do the job fine. My bases are sized to fit my Detolf cabinet so i am restricted to 39x29 cm which is well enough to fit 1/48 models.
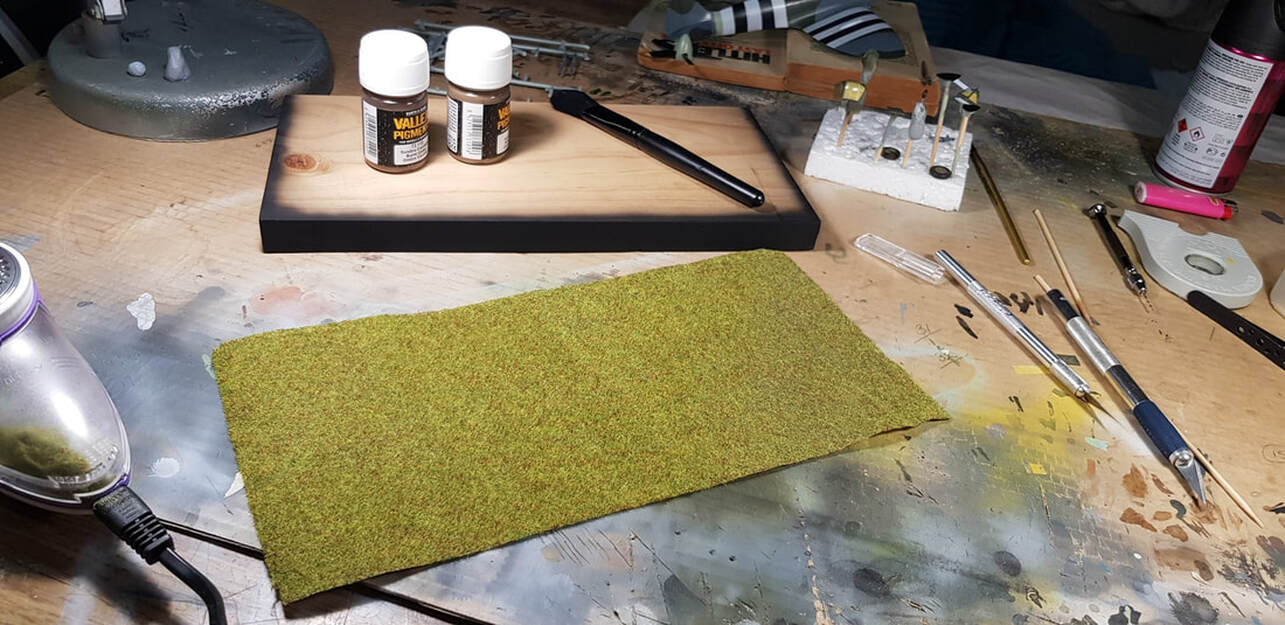
The generic autumn grass matting is a 2 metre roll that cost me 20 dollars from my local model shop, well enough to do both of my current cabinets collection with plenty left over. So lets's start.
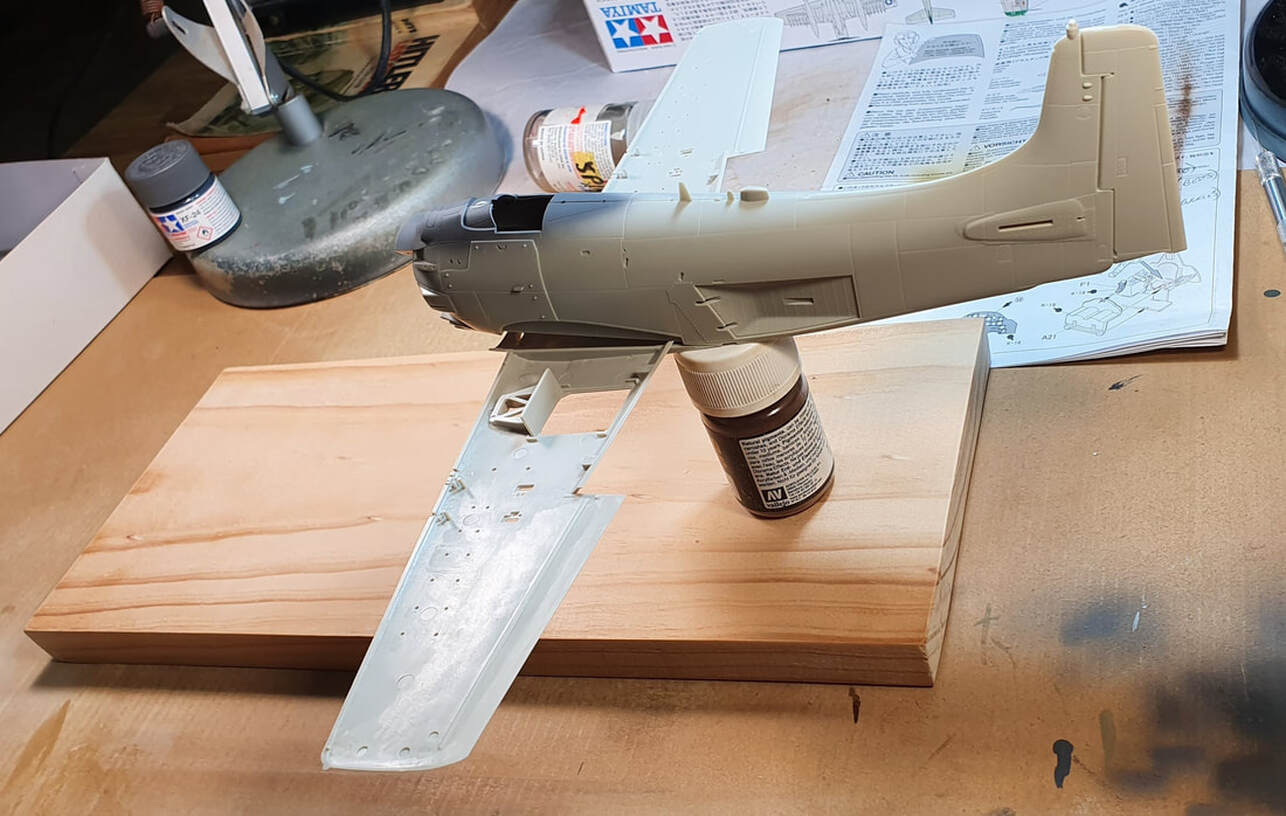
First off, decide the size of your base and cut too shape. Rectangle, square, circle, whatever, it;s nice to have a bit of a mix up if you are doing a couple of bases. Once you have your shape, grab your model and decide where it is going to sit, middle, end, what angle etc. This is the placement i have decided on for a Skyraider that i am going to use a piece of clear rod with to have it 'flying' above the base.
-What you'll need-
A piece of wood
Handsaw (but a jig saw will make it easier)
A cheap roll of model grass matting
Dirt or dirt pigments
PVA (clear wood glue)
Cheap dollar store tea strainer or flour sifter
That's it!
I am using some old bed frame and slowly hacking it up as i work through my model kits adding bases. The first one i did was for the Douglas Dauntless and since then the rest of my models have looked a bit empty. The next one was for the Spitfire and then this double version for the Eduard 109's . This was the first one where i decided to use a jigsaw instead of a hand saw, but for these basic shapes a hand saw will do the job fine. My bases are sized to fit my Detolf cabinet so i am restricted to 39x29 cm which is well enough to fit 1/48 models.
The generic autumn grass matting is a 2 metre roll that cost me 20 dollars from my local model shop, well enough to do both of my current cabinets collection with plenty left over. So lets's start.
First off, decide the size of your base and cut too shape. Rectangle, square, circle, whatever, it;s nice to have a bit of a mix up if you are doing a couple of bases. Once you have your shape, grab your model and decide where it is going to sit, middle, end, what angle etc. This is the placement i have decided on for a Skyraider that i am going to use a piece of clear rod with to have it 'flying' above the base.
Then it's time to decide how much grass vs how much dirt, or maybe you just want it all grass. I use the dirt section to add interest, it breaks up the grass and allows you to make the grass section into any shape you want.
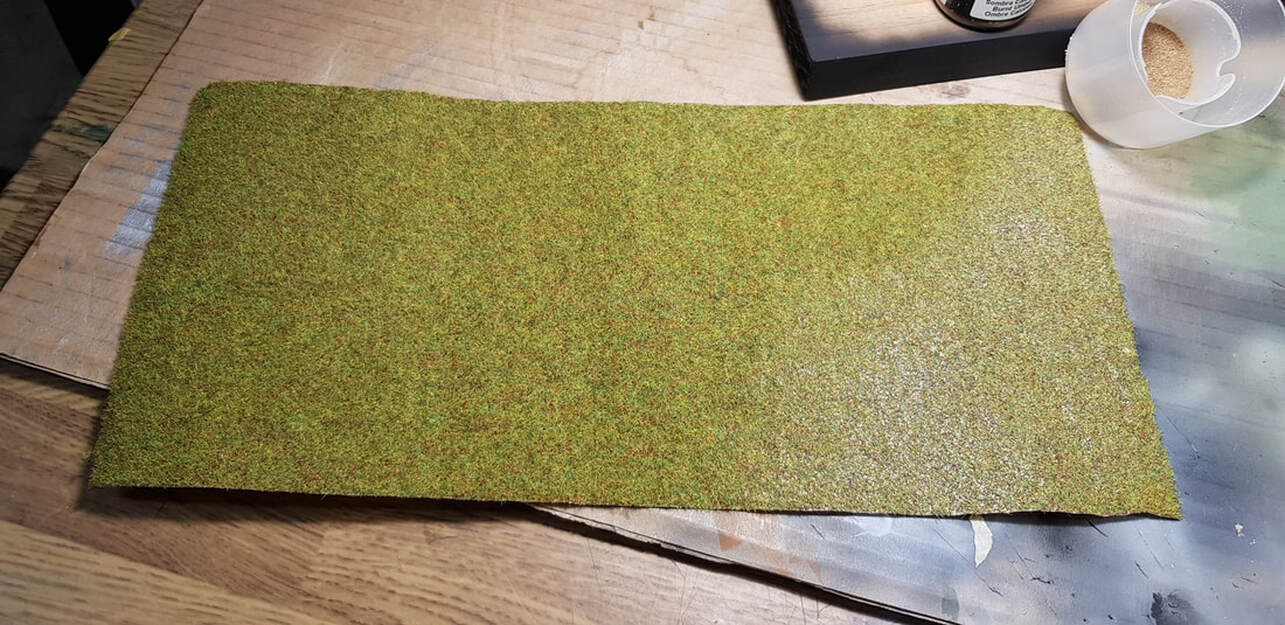
Here is about twenty minutes worth of work, wood cut and painted and the grass mat trimmed to slightly overhang the base.
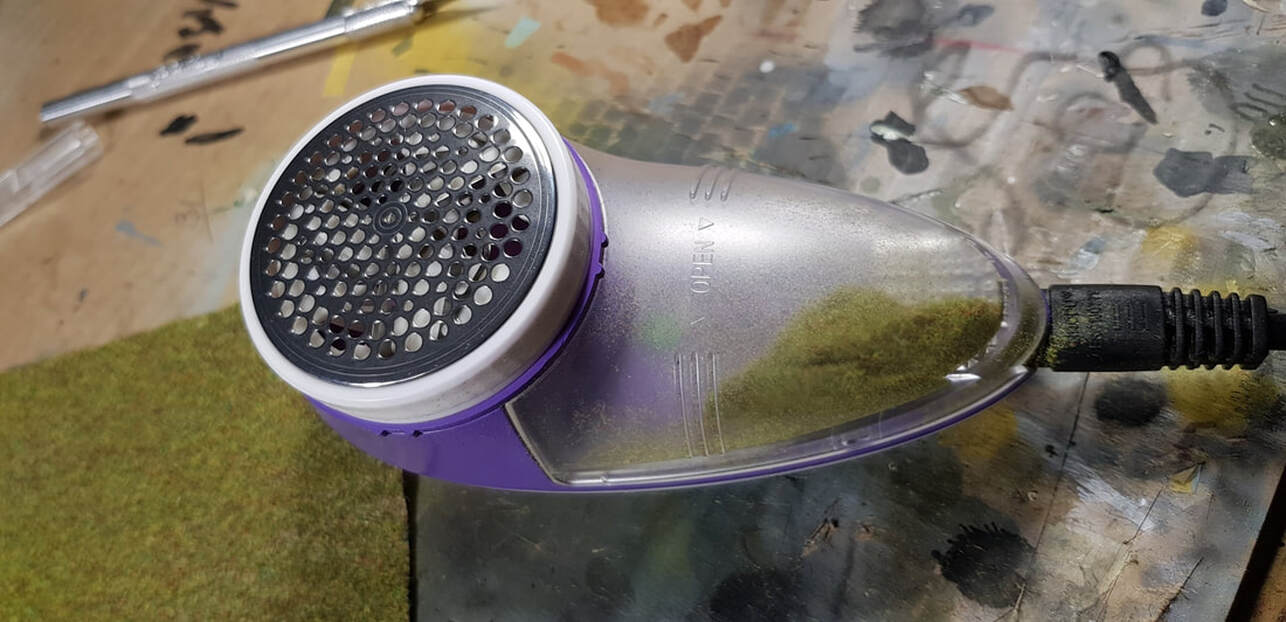
So now i have a rough idea of of what i want a small section of angled dirt at one end that faded into the grass. I couldn't just plonk the dirt down on top of the grass as it needed to be slightly lower to look at least half credible..but i wasn't sure how to remove or lower the grass. For this base i used an electric lint remover, but, you don't really need to do this, you can simply cut off the section of grass that you don't need. Of course, if you are doing a full grass base none of that applies.
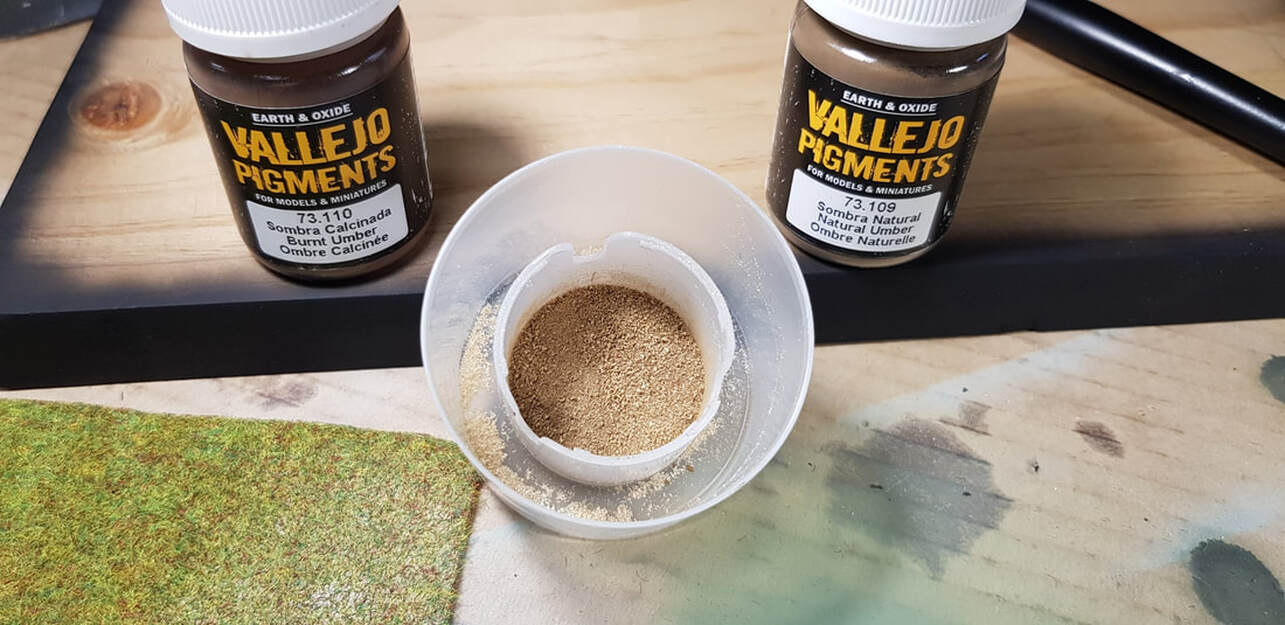
The dirt. I saved the sawdust from cutting my base and mixed it with some Vallejo dirt pigments to flesh it out with colour, this mix was what i used for the first layer. Just mix in the pigment until you get the colour you desire. Doing it this way also gives you another colour as the sawdust mix tames it down. If you don't have pigments, grab some dry yard dirt and sift it so you are using only the smallest grains. The bonus of using some dirt from the garden is that it is free and it already has a natural variety of colours.
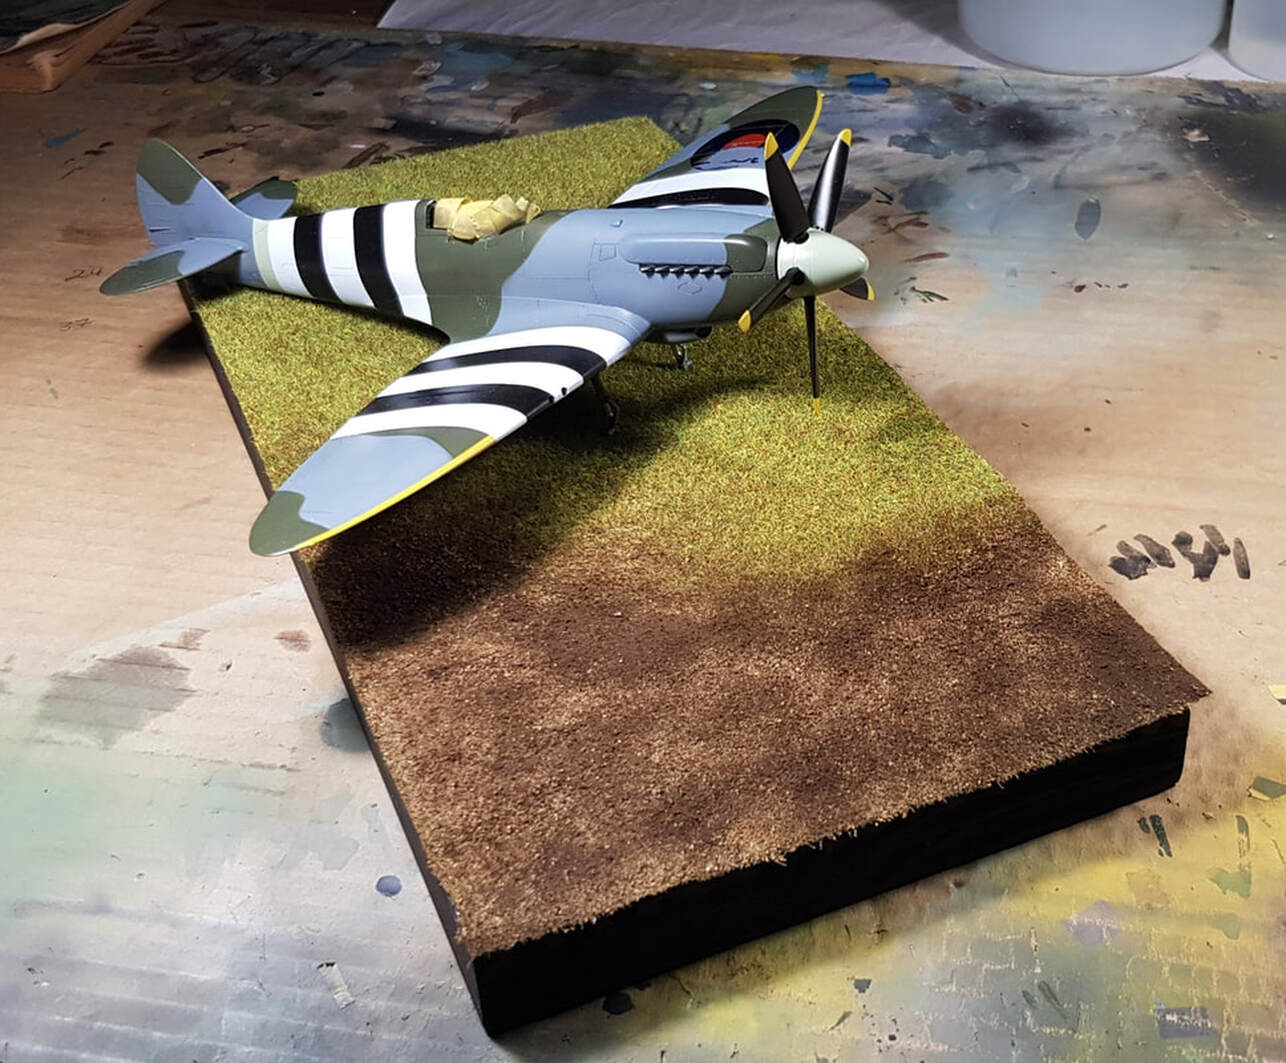
Once the base is painted and dried the matting is glued down with pva clear wood glue and then left to set overnight with some light weight on it. The Spitfire base got a full length of matting whereas the 109 base only got a small section of grass on one end. Once the matting is dry it's time to start adding the dirt. Before this, i make a mix of wood glue and water that is thin enough to spray through my brush, about 50/50 @ 20psi. If you don't have an airbrush you can still make a watered down mix and hand brush it on, i've done both ways with no issues.
Paint or brush on the glue mix in the area you are going to be laying the dirt down, then simply sprinkle or sift the pigment or dirt onto the glue. Once the initial layer is dry, about two hours, i lightly bang the base on the bench to remove any loose pigment and then reuse it for the next layer. Generally i do three layers of the main colour which helps hide the wood and also causes some height variation so it isn't all perfectly flat.
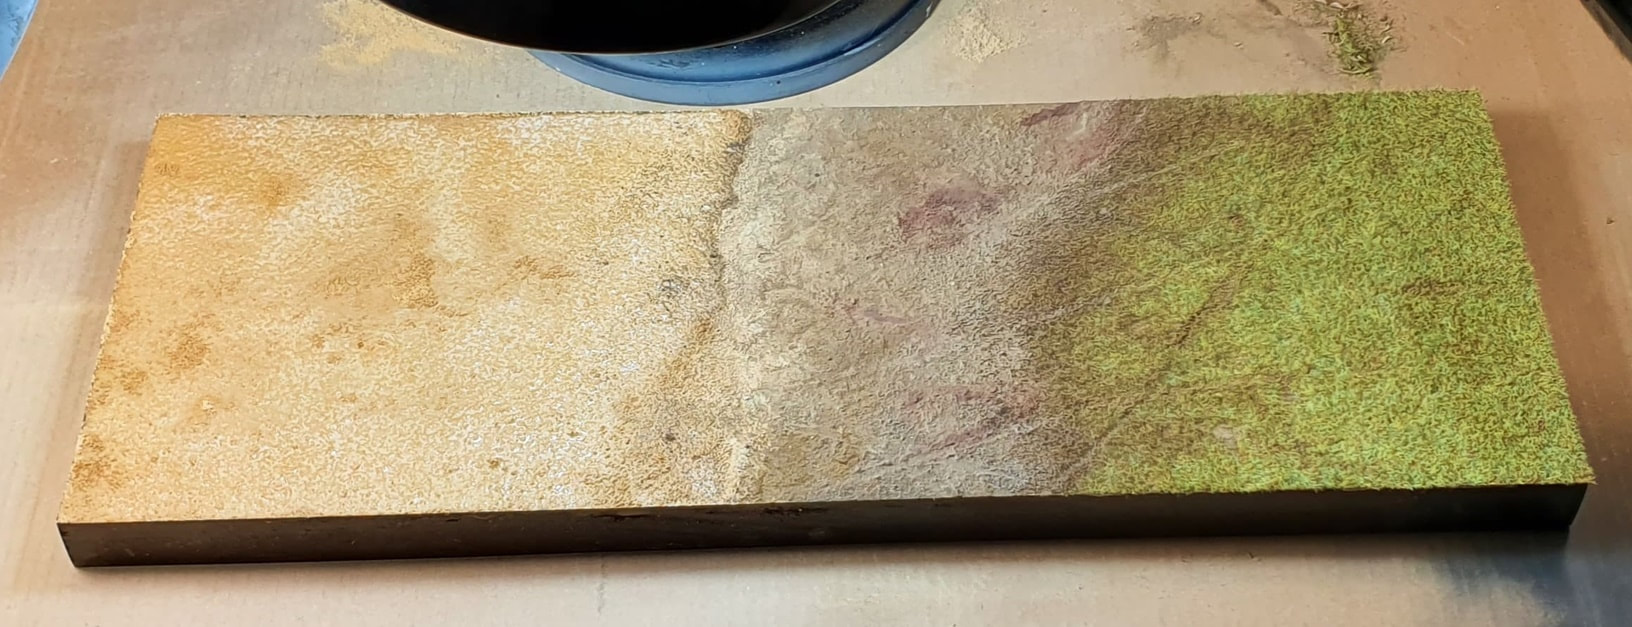
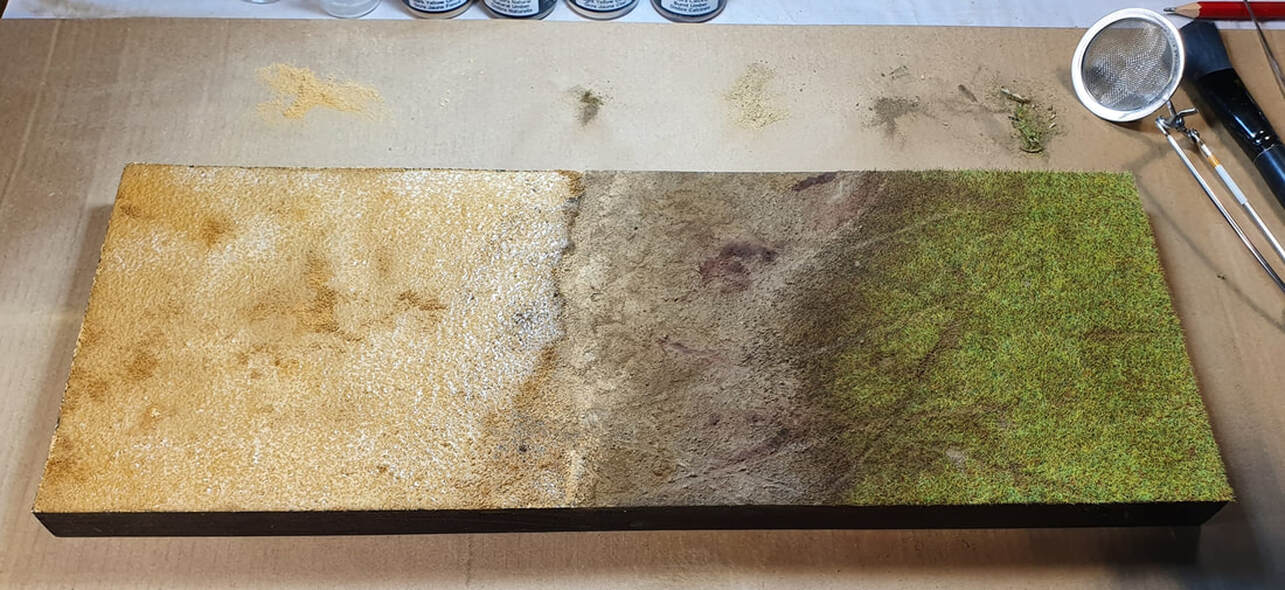
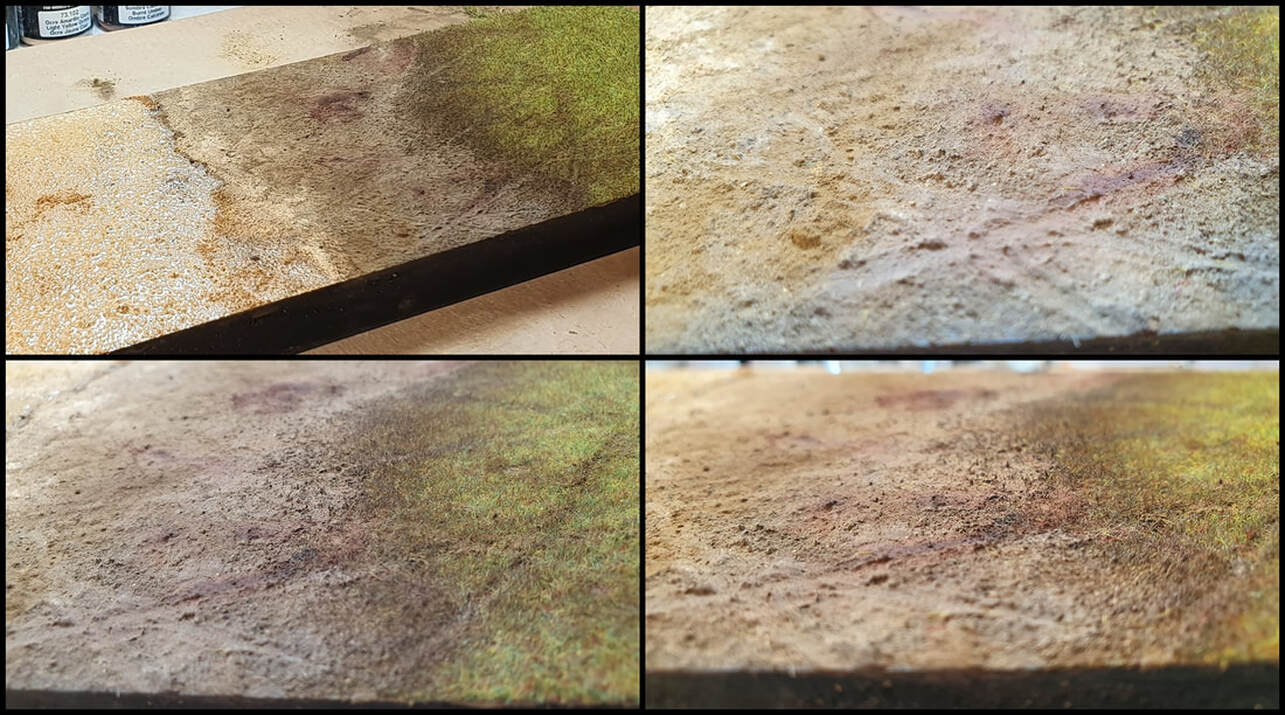
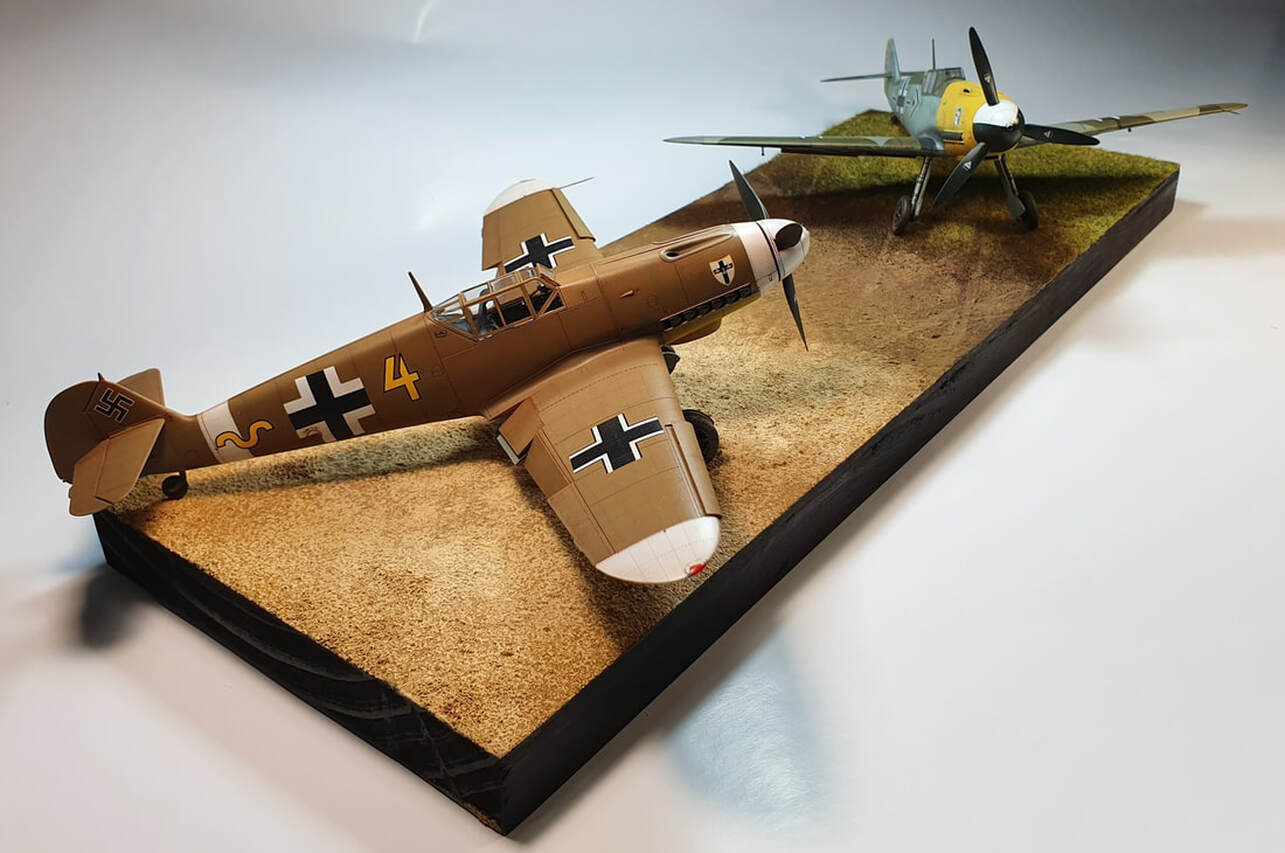
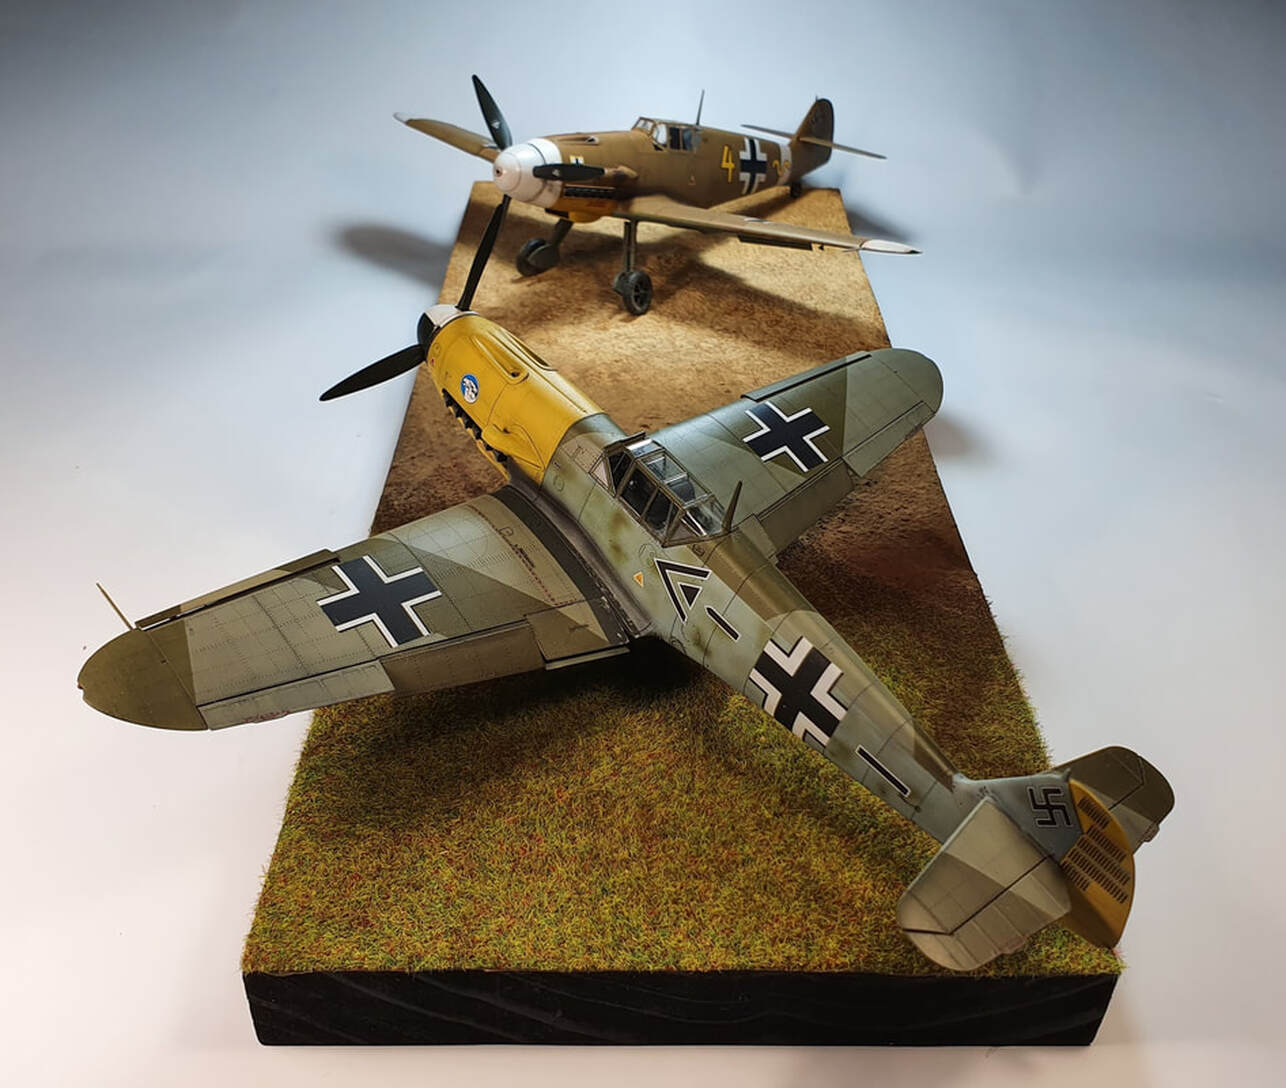
With the 109 base because i was doing a split Western front/Desert theatre base and used four different coloured pigments. Vallejos Light Yellow Ochre for the desert and Natural Umber for France, Dark yellow ochre was added to highlight sections in the desert and Burnt Umber for France. With three or four pigments you can make a ton of variations and just sprinkle it randomly in small sections to blend it all in at the finish. If you are using dirt you can add variety by simply spraying a light mist coat of tan, browns etc.
The wheel tracks were made by just trailing the end of a paint brush through the dirt and grass and then sprinkling a small amount of pigment into the grass ruts so it doesn't look so clean. It's all really up to you how much detail you want to add. The glue is still setting in the following pics, i let it sit for about two hours under lamps before adding the next layer. Without lamps it may take longer, put it out in the sun or under a fan.
Paint or brush on the glue mix in the area you are going to be laying the dirt down, then simply sprinkle or sift the pigment or dirt onto the glue. Once the initial layer is dry, about two hours, i lightly bang the base on the bench to remove any loose pigment and then reuse it for the next layer. Generally i do three layers of the main colour which helps hide the wood and also causes some height variation so it isn't all perfectly flat.
With the 109 base because i was doing a split Western front/Desert theatre base and used four different coloured pigments. Vallejos Light Yellow Ochre for the desert and Natural Umber for France, Dark yellow ochre was added to highlight sections in the desert and Burnt Umber for France. With three or four pigments you can make a ton of variations and just sprinkle it randomly in small sections to blend it all in at the finish. If you are using dirt you can add variety by simply spraying a light mist coat of tan, browns etc.
The wheel tracks were made by just trailing the end of a paint brush through the dirt and grass and then sprinkling a small amount of pigment into the grass ruts so it doesn't look so clean. It's all really up to you how much detail you want to add. The glue is still setting in the following pics, i let it sit for about two hours under lamps before adding the next layer. Without lamps it may take longer, put it out in the sun or under a fan.
This is the Spit base with three layers down, untrimmed, and adding in some lighter pigment for variety.
Finishing the base is just adding small amounts of pigment/dirt until you are happy with how it all looks. For this i use my $1.40 home brand strainer. I then spray a super light mist of the glue mix @ 10 psi to make sure the final pigment holds. If you don't have an airbrush you can skip this step as, unless you are storing your models directly under a blasting fan, the pigment should not move anyway.
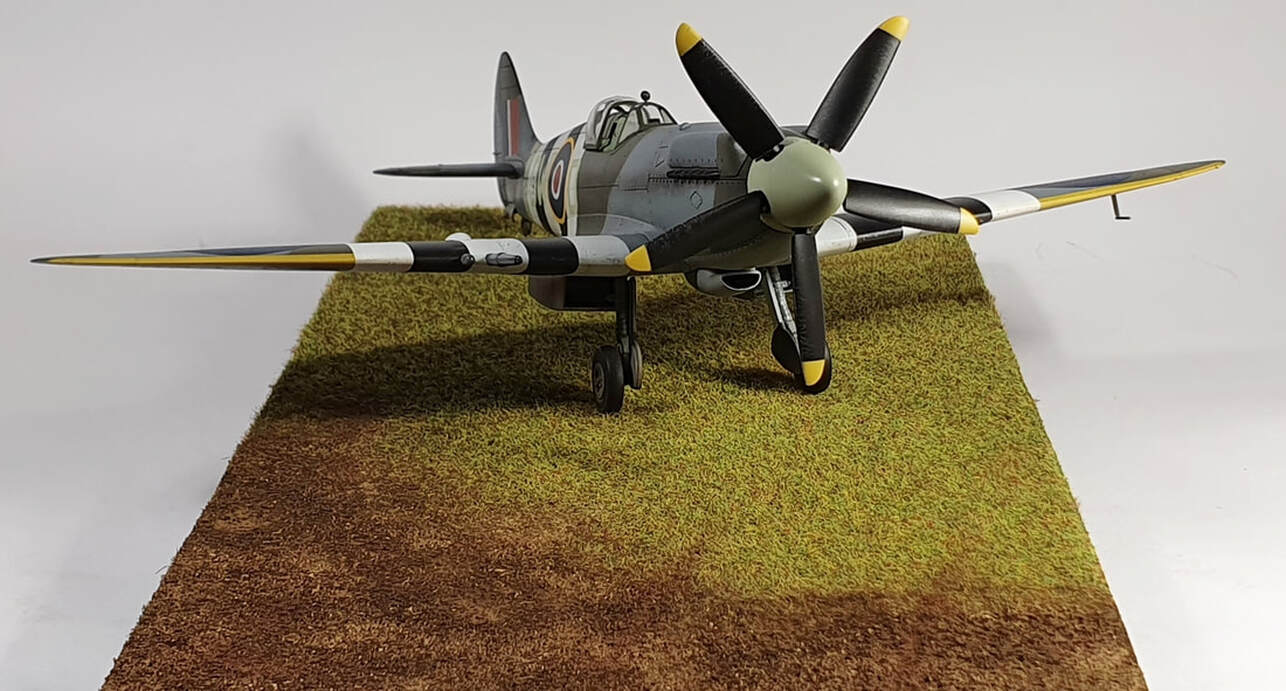
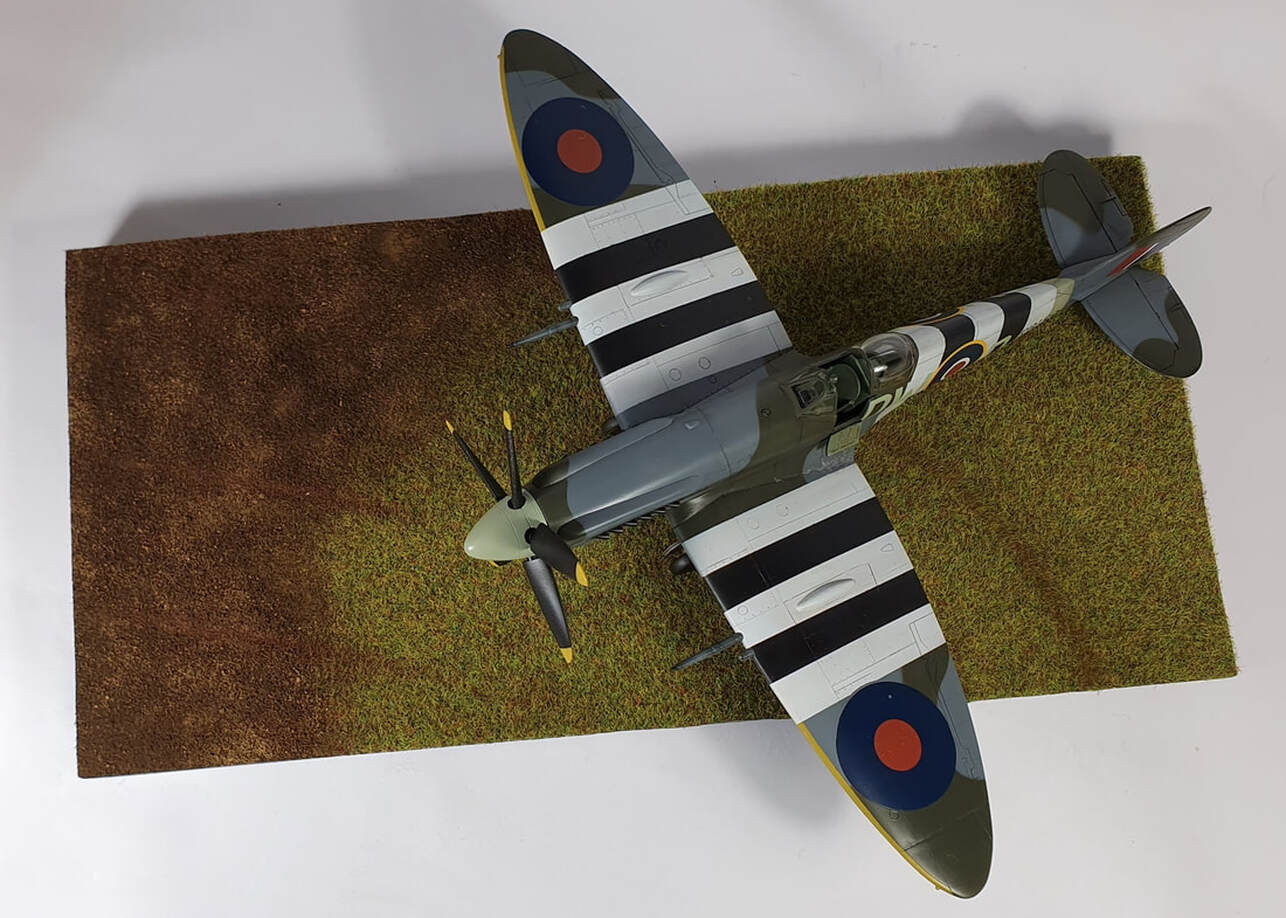
Once it is all dry i trim the grass section to match the base and we can finally place the models. You can see how the different coloured pigments make a much more visually pleasing base than just one or two solid colours. Also adding sections of dirt to the grass really helps adds some life and breaks it up.

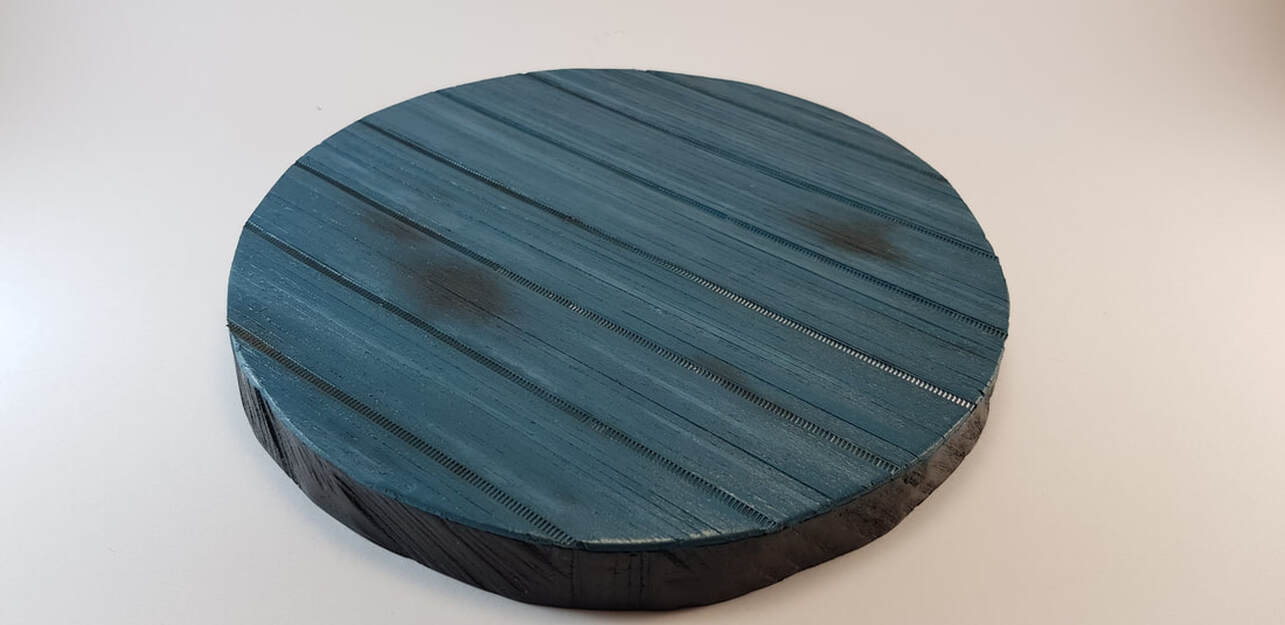
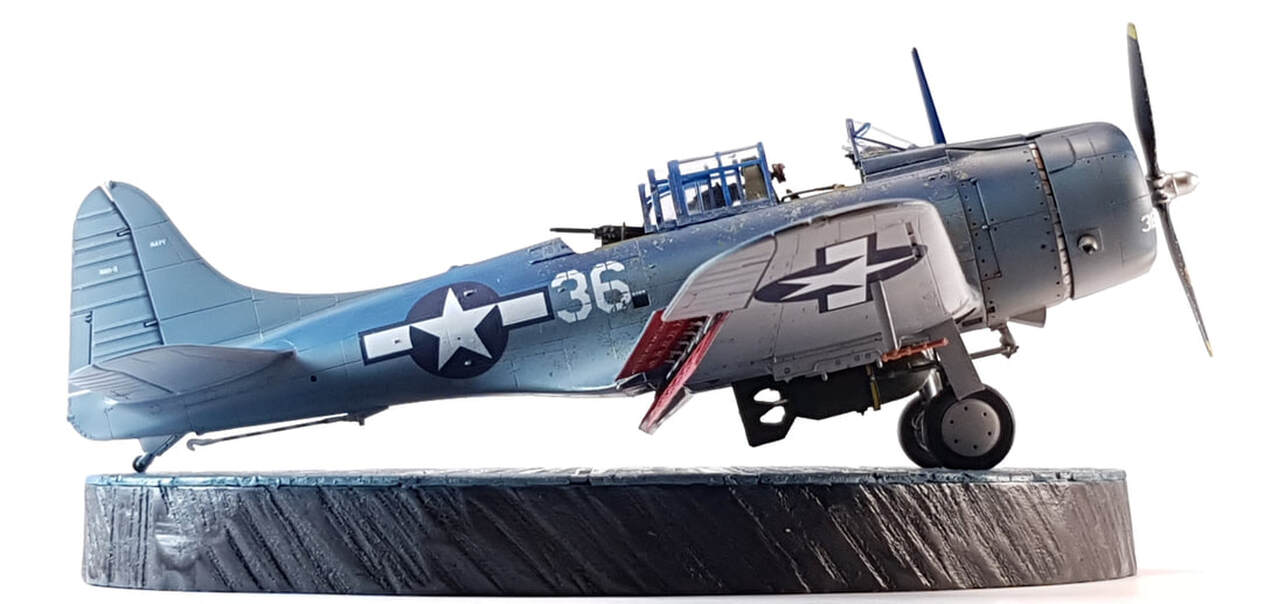
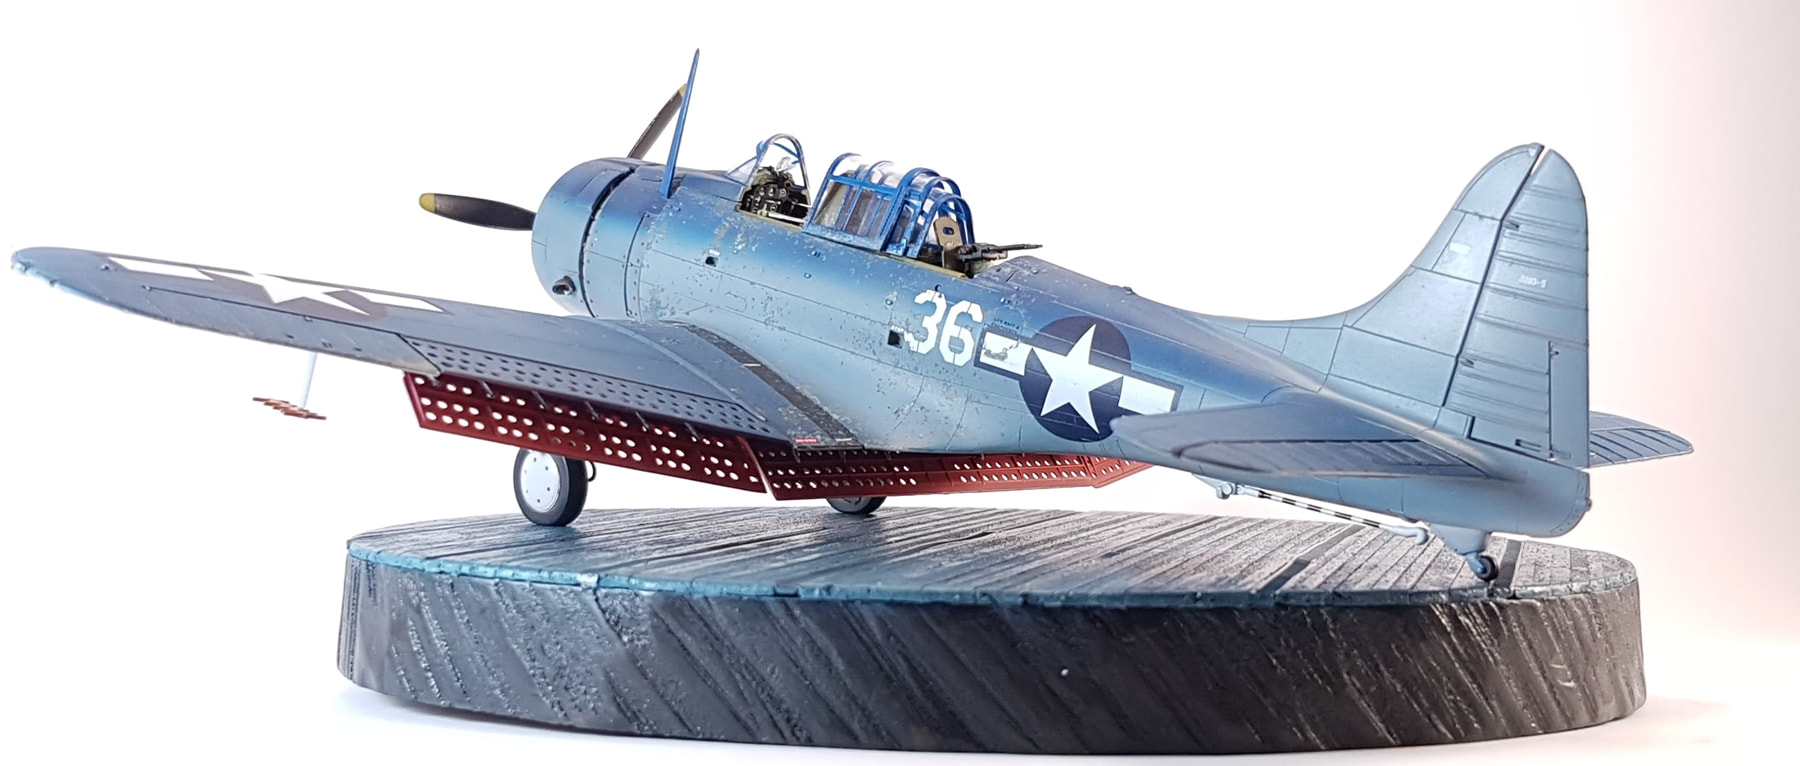
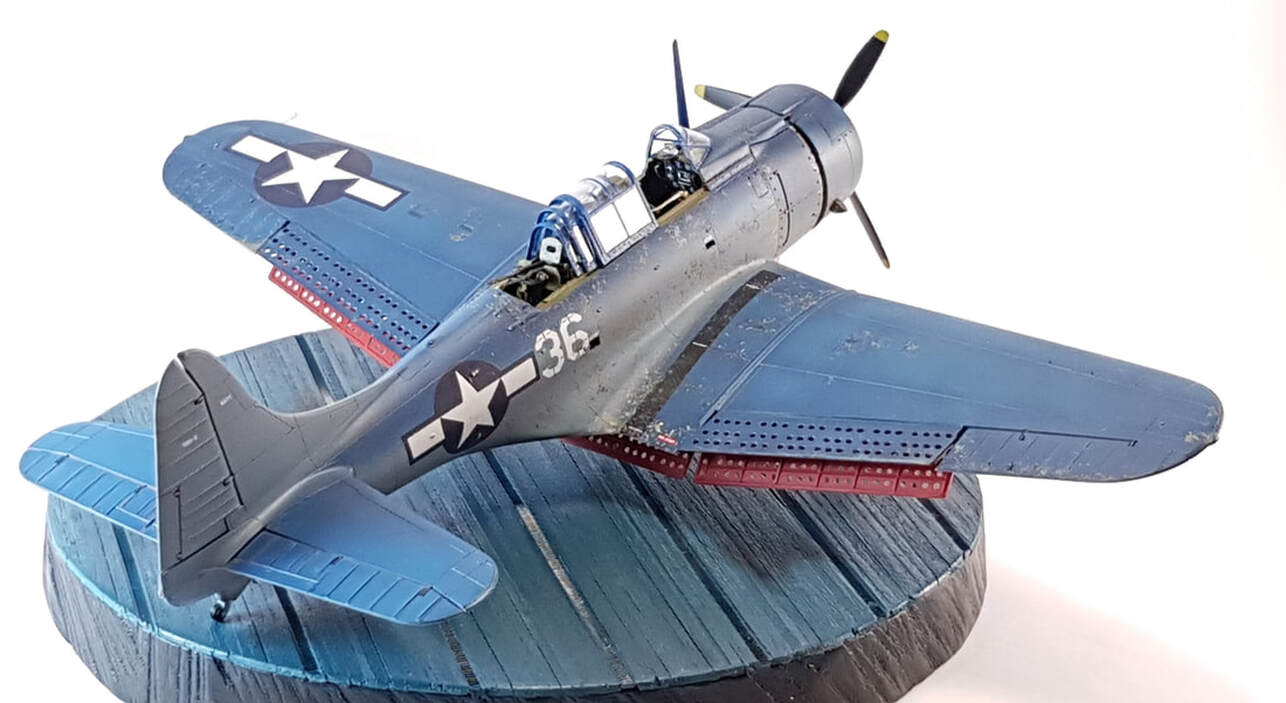
This was the first base i ever made. Marked into a circle and hand sawed, wood stained on the sides and balsa strips and zip ties to recreate an American CV deck. The zip ties cost two dollars and the balsa sheet was about three. The mdf i used was some left over scrap in the shed and the wood stain was a two dollar pot sample from the local hardware store. Under ten dollars in total and adds a heap of interest to the model i think.